Holly makes t-shirts, and I helped! (a little)
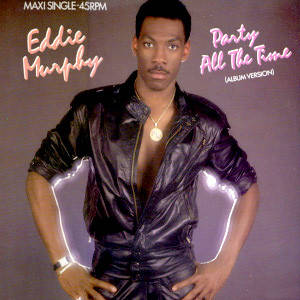
Holly has been making t-shirts lately and I got to help with this last one, a tribute to Eddie Murphy’s “Party All The Time” record, made for Matt Hayden.

The Hunt for Side Profiles
Holly wanted me to find a side profile pic of Murphy because it’s easier to make 1 color images that way. This was surprisingly difficult to do (finding only this one small pic on Google Images), so I tried a different idea and found this photo from Reuters:
I then cropped it and uploaded it to Picnik to “posterize” it.
My settings on Picnik under [Create tab>Effects>Posterize] were “7 colors, 0% detail, 0% fade”.
I ended up with this:
Next Page >>>
Then I opened up the posterized image in GIMP (a free alternative to PhotoShop) and started deleting various colors out.
Click here to download free GIMP software.
The tool to use that will select all occurrences of the same color in the entire image is the “Select by Color Tool”.
Here’s what happens when I select the darkest brown color and hit the delete key:
And after deleting the color (pressing “delete” key):
So I didn’t want to entirely delete any more colors, because it wouldn’t make the finished graphic look right. So first I used the “Color Picker Tool” to select the darkest color. I do this because it’s not exactly black (dark brown) like GIMP’s default color, and I want to use it to paint other areas so they’re all the same color).
Next Page >>>
Then I started selecting various regions of color to paint the darkest color (which I selected with the Color Picker Tool). The tool to pick pick single regions of a color instead of ALL REGIONS of the same color is the “Fuzzy Select Tool” (I believe it’s called “Magic Wand Tool” in PhotoShop.)
To paint selections, I usually prefer the “Air Brush Tool”. Here’s a screenshot of selecting a region, then painting only part of that region. The cool thing is: the paint will only go within the selection boundaries. In this screenshot I’ve circled the area I selected with the Fuzzy Select Tool (his eye/eyebrow region), and the default paint color was already selected using the Color Picker Tool in a previous step. Then I moved the Airbrush Tool’s “Scale” slider to 100% so it paints a larger area, as I prefer it this way.
So I just played around with painting parts of various color regions to my liking, and then deleting the color region that was left by selecting it with Fuzzy Select Tool and pressing “Delete”. You can figure this out even if you’ve never used a PhotoShop-type application before.
Here’s what I ended up with after photo editing:
Next Page >>>
Preparing the Graphics for Printing
I saved this image as a jpg and then opened up a Word document and inserted the image into it. Why? Because I was going to fit this to a standard “Letter” size piece of paper to print on our home printer. I reduced the margins as much as possible, and then made the image as large as possible (still fitting to the page), then Save As>pdf. I like the pdf format because you don’t have to own MS Office to use it. If you want this pdf (for some strange reason) download it here, and download the text here.
Tracing, Cutting out, and Ironing On the Stencil
Next step is to trace the design onto Freezer Paper to cut out a stencil (using an Xacto Knife).
Next Page >>>
What is Freezer Paper?
I’d never heard of it. This is what it looks like when Reynolds manufactures it:
Next Page >>>
Painting with Fabric Paint
Paint the stencil with fabric paint (whichever brand you prefer or find). Read their directions on how long to let it set up before peeling off the freezer paper stencil.
Next Page >>>
Make rectangular backgrounds for the text
There’s no photos to illustrate the following step; Draw a rectangle around the lines of text after you’ve traced them onto freezer paper. Cut out the text sentences and use the background piece of freezer paper to make the hot-pink colored painted backgrounds for the text “My Girl Wants To” and “Party All The Time” lettering.
Make the Lettering Stencils
You can see how these rectangles were cut out of the freezer paper, and the freezer paper with the rectangular cutouts was then ironed on to the tshirt to paint the hot-pink backgrounds of the lettering.
Next Page >>>
Painting the Lettering
If you make this or a similar project and have any questions, just comment below and I’ll try to answer them.