
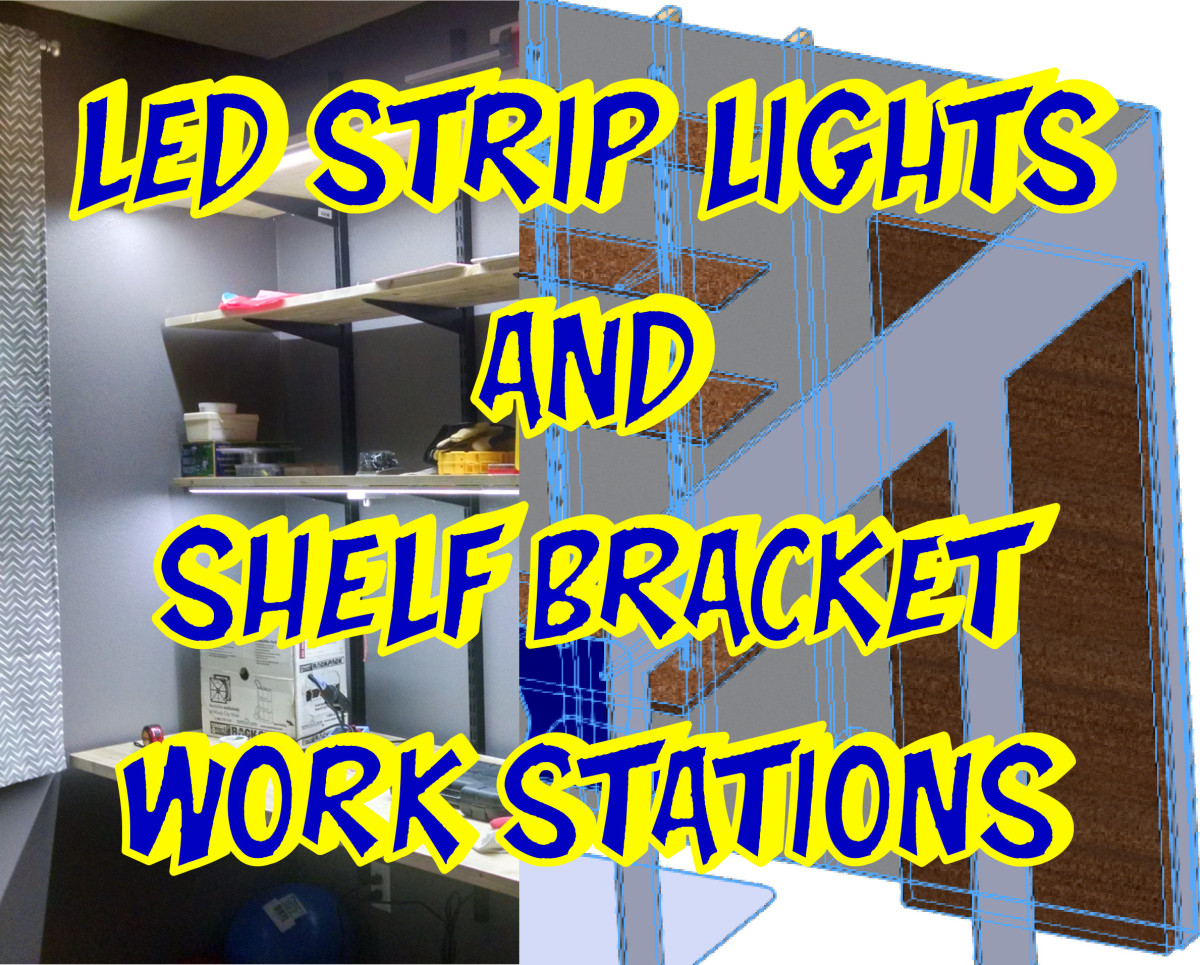
Part 2: How To Buy & Make Attractive LED Strip Lighting
Stuff I Researched and Bought:
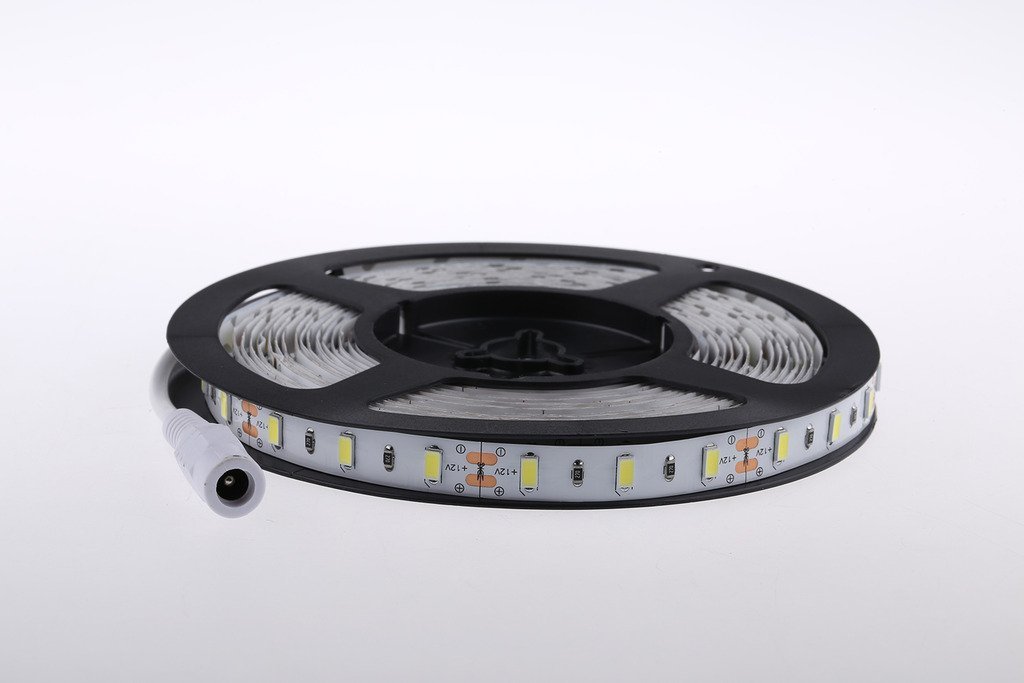
Find a LED light strip (LED Tape Roll).
- I was going to get the 5050s
- These numbers are the size of the diodes, in millimeters (5050 is 5.0mm x 5.0mm, 5630 is 5.6mm x 3.0mm, etc.)
- If you don’t need waterproof lights


Find a switch.
- I used a PWM knob dimmer
- I used an in-line electronic touch dimmer


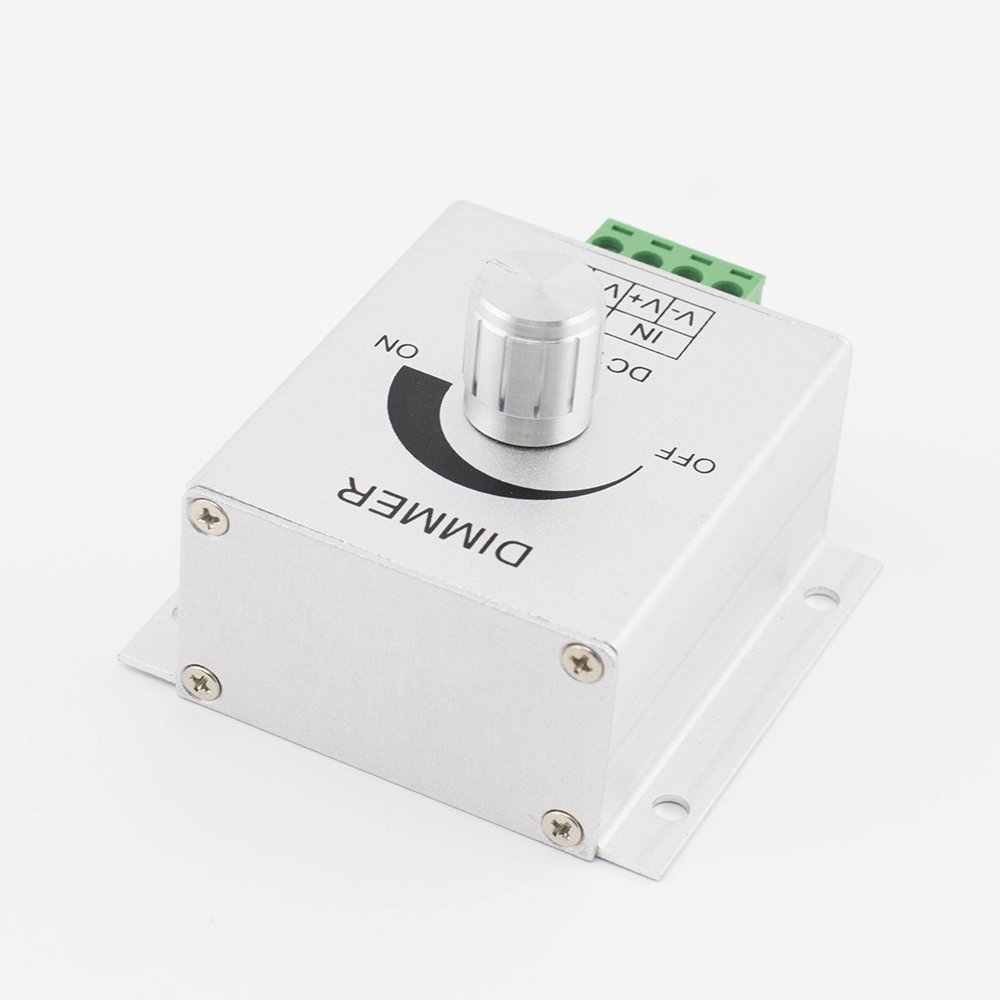
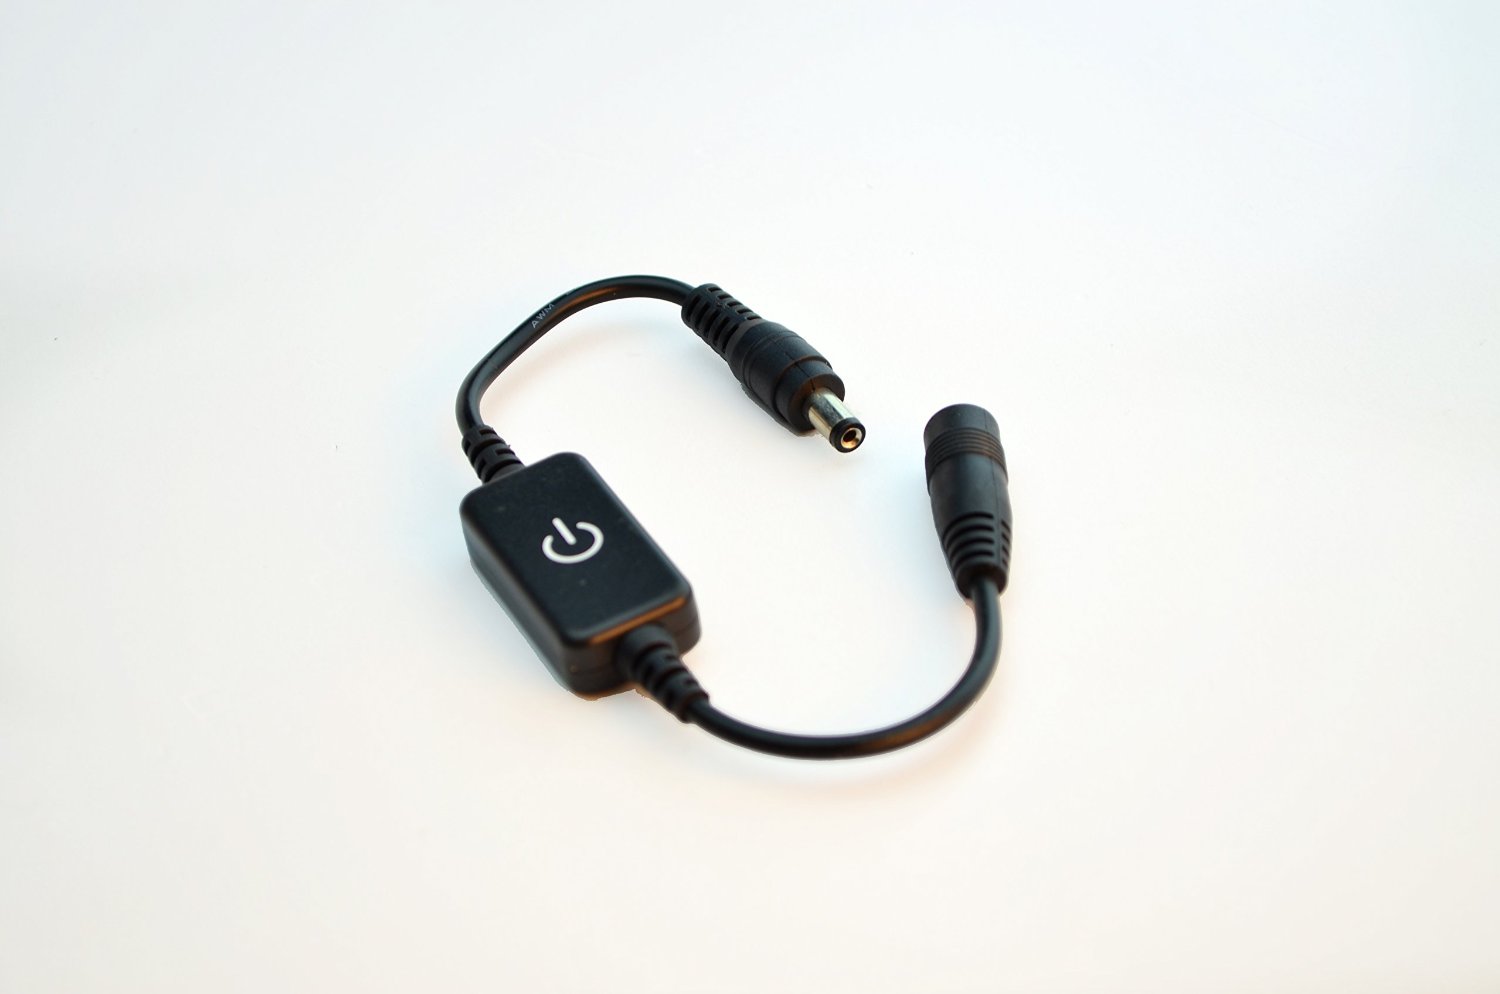
Figure up how much juice you’ll need.
- If you buy a roll of strip lights, it’s about 15ft long. Find out how many watts per foot your strip pulls, take it times the amount of feet you’ll install at a location, add 10-20% extra, and get a transformer that fits the bill.
- EXAMPLE: I buy 1x roll of 5630 LED strip, which is about 15ft. It says to take 12volts at 5amps, or 60watts of power per roll (12v times 5a equals 60watts).
- if I decide I want to construct a light strip that is 5ft long, I’ll figure 60watts for a 15ft roll, then my 5ft strip is 1/3rd of that roll, so 1/3rd of 60watts is 20watts.
- 20w divided by 12v is 1.67amps.
- 1.67amps will round to 2amps, and also add in a safe-feeling overage.
- this means I’ll need to order a power supply (or “driver” as it may be called) of 12volts @ 2amps, or 12×2 = 24watts.
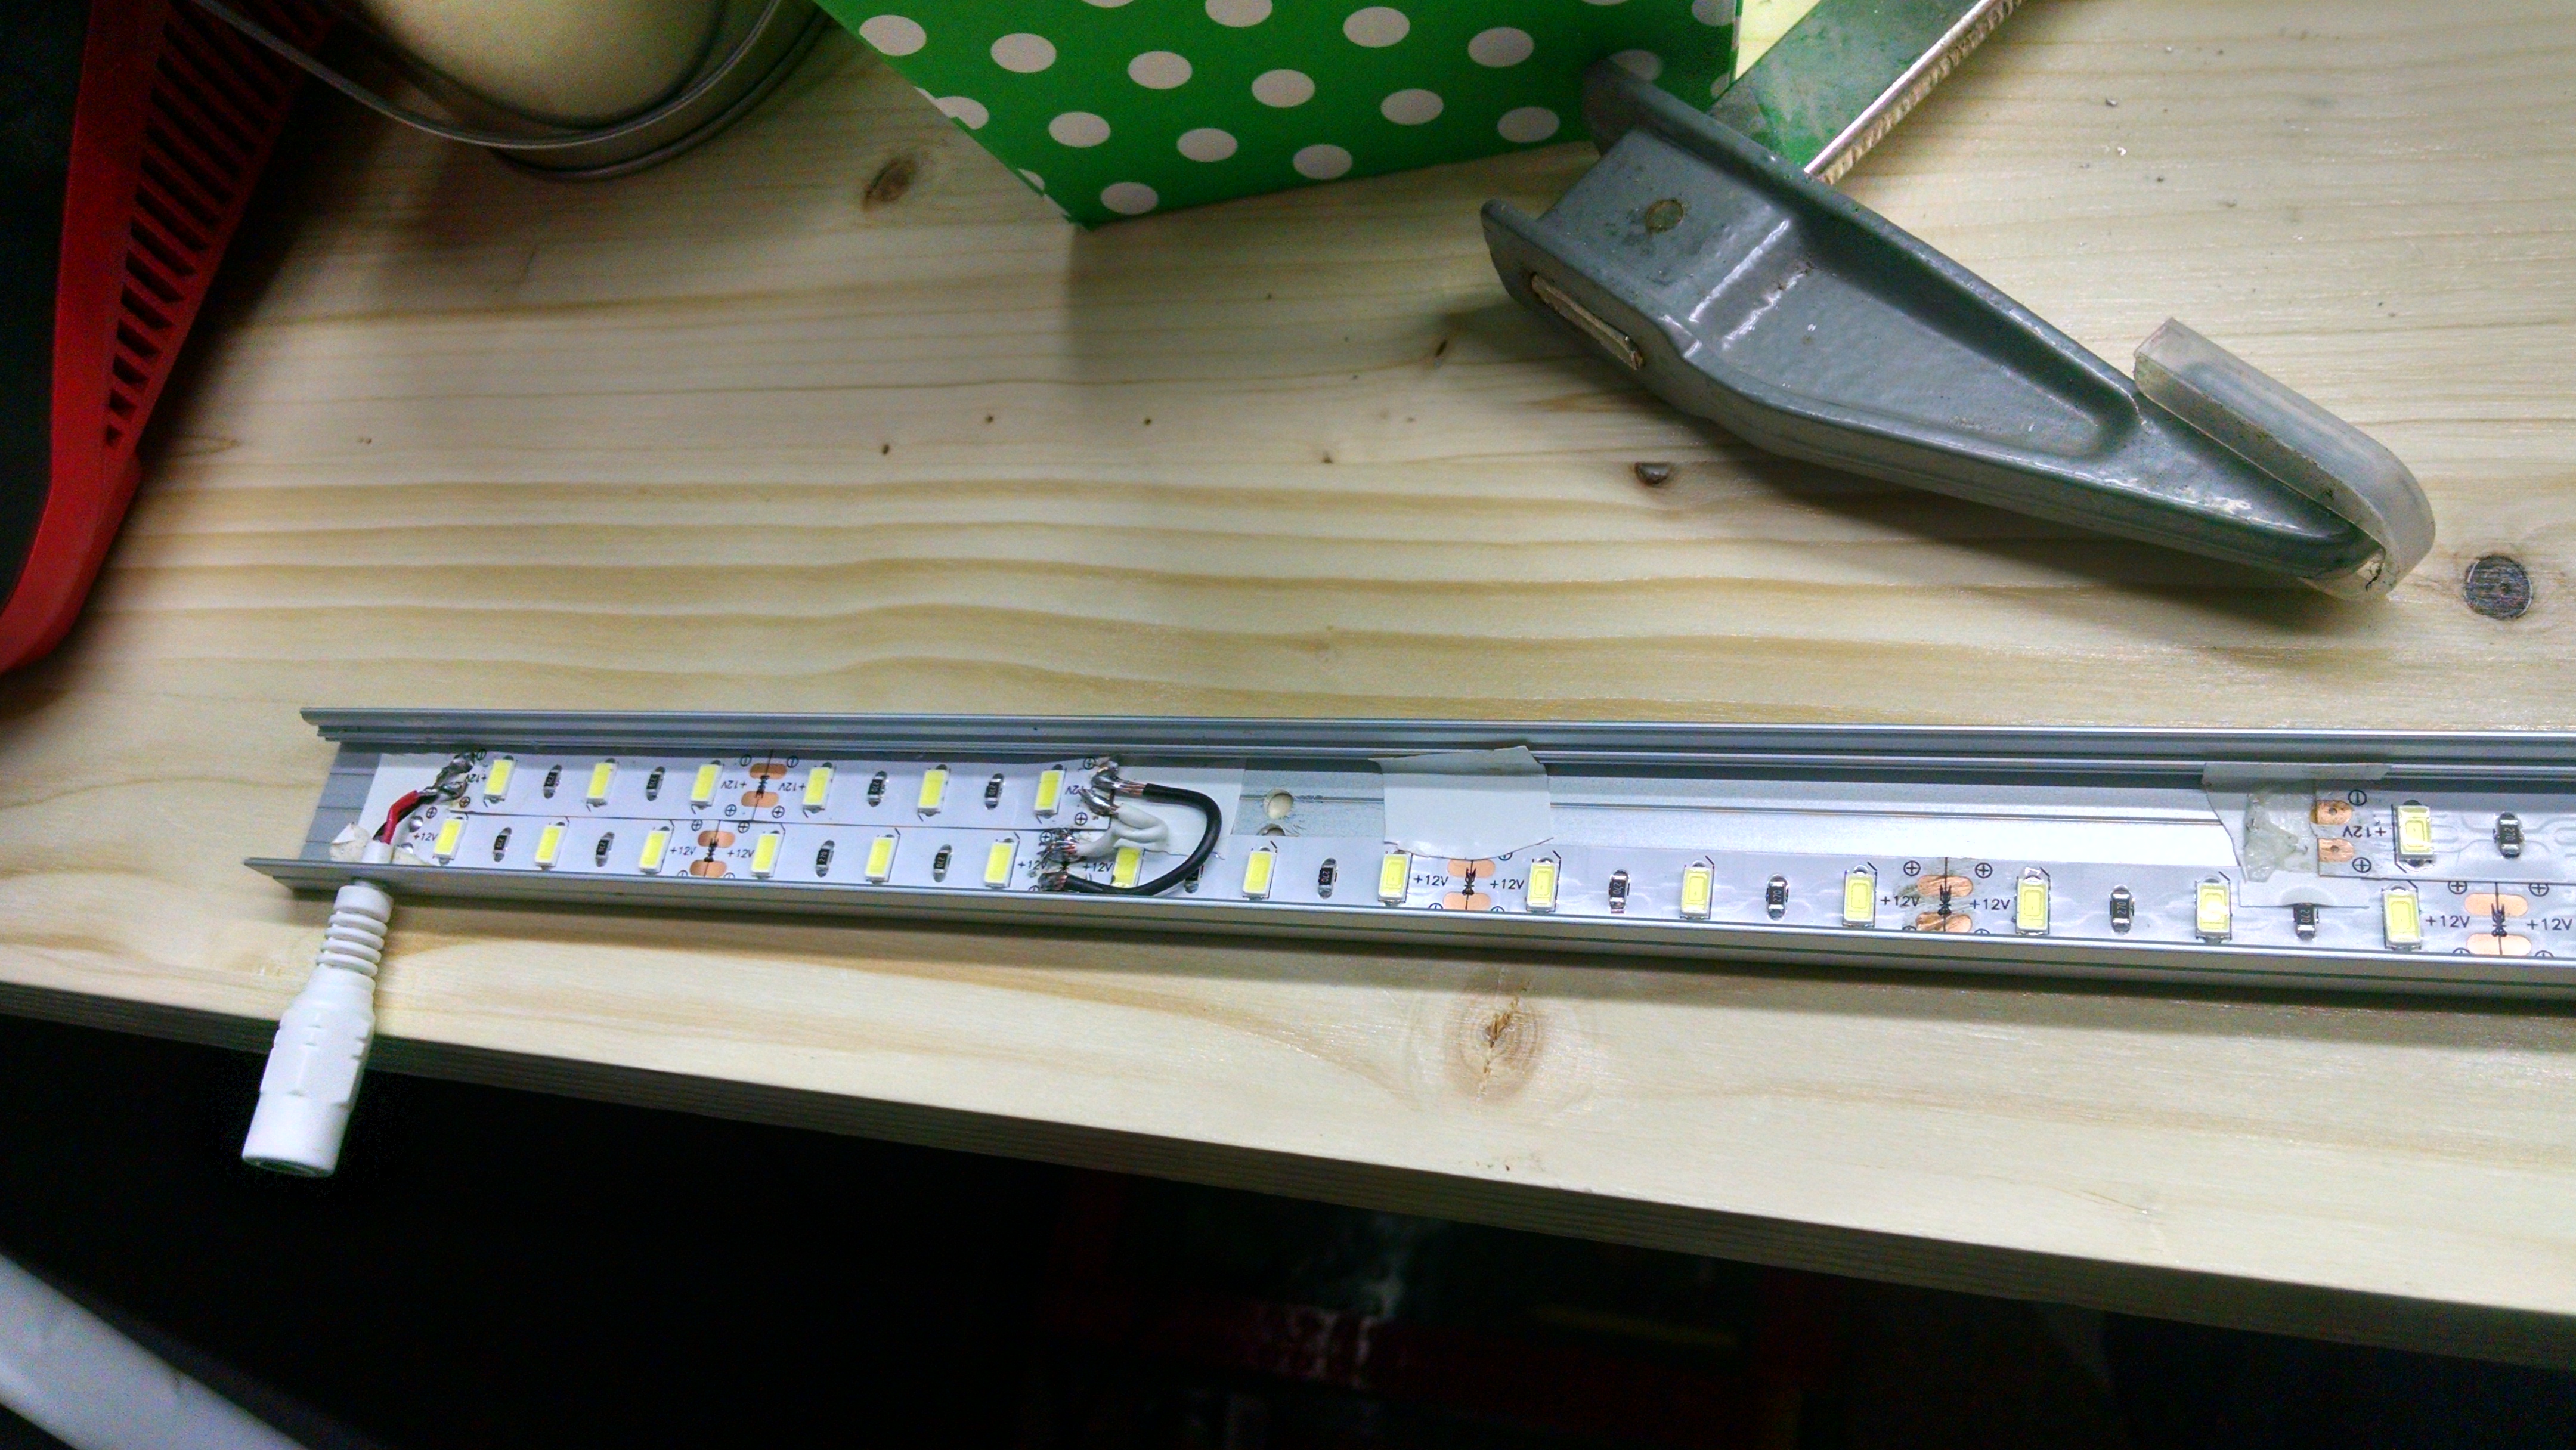
- I’d probably just get this for my 5ft strip light (and solder a female barrel connector out of my light strip):
- EXAMPLE: I buy 1x roll of 5630 LED strip, which is about 15ft. It says to take 12volts at 5amps, or 60watts of power per roll (12v times 5a equals 60watts).


- There are other considerations, like if you’ve got too many linear feet in a row, you may want to run wire to both ends of your strip. Or come in at the middle.
- There are many blogs and calculators for this if my explanations are too cursory. Take a Google Excursion if you’re feeling unsure.
- I take no responsibility for bad wiring, and remember: a bad wiring job can result in fire and death.
Choose a Power Supply
With bare-wire leads you’ll solder in? Or “brick” transformer with barrel connector?
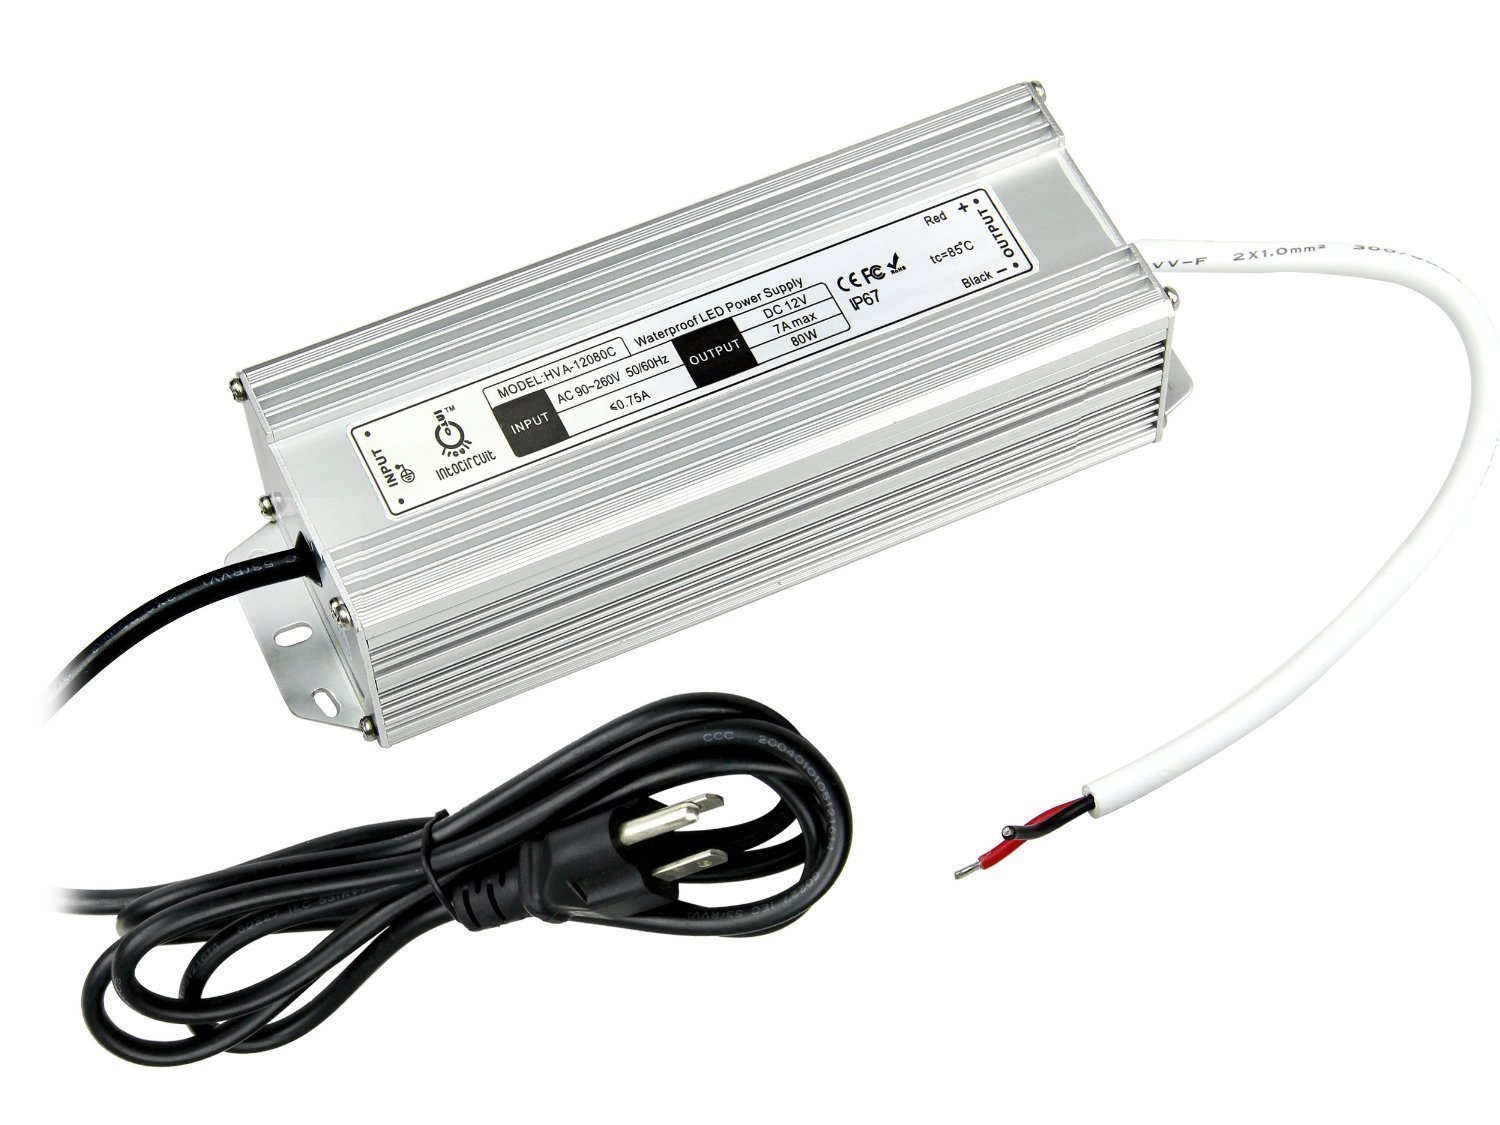
Bare-Wire Soldered Connection Driver
You can buy a driver like this (silver heatsink’d unit

Wire & Wire Management:
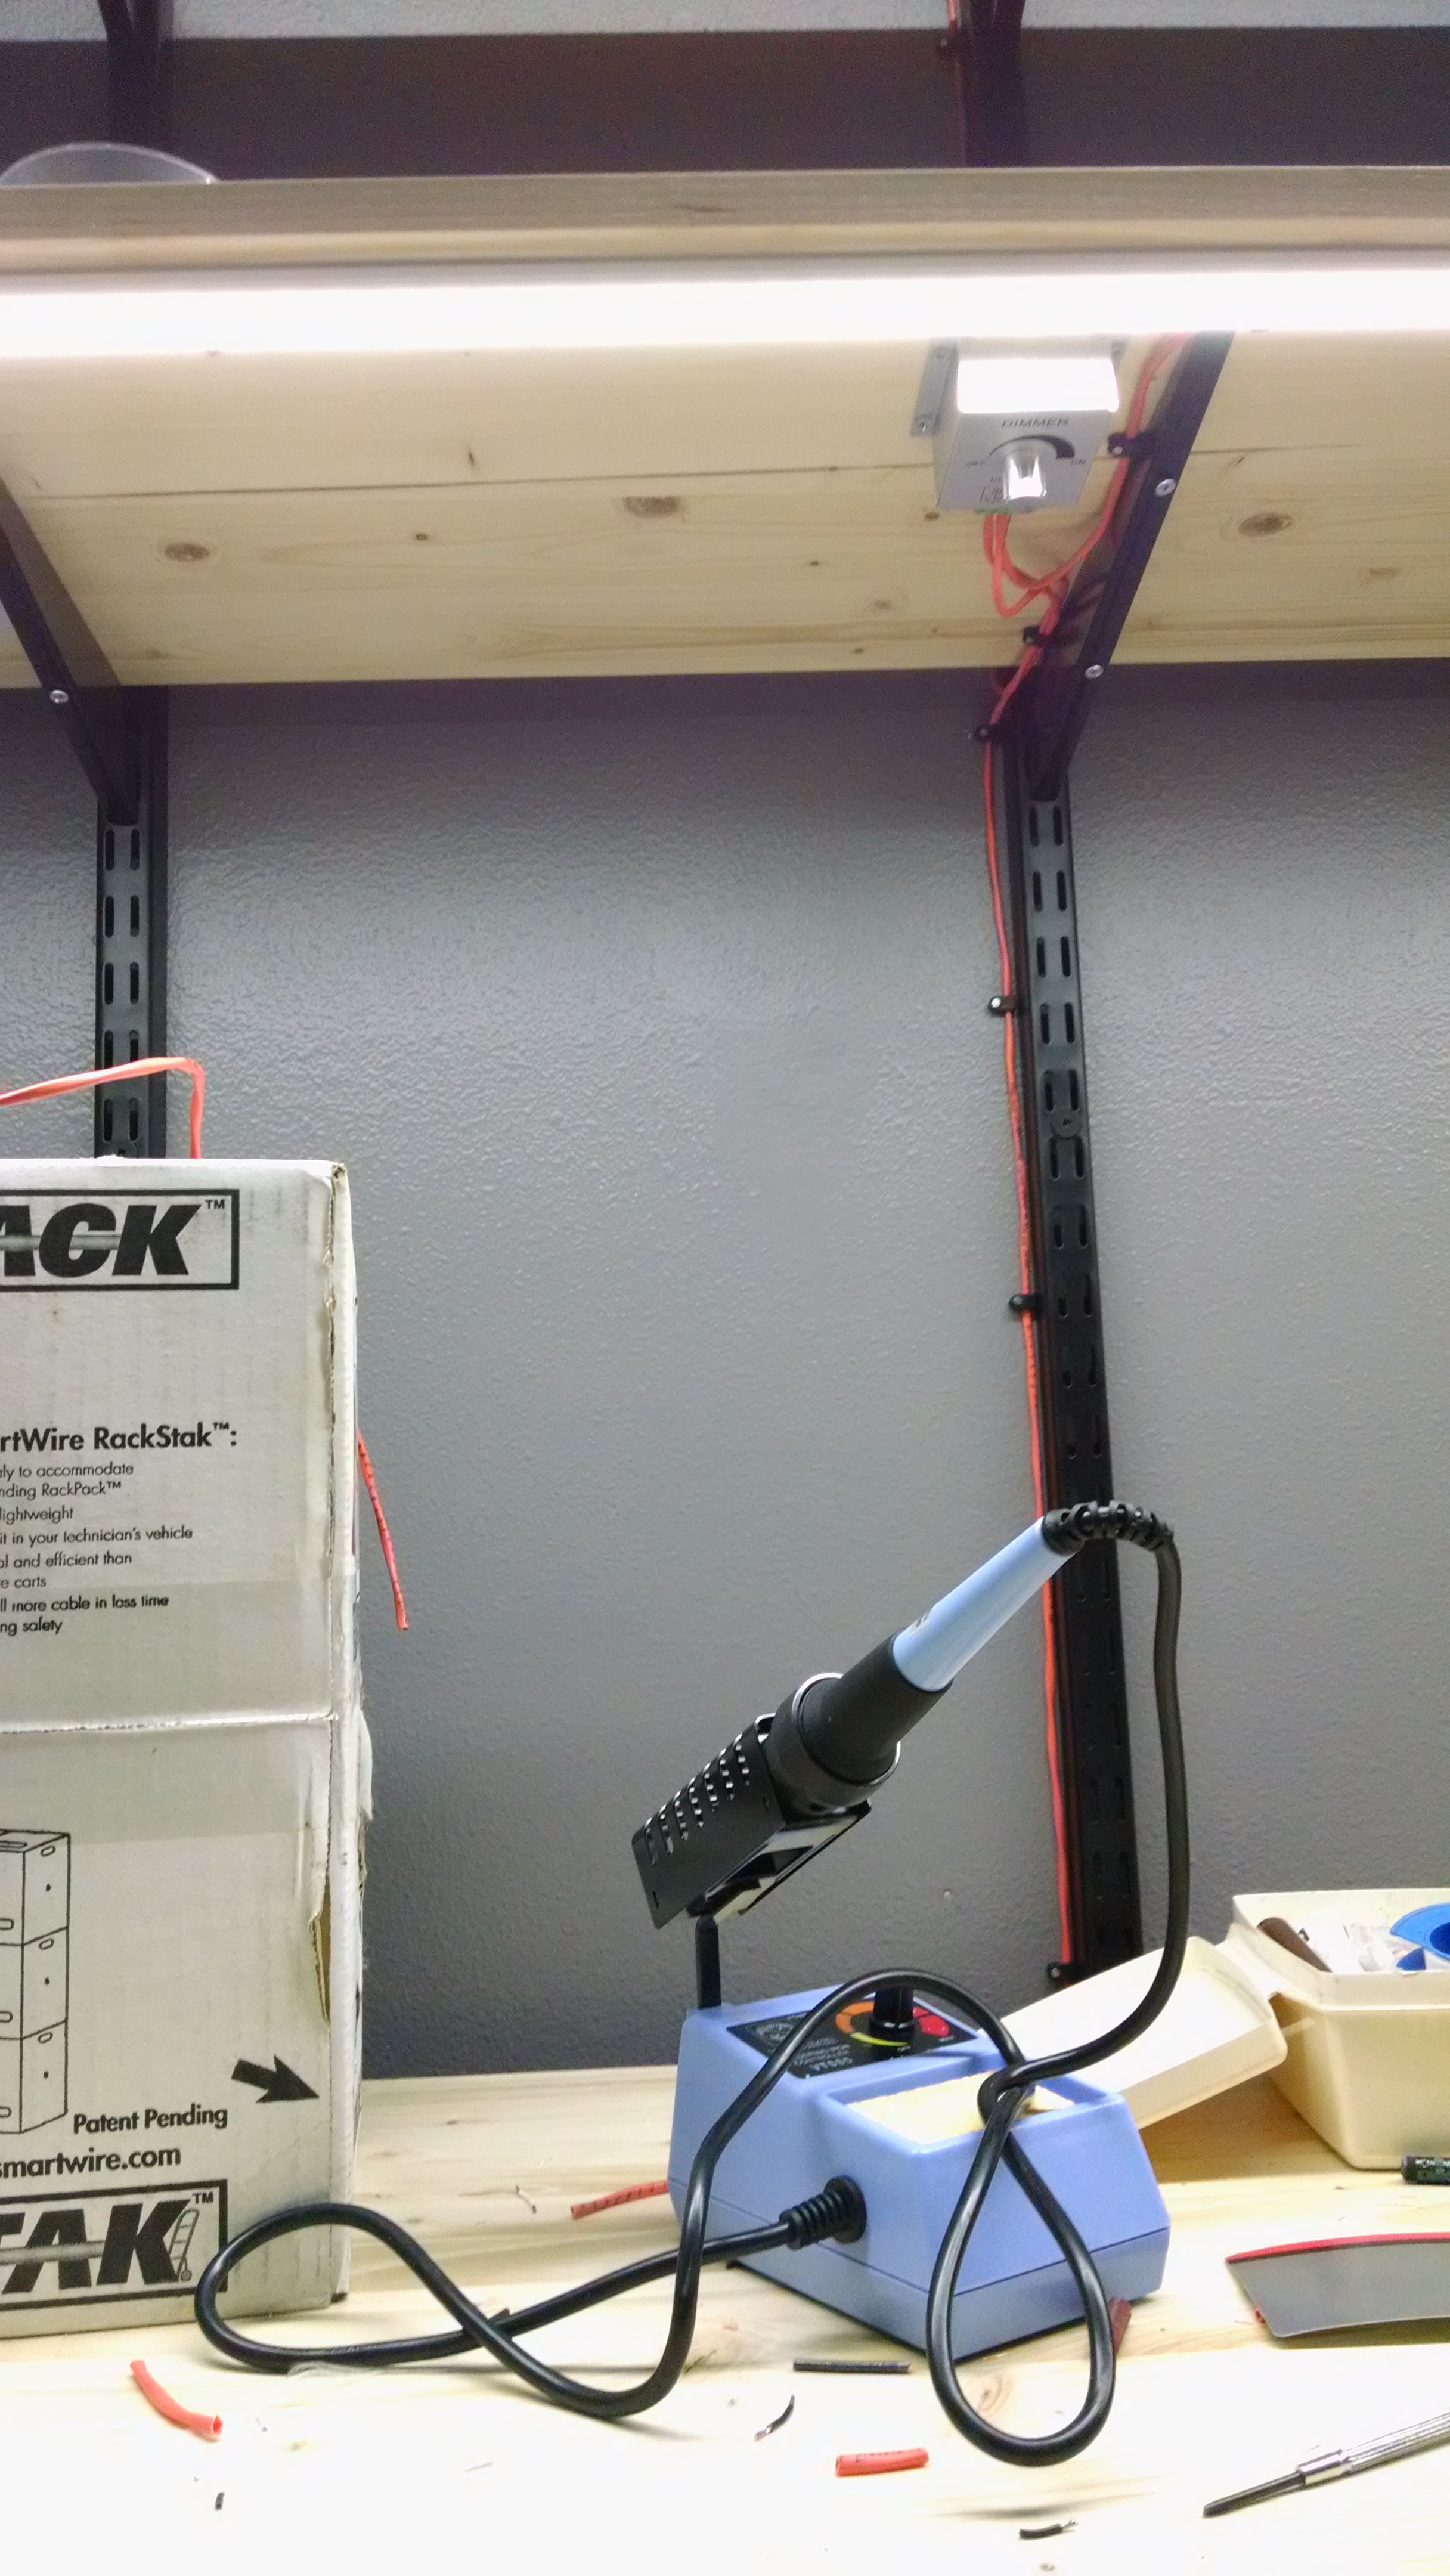
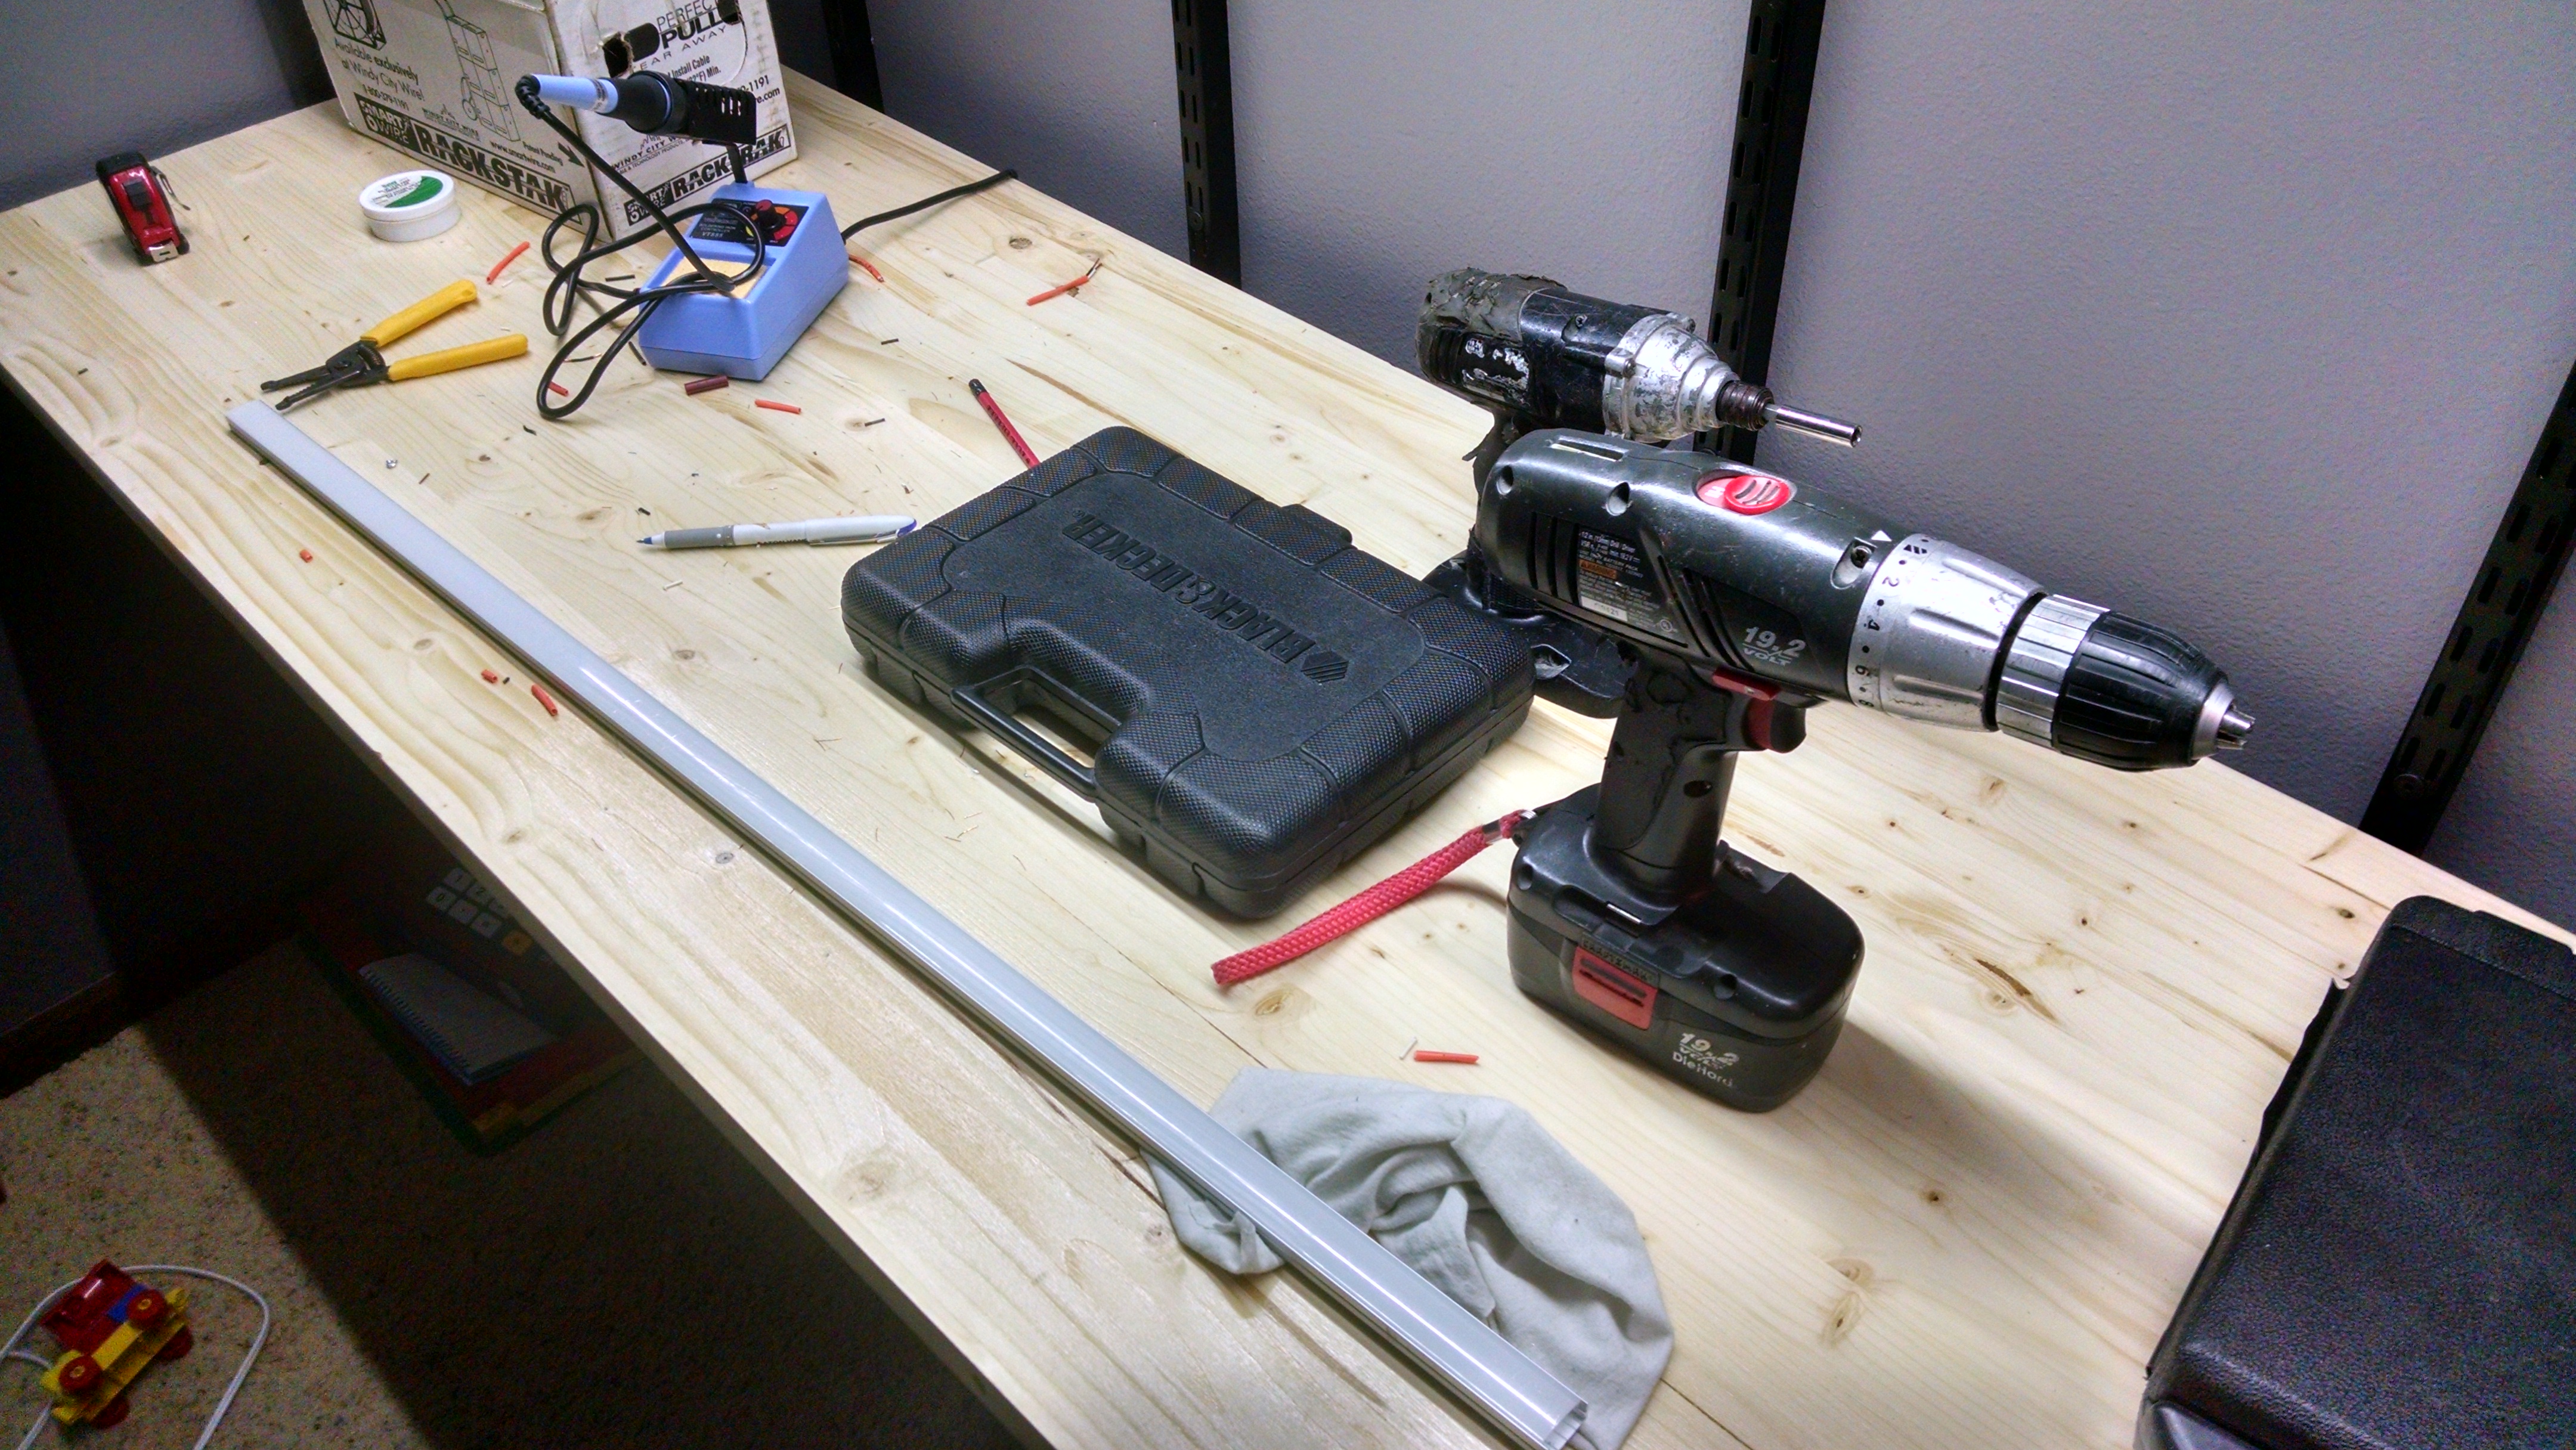
I used some roll of wire I had been given when I worked at a facilities controls design/build firm years ago. The owner told me I could have it to run some built-in home theater speakers, as it made great speaker wire. But it’s also handy for these LED lights. In fact, it’s been handy for all sorts of projects, from an OTA TV antenna I made to hanging a “stop pendulum” in our garage that my wife hits with her van windshield to know when to stop and park. Otherwise she’d drive clean through the wall. Maybe you should buy a huge spool of wire. It’s practically guaranteed to improve your life. (Notice the box of “Smart Wire” on the pics below. The box contains a spool of wire.)
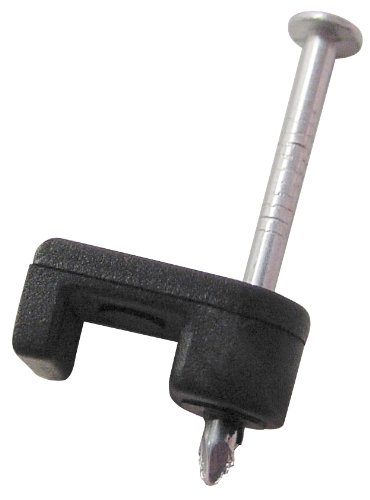
Notice I bought some wall wire clips

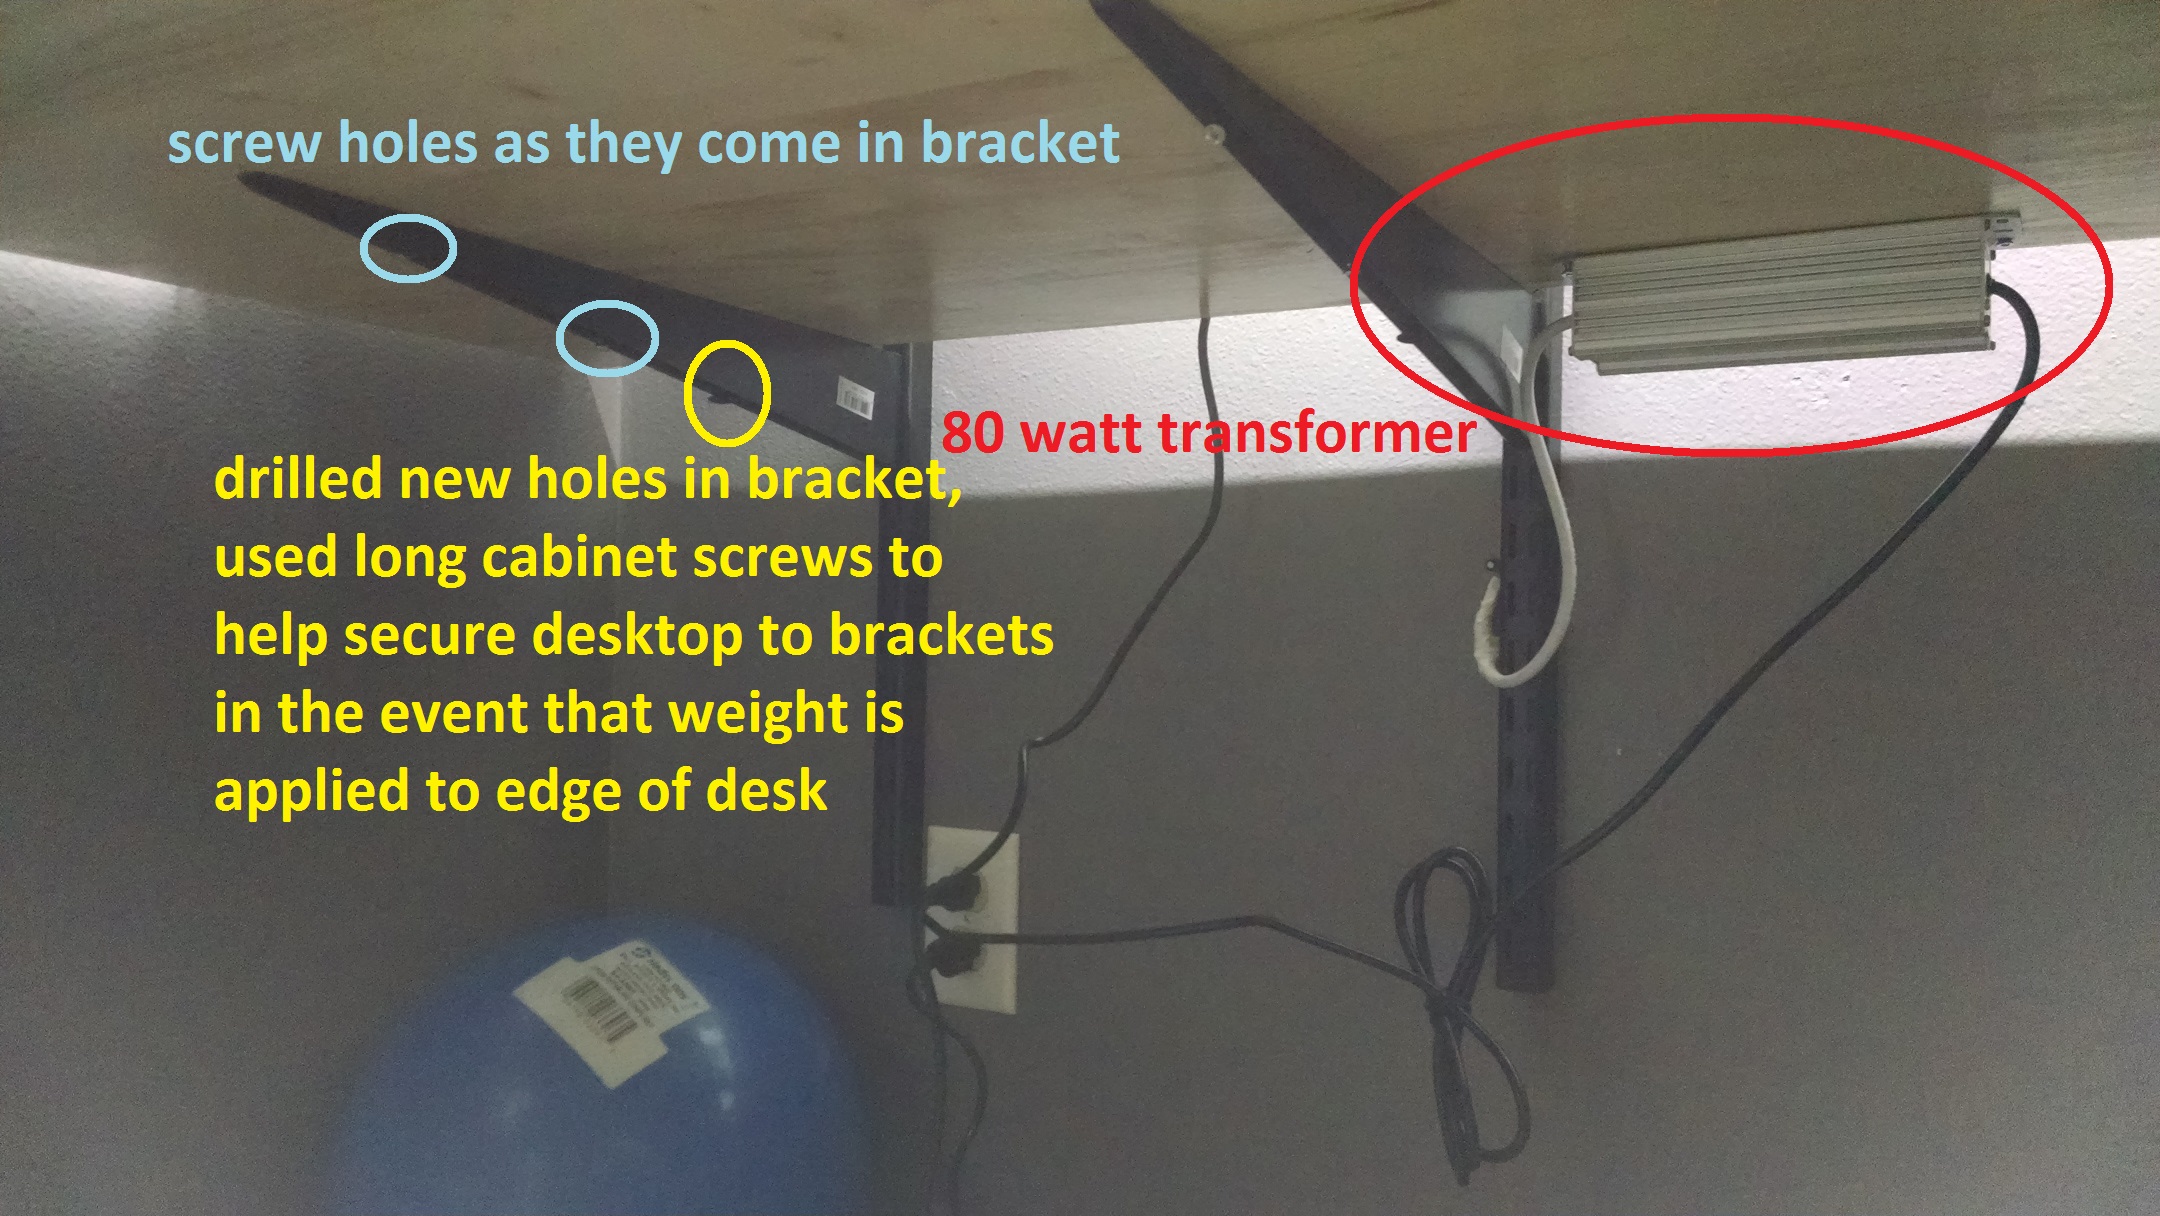
I also considered running wires up through the wall standards, especially since they’re “Heavy Duty” versions, and therefore have more room. But it seemed like if at some point I wanted to adjust the locations of shelves, and since the lights are connected to them, it would be much more difficult to manipulate wires when they’re trapped in a steel cage.
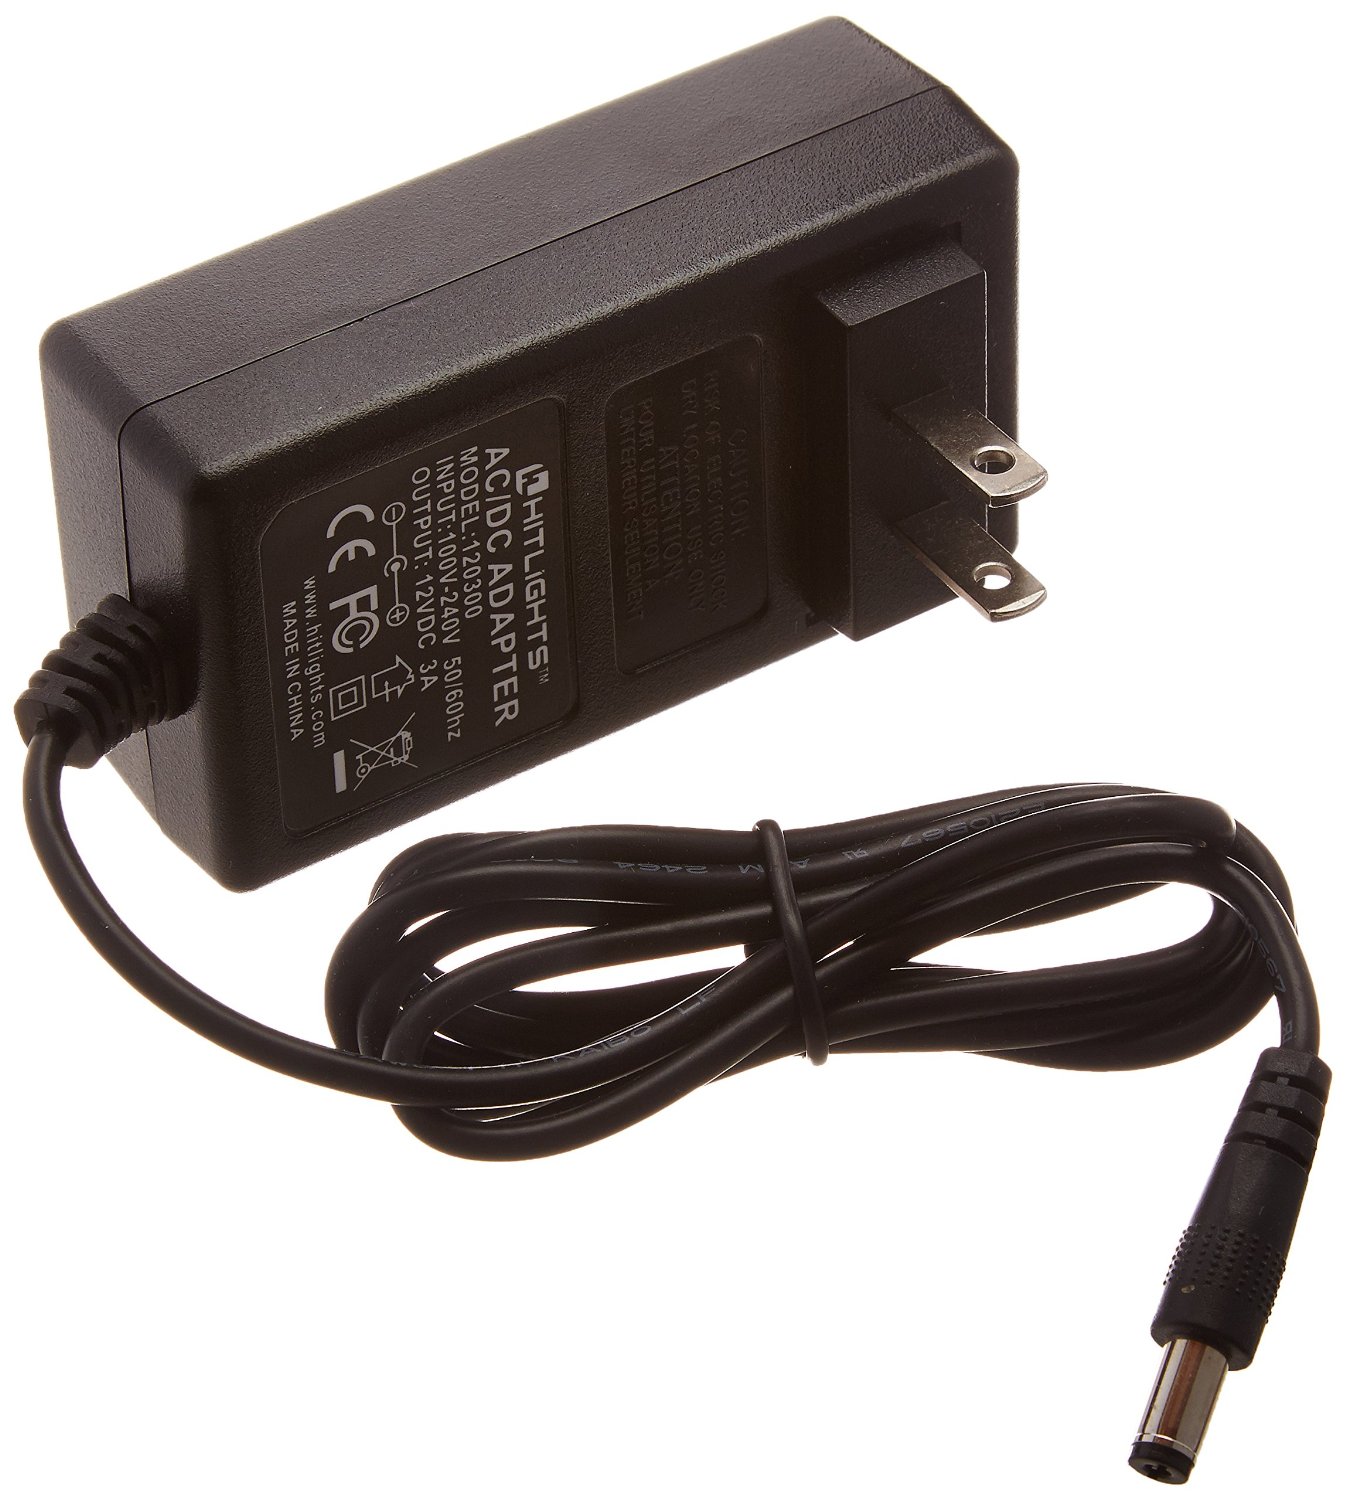
Plugin Transformer with Barrel Connector
The 2nd driver pic below is another plugin transformer type with barrel connector. I used one of these for the sewing/computer workstation I wired for my wife.
Unfortunately the “Hitlights

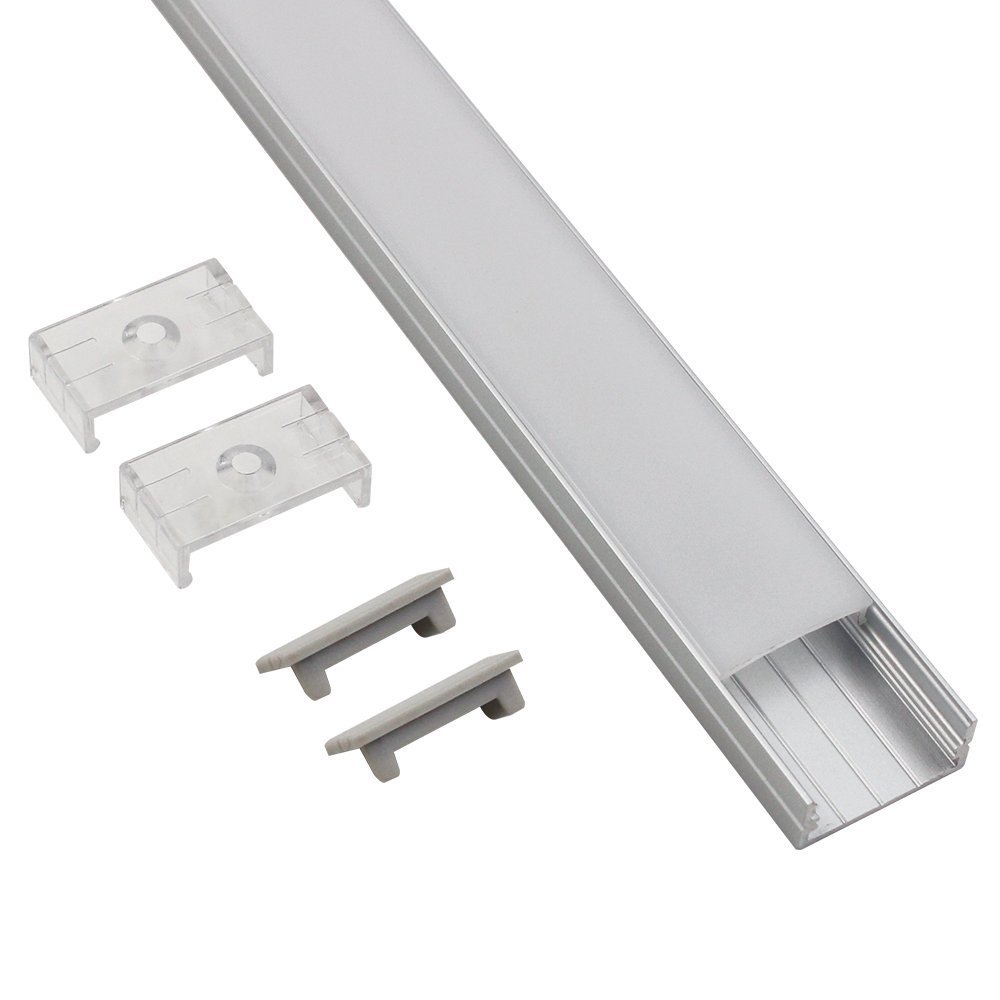
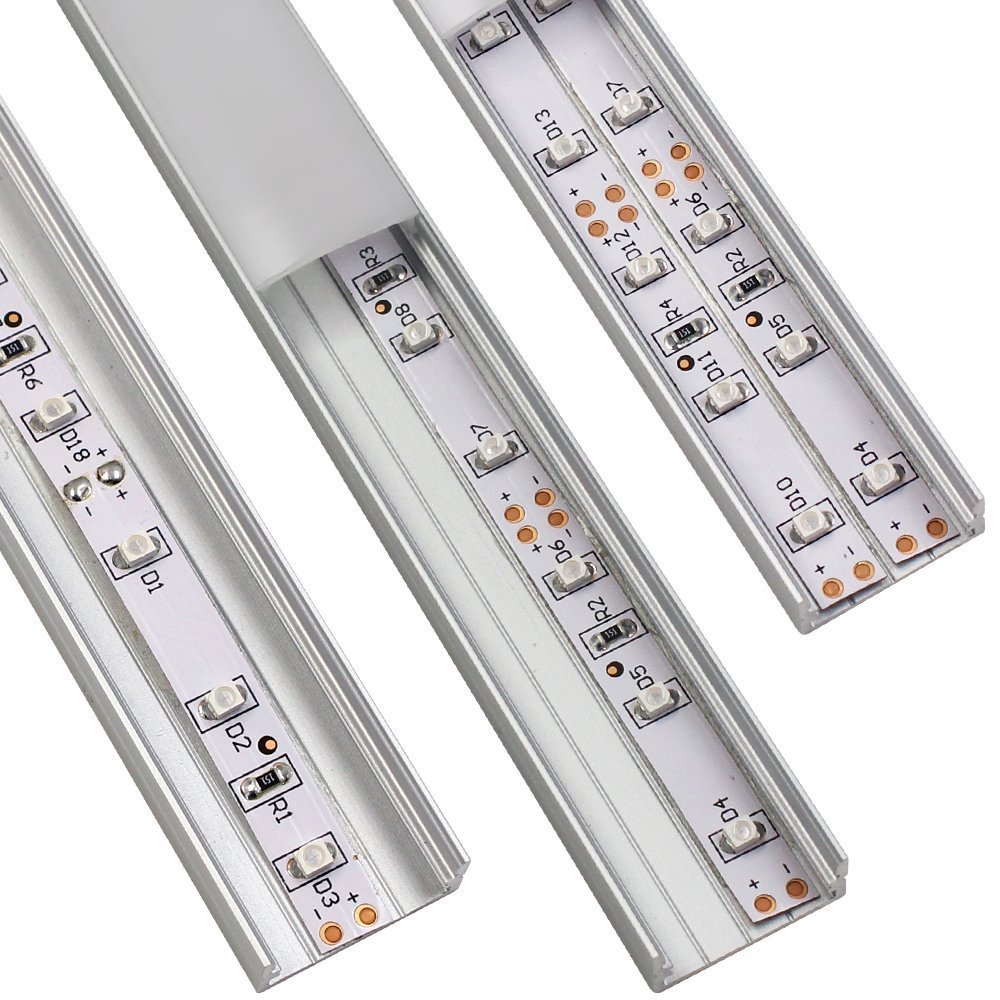
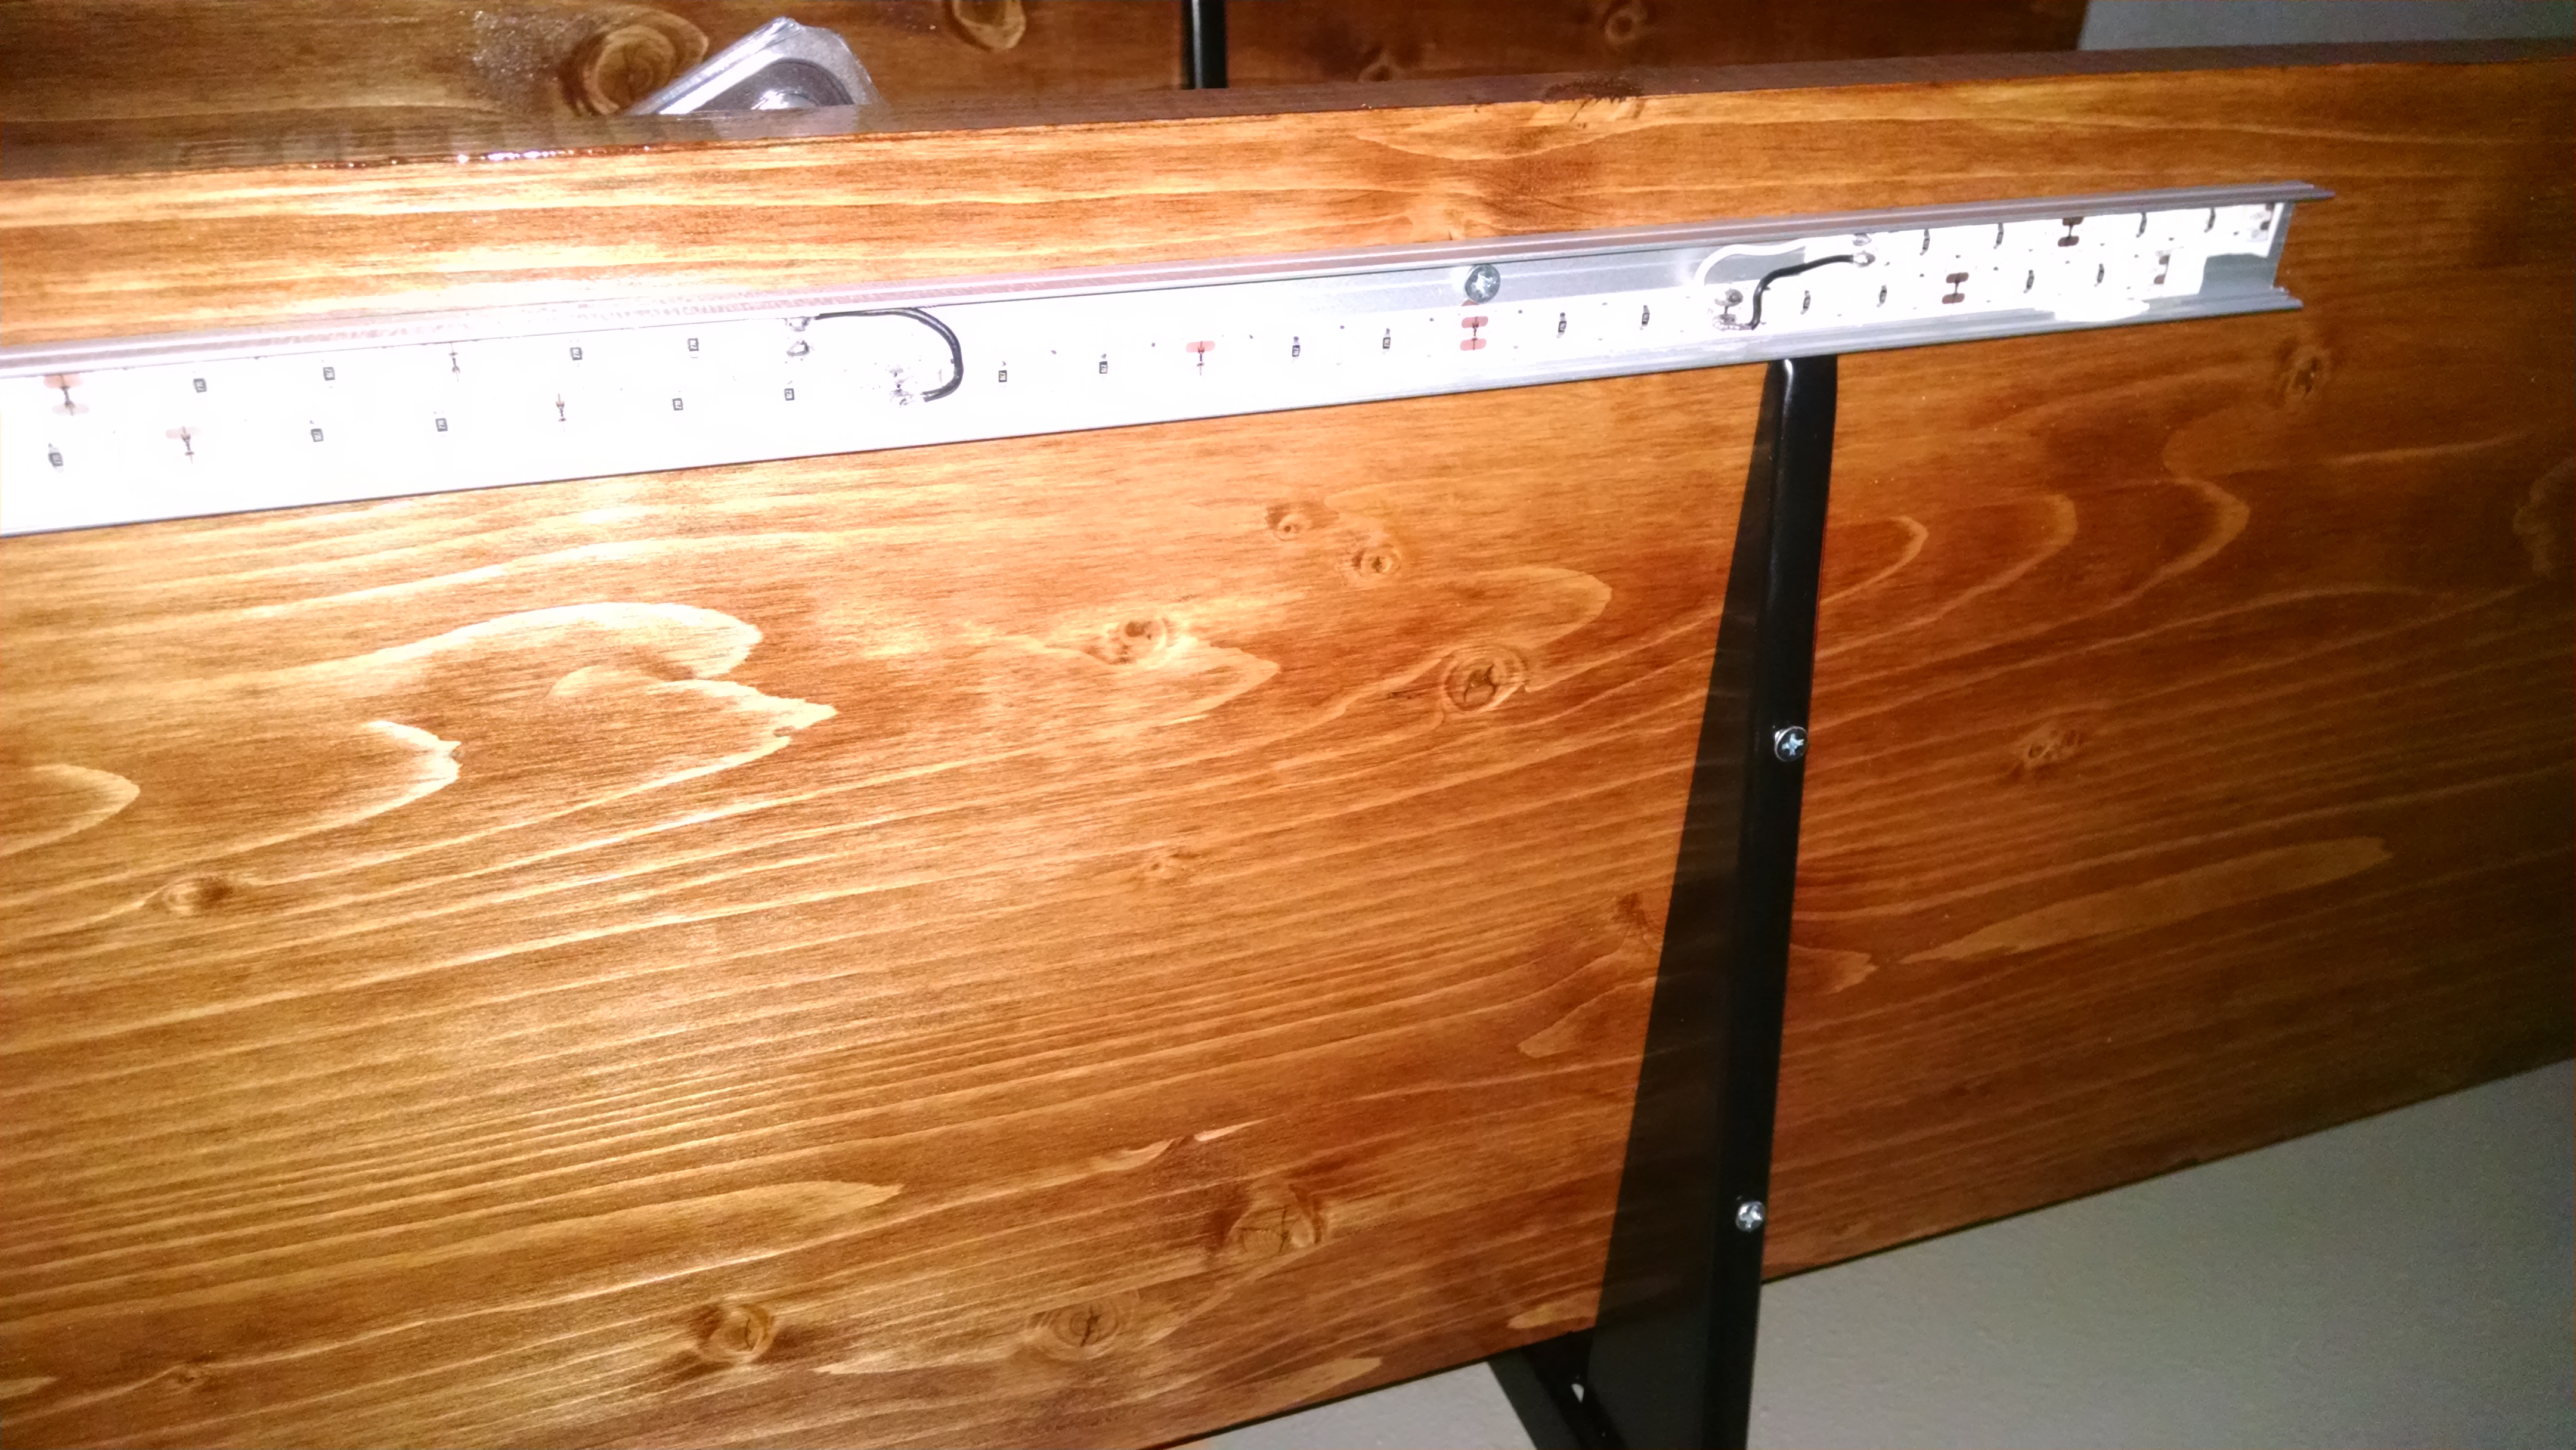
Find an aluminum channel with diffuser.
- You’ll want a diffuser lens over your LEDs, because it gets rid of that “Thousand points of retina-burning lasers” effect.
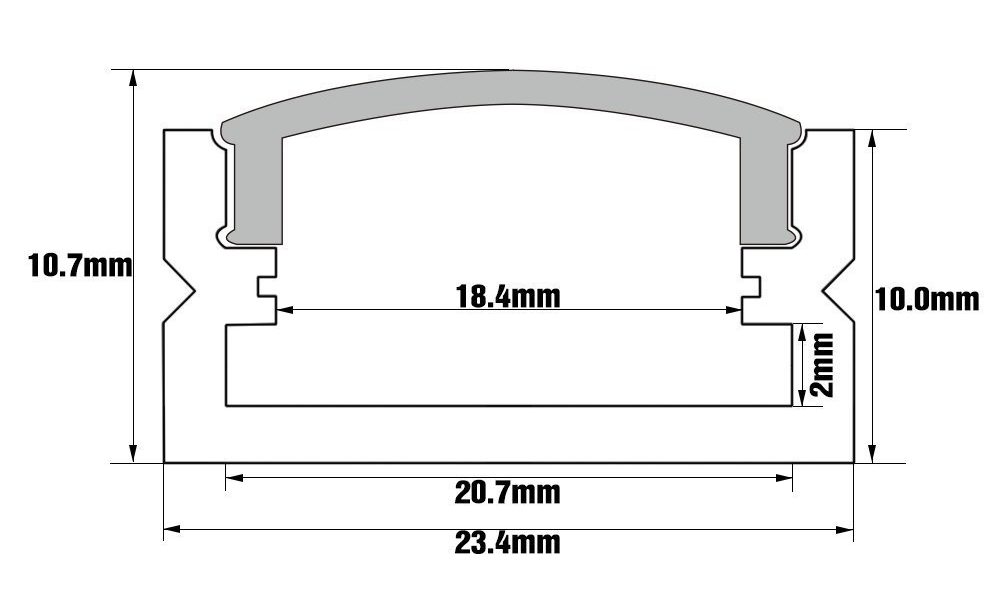
- I love these aluminum extrusions from “Torchstar
- If you get the “U07
- If you get the “U07
- To cut the extrusions, if needed: If you have a chop saw/miter saw


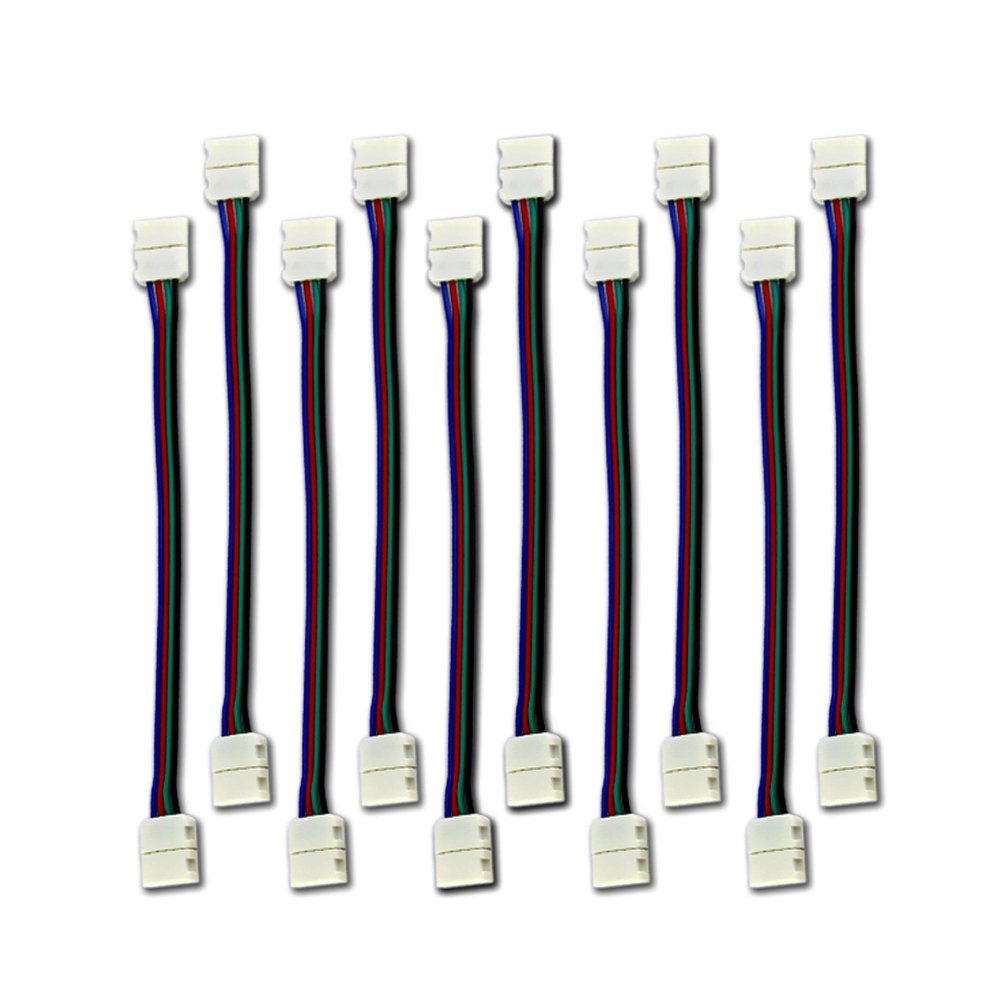
Pick up a soldering iron or connector clips
If you’ve never soldered wires before, it’s not hard. But if you’re nervous about melting metal at hundreds of degrees; If you lay your LED tape out well enough, you can use snap-together connectors

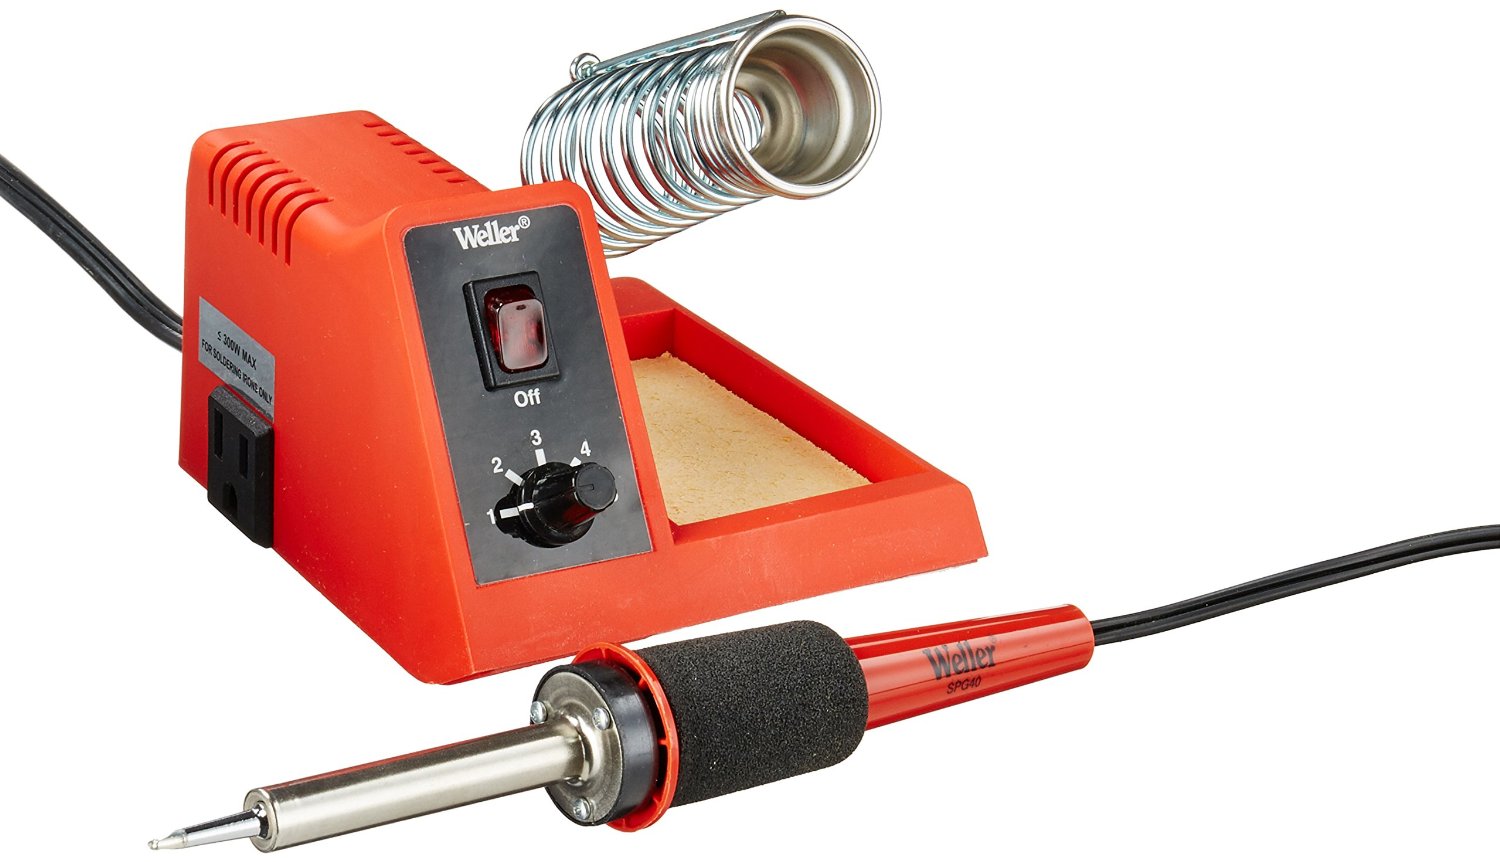
Buying a Soldering Iron: Don’t get the cheapest! (But decent ones aren’t expensive).
You can purchase a decent iron like the one below for $35 on Amazon Prime


Soldering.
If I can solder, you can too. I just bought a decent iron on sale for less than $50. I didn’t even buy special solder, but just use the flux, flux brush and solder from my copper pipe plumbing kit

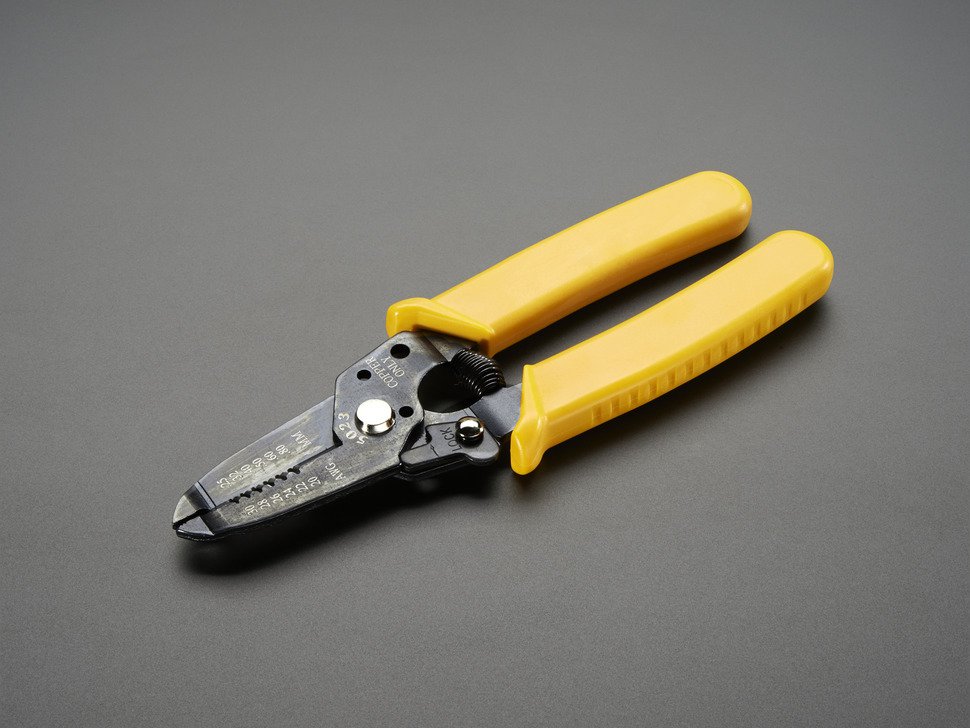
And of course you’ll need wire (I’ll leave that to you to find–see my recommendation for buying life-changing-size spools of “Smart Wire” above), and a wire cutter/stripper. A reasonably good wire cutter versus a piece of trash makes all the difference in whether or not you enjoy your wiring project (same for the quality of your soldering iron). So get a decent one. Should cost between $7 & $20

The thing about soldering is: you’re using small gauge wire. And it’s made out of very conductive metals, and that means they not only conduct electricity very well, but also heat. So make sure you flux your wire ends and/or solder contacts so they’re ready to melt right away, because you don’t want to have to hold the iron tip to the wire for long, or it will get so hot it melts its jacket.
Other little tricks I recommend, if you can call them that:
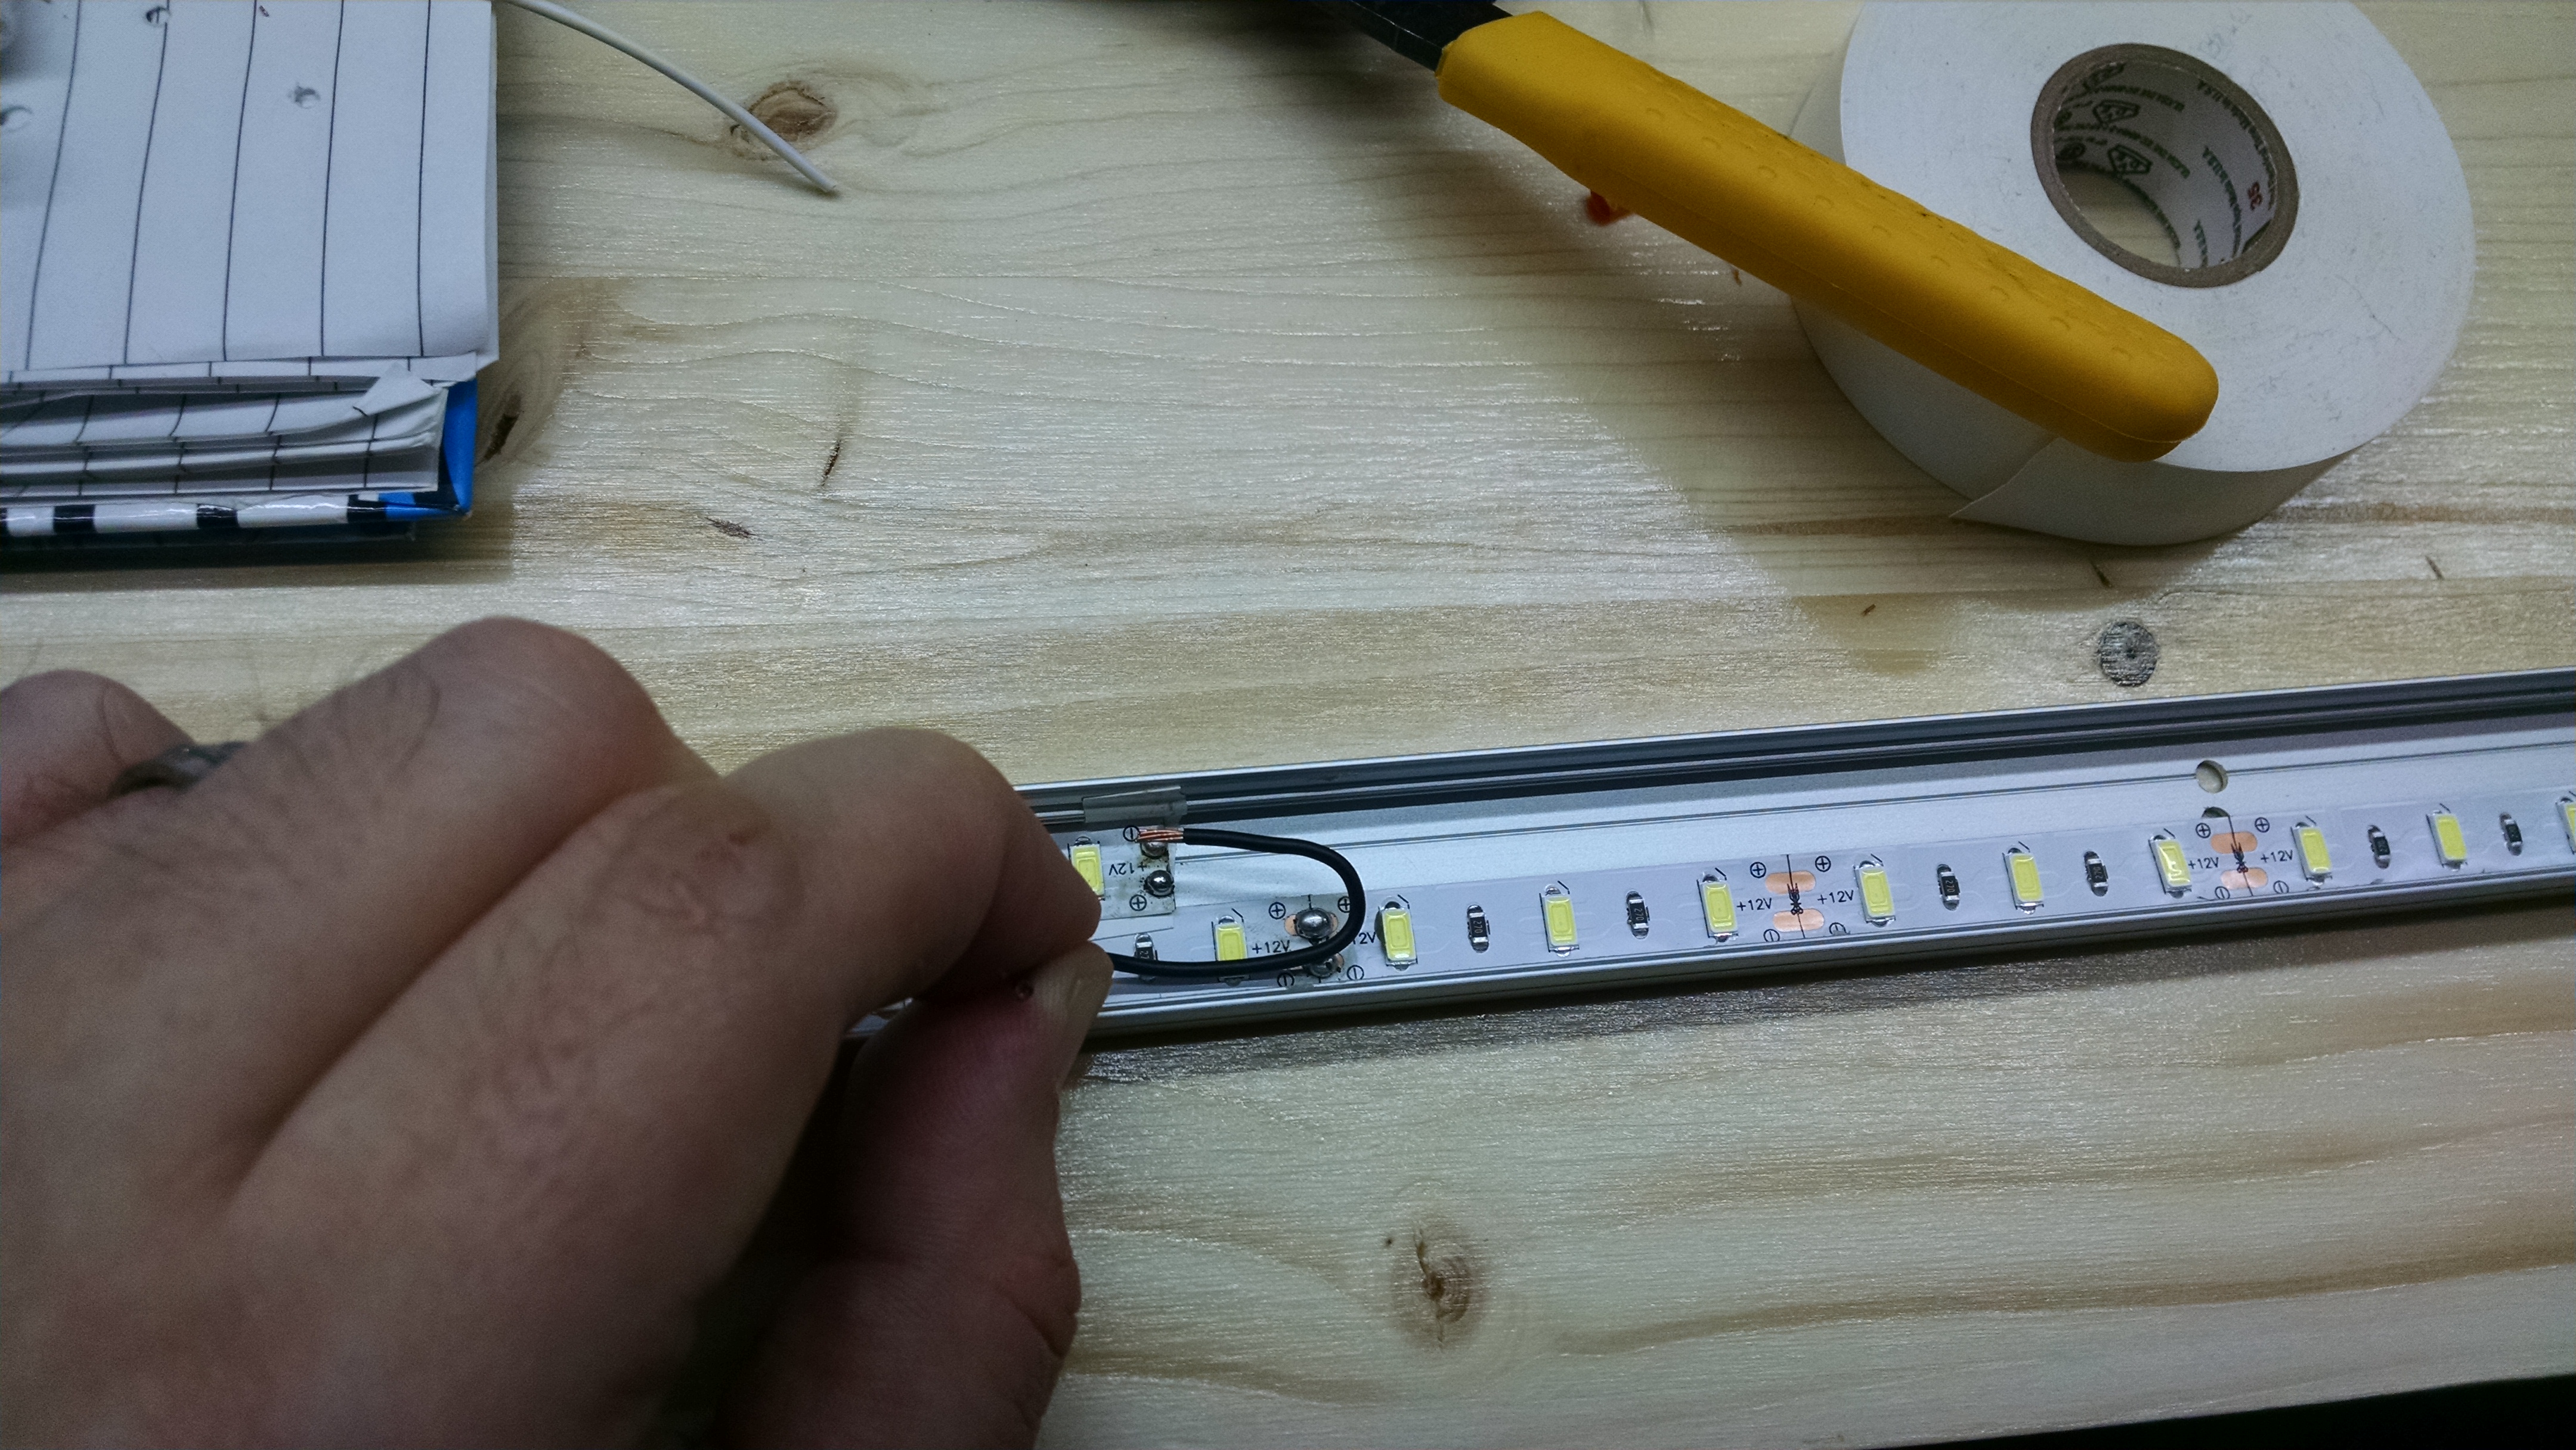
- Get your pieces of wire sized and cut before soldering.
- This is too tight, in these tiny aluminum channels, to be free-form jazzing your wire solders. Cut each wire snippet to length, bend them so they’re ready to hold with the grabber part of your wire strippers, and then you’re not trying to cut and fashion wires that are solder-fixed on one end.
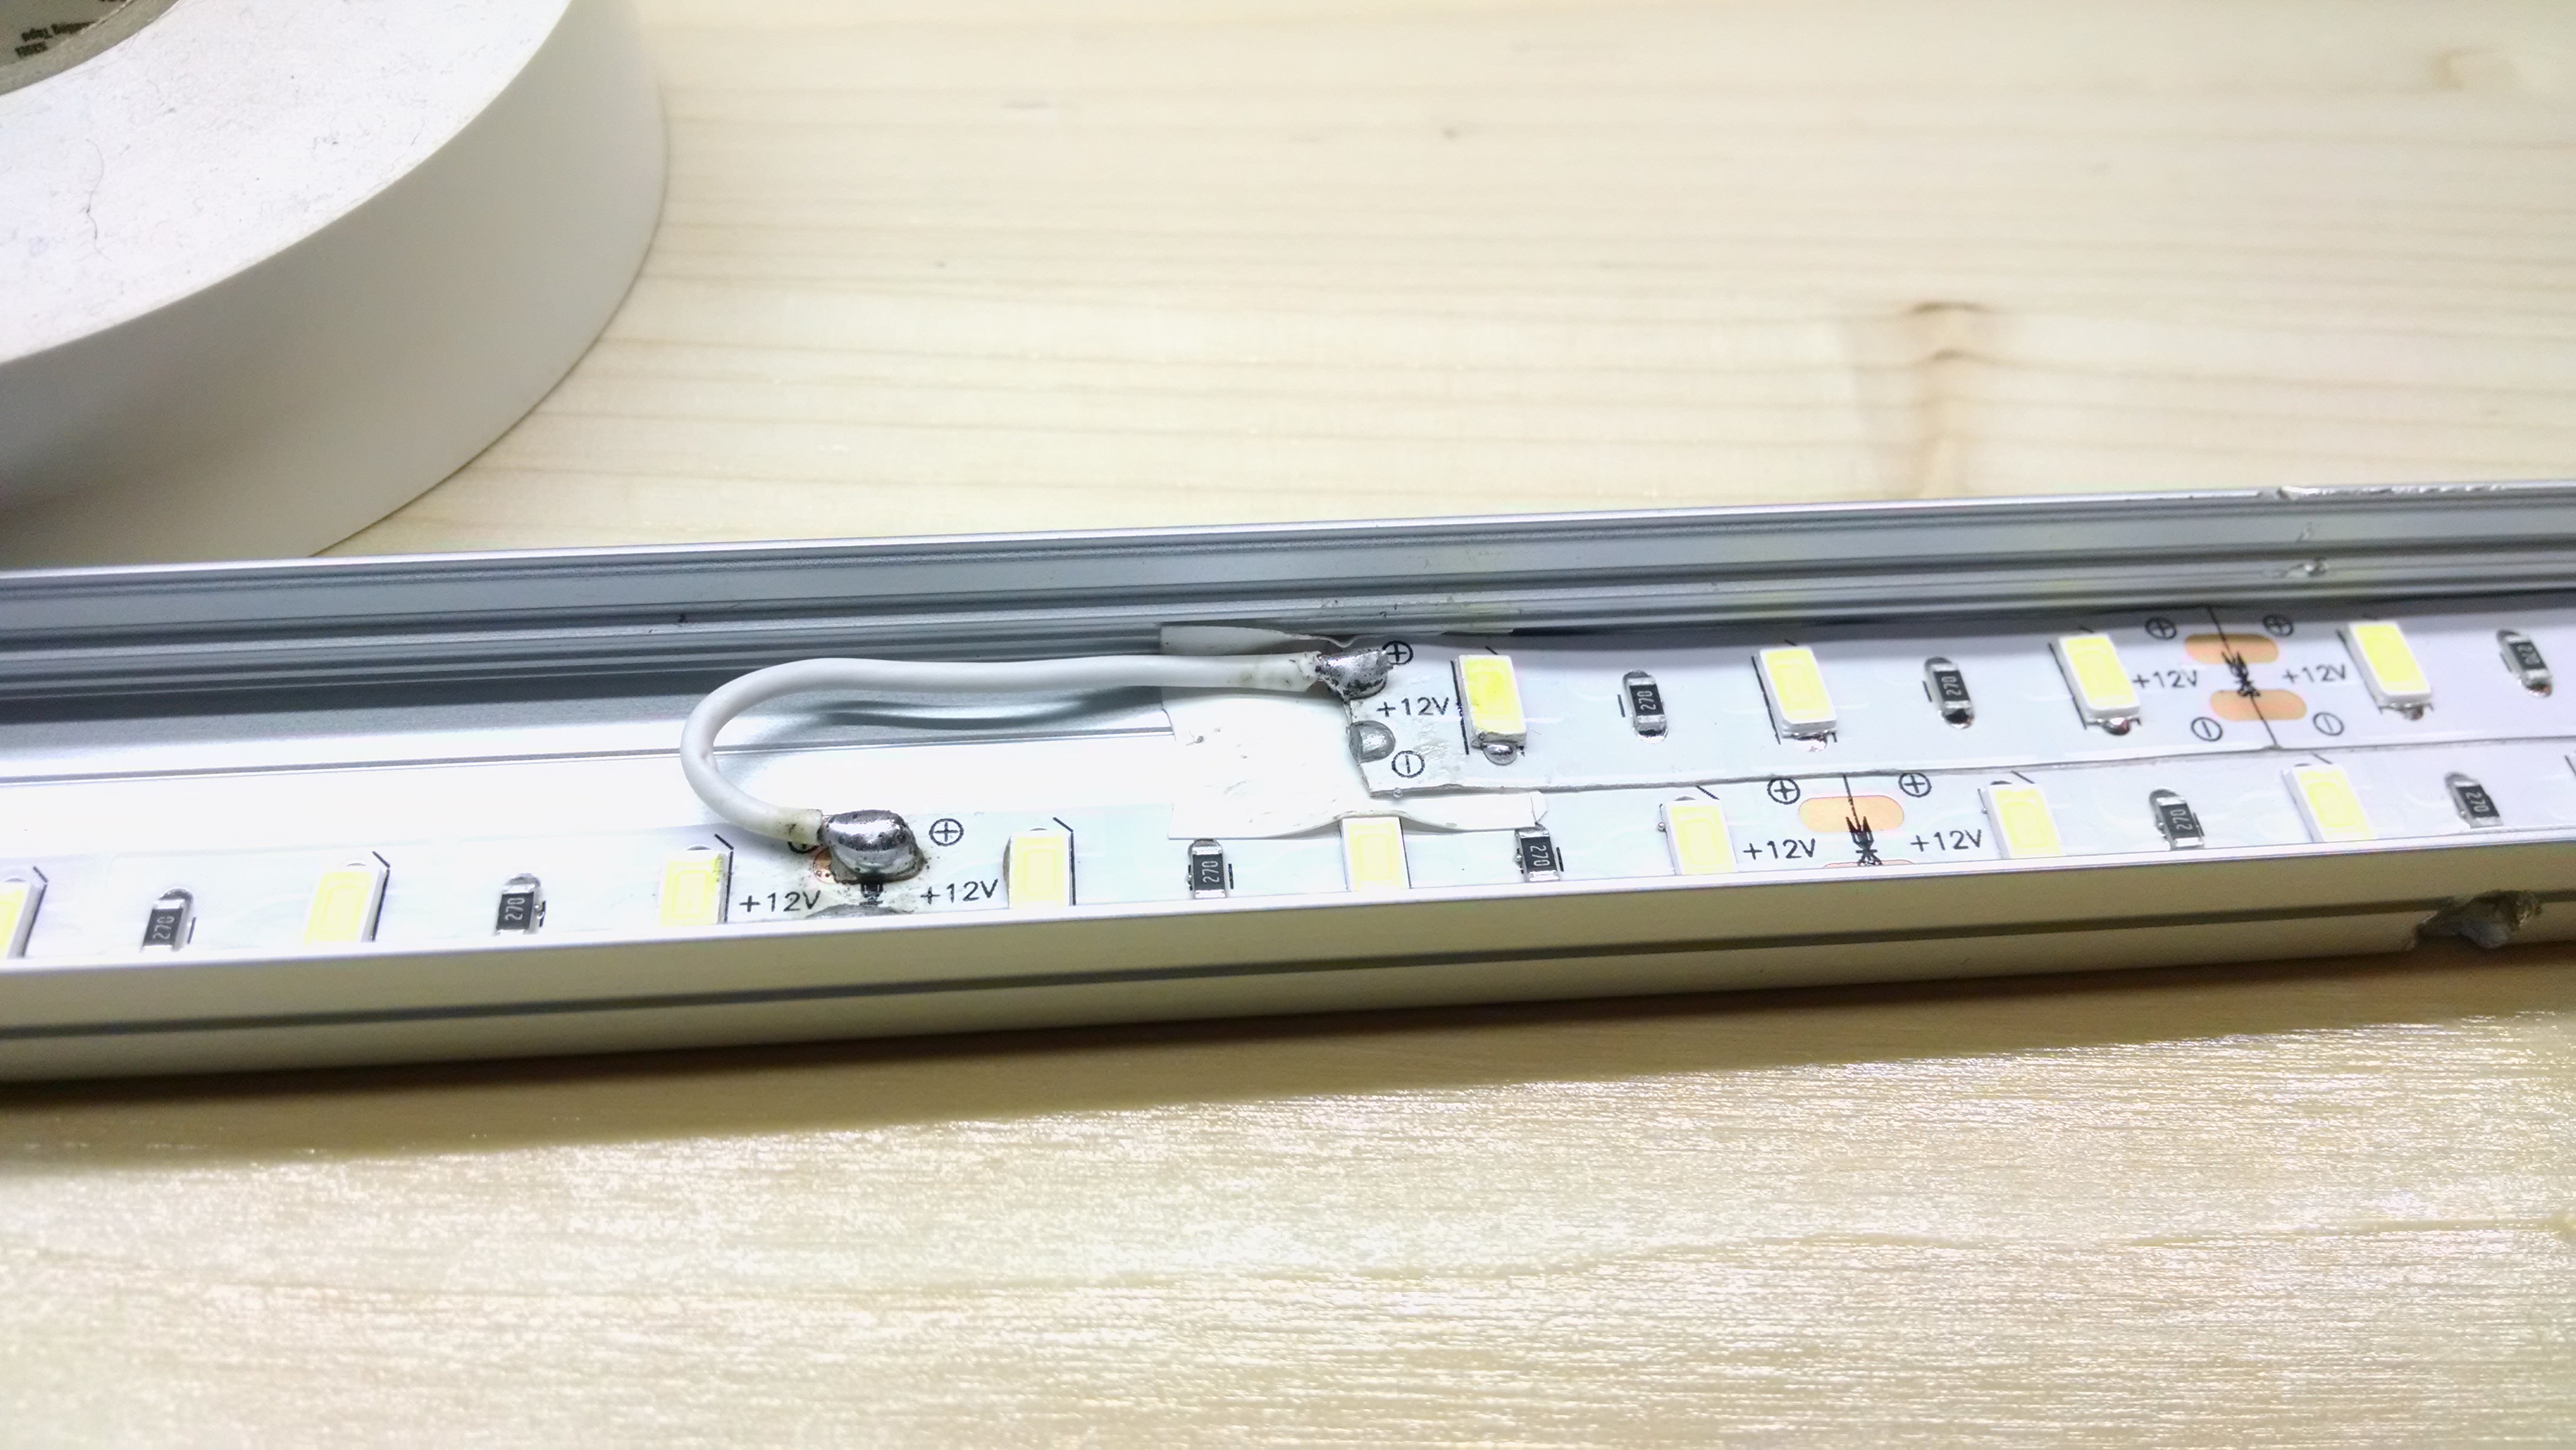
- Get electrical tape ready – light colored. I don’t know how necessary it was, but I didn’t want any leads from one LED strip touching the neighboring stip’s leads.
- In this channel, 2 strips are overlapping, so I staggered them so no leads lined up side-by-side.
- See the little tape snippets I put in below. And I used white tape because I didn’t want a dark “bruise” effect showing through the lens.
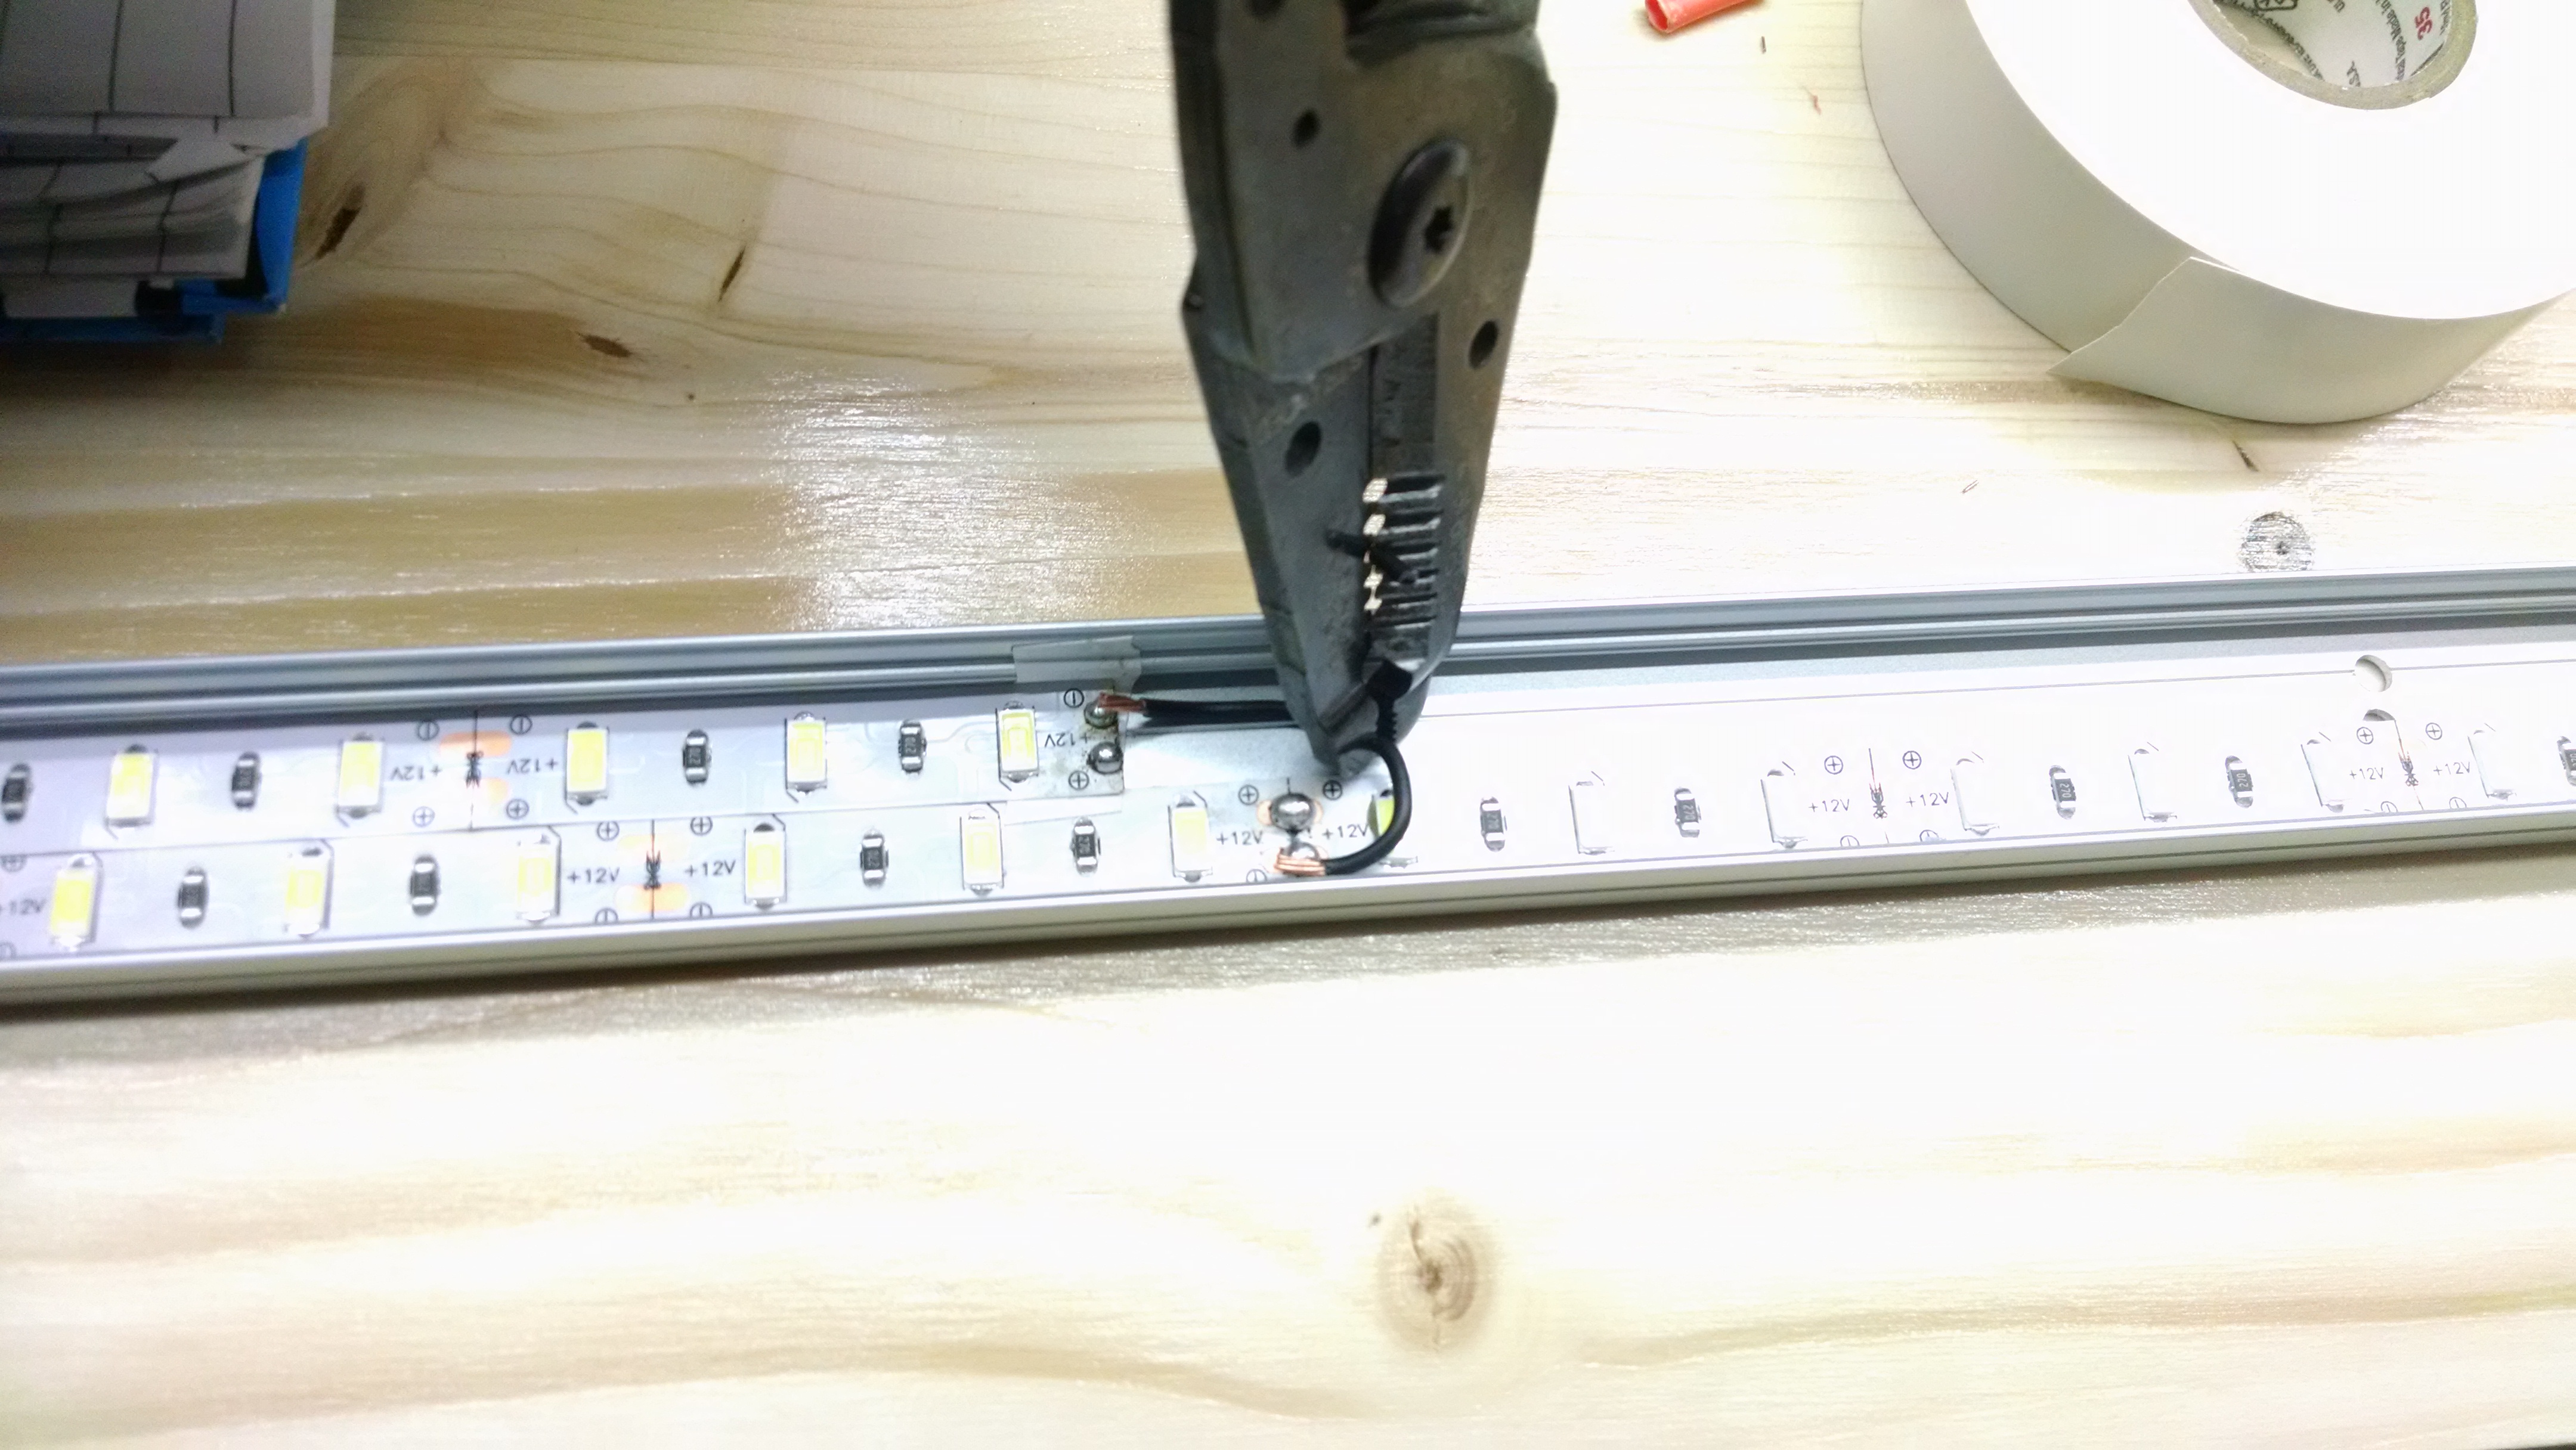
- Consider fluxing a lead on the LED strip and then soldering a drop of solder onto it, instead of trying to melt solder onto a dry wire-and-lead connection.
- Sometimes it’s easier to heat up and melt that drop, then push the copper wire into the liquified drop and let it congeal, rather than to try to drop molten solder on a wire and contact at the same time. Ask yourself “how shaky are my hands?”

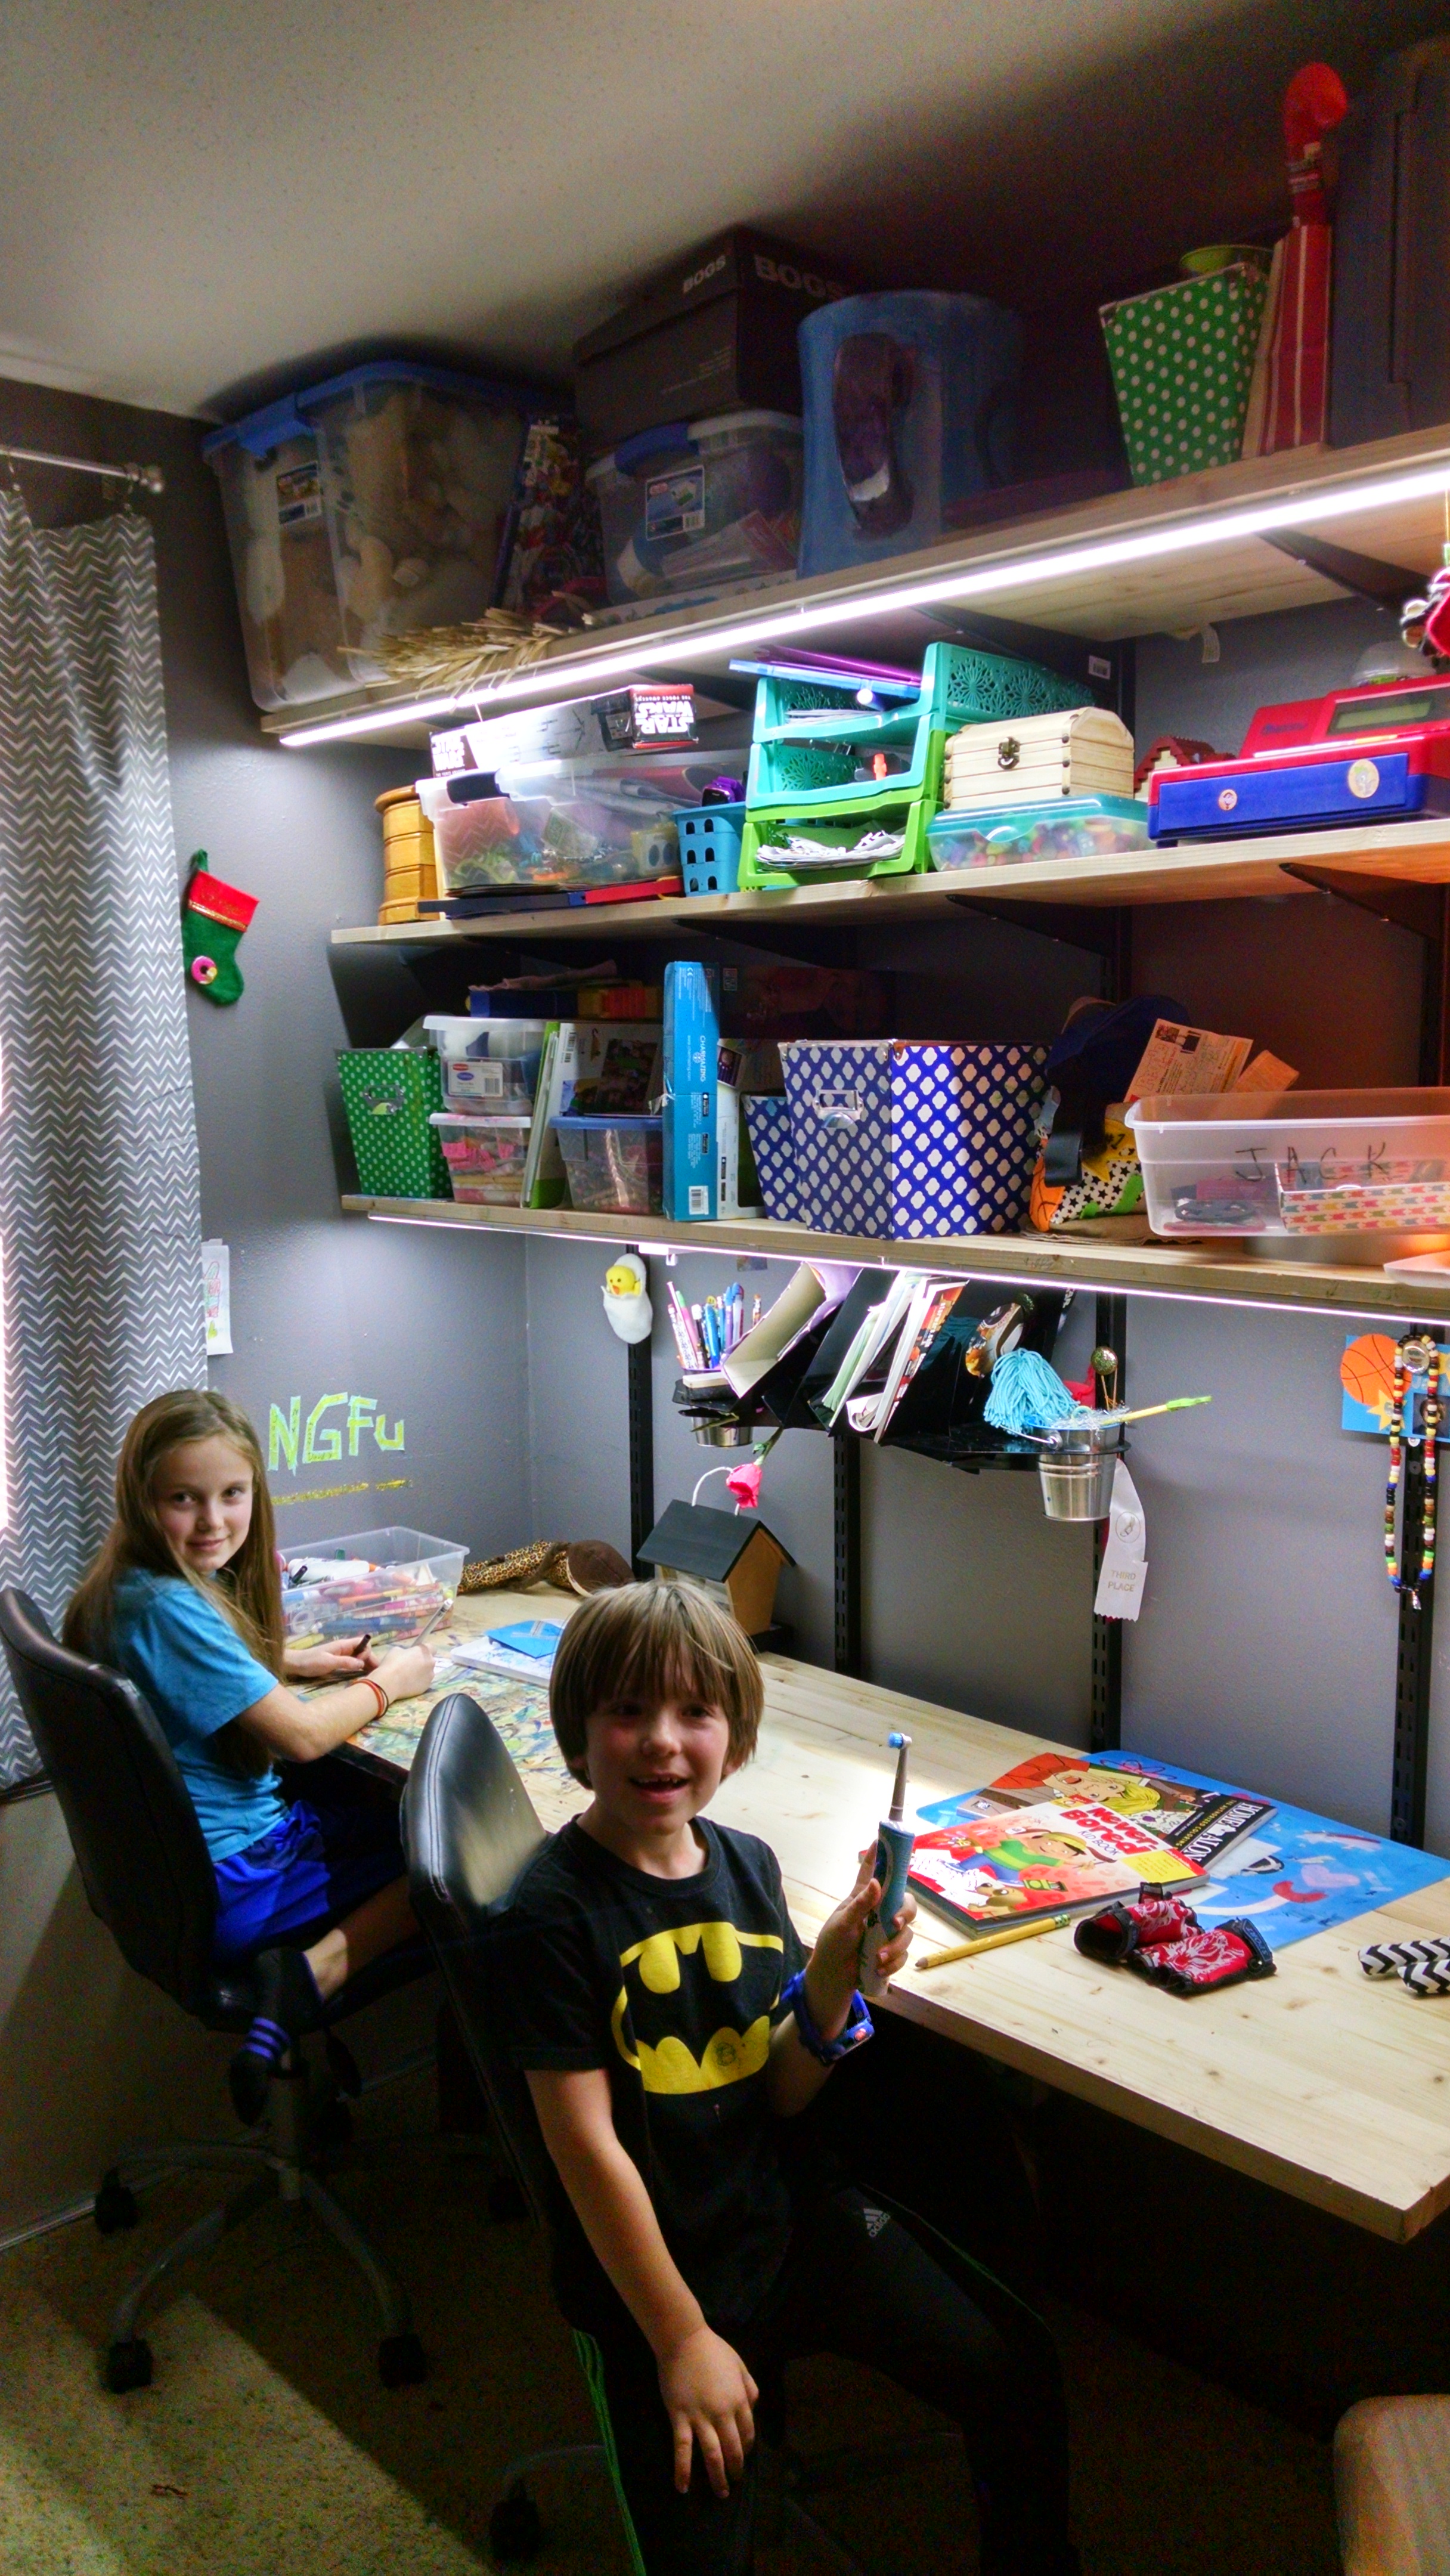
Next Page: Custom-Designed Floating Desk Organizer
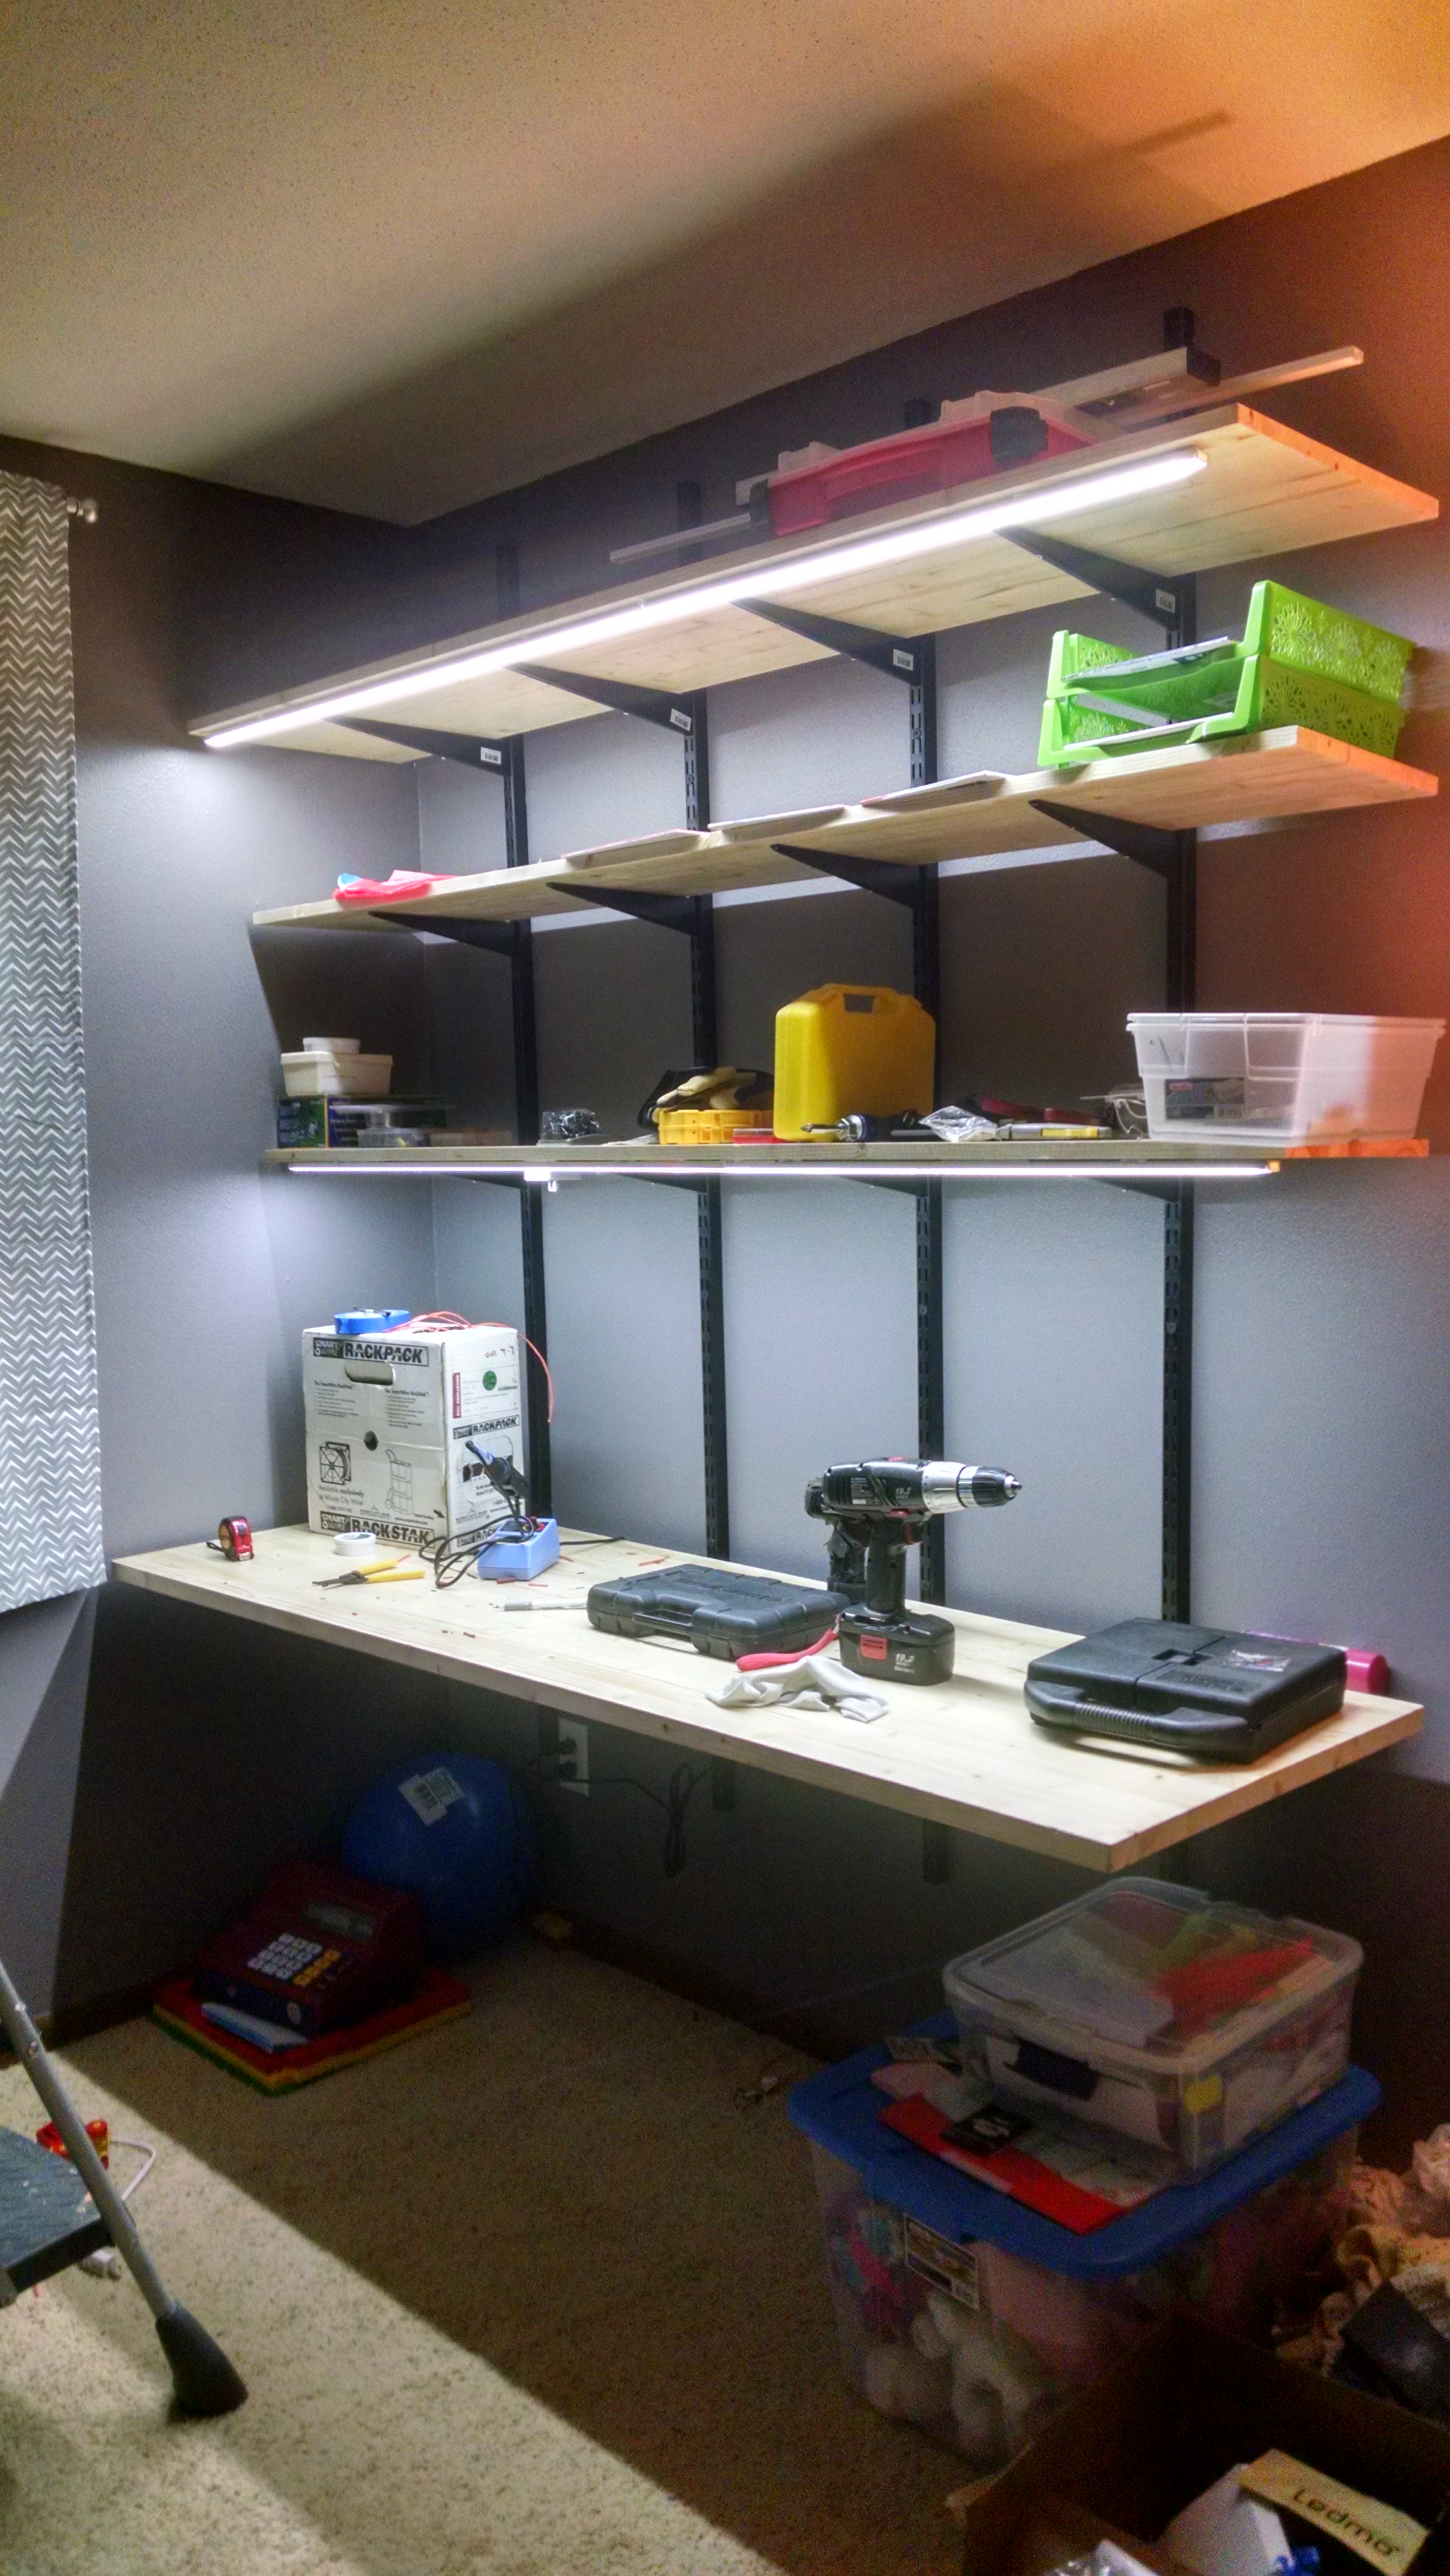
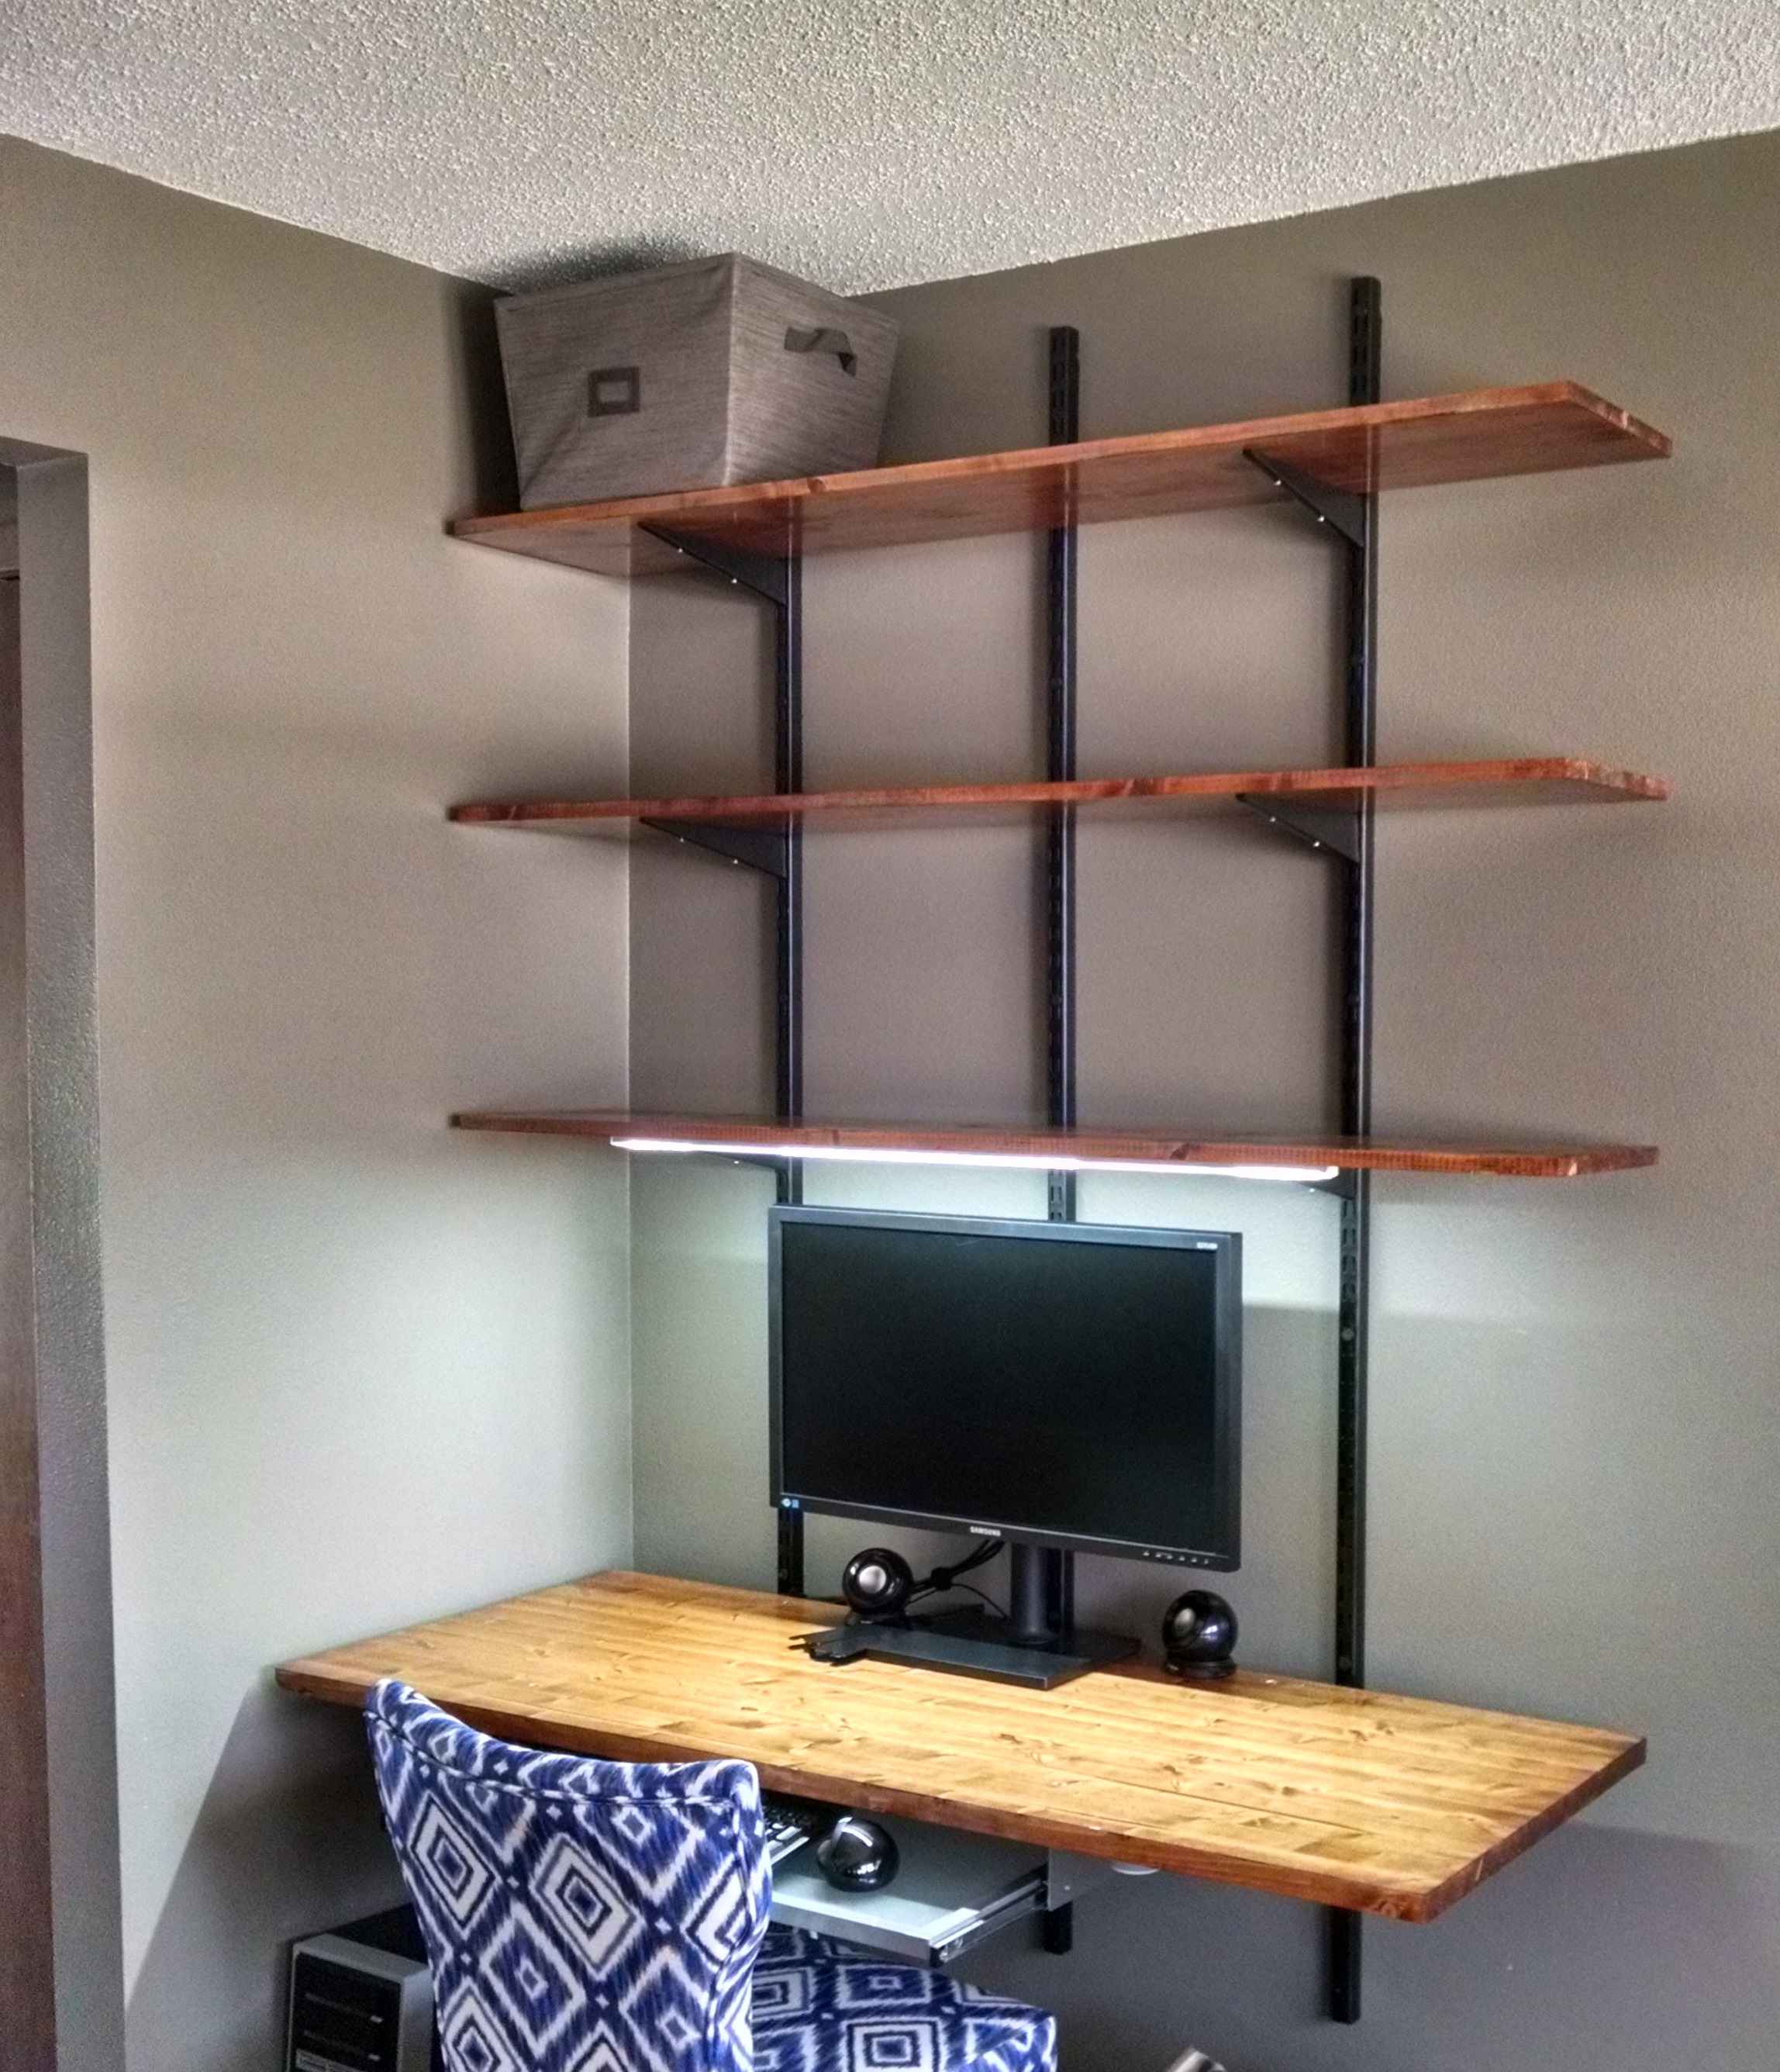
Here’s what the Kids’ Desk looks like after Wiring the LED Strip Lighting:


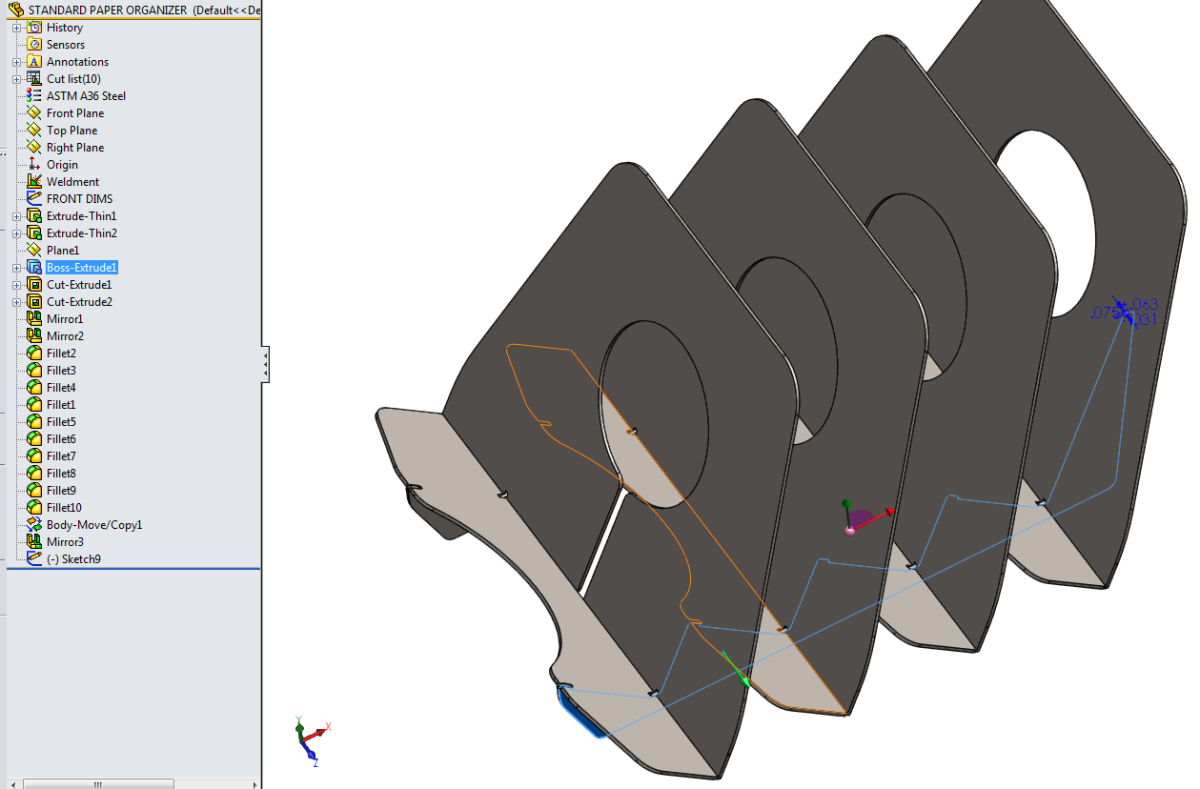
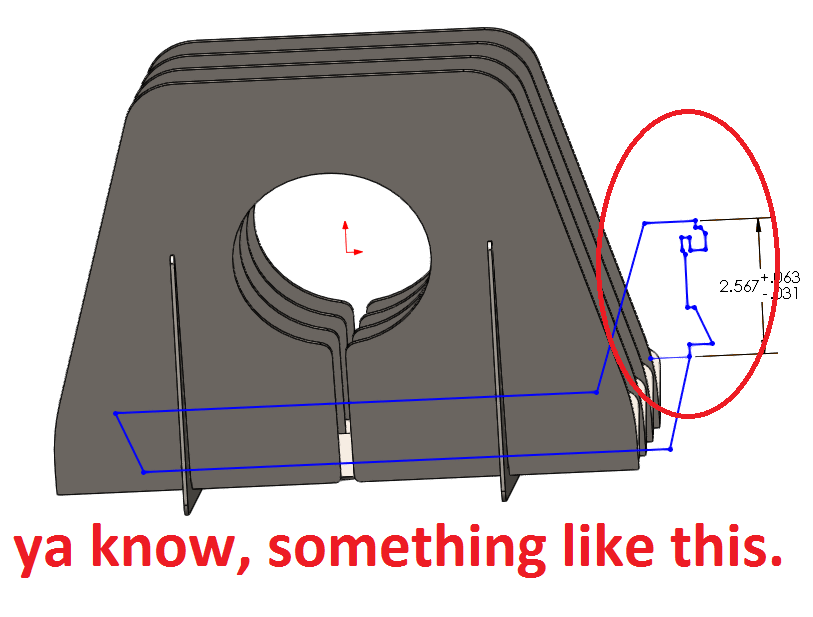
Custom “Floating” Shelf Organizer Design & Build:
Here’s my design of a paper organizer that is made to sit on the same brackets that clip-into the standards.
I had made a version that had its own male parts that clipped into the wall standard slots, but thought it would be more versatile to sit on brackets instead of needing the perfectly spaced wall standards I measured in the kids’s room. No two shelf standards are exactly the same distance apart, it seems.
Fabrication, Design Changes
I had this piece lasered out of 14ga (0.075″ thick, or a little over 1/16″) plate steel. My goal was to have a little piece that was both useful, and didn’t need to be welded. So it’s got extensive slotting and “hooking” tabs to hold itself together. I learned I should have made the hooks more aggressive, so they had more bearing surface. Some of the upright dividers want to “recline” because they’re not being properly “grabbed” by more intrusive hook features. A deeper hook groove would solve that.
As is, the piece is a success, in that it’s functional and the kids like it and use it. But because of the meek hooks (slots) I designed, some parts should be glued up with a spot of epoxy

Some of the slots or holes you’ll see on some plates are there just to cut weight, add a feature hang on paint hooks for powdercoat, and/or to eliminate laser stop-points (as I’ve mentioned in other blogs here, when a laser stops at a sharp corner or end of a cutting path, it can be similar to a pierce point, and those are places more likely to “weld” to itself or have a “blowout” or create some other cutting inconsistency. I try to create plate parts and laserable features with as few sharp points and pierce points as possible. (Design For Manufacturing & Assembly).

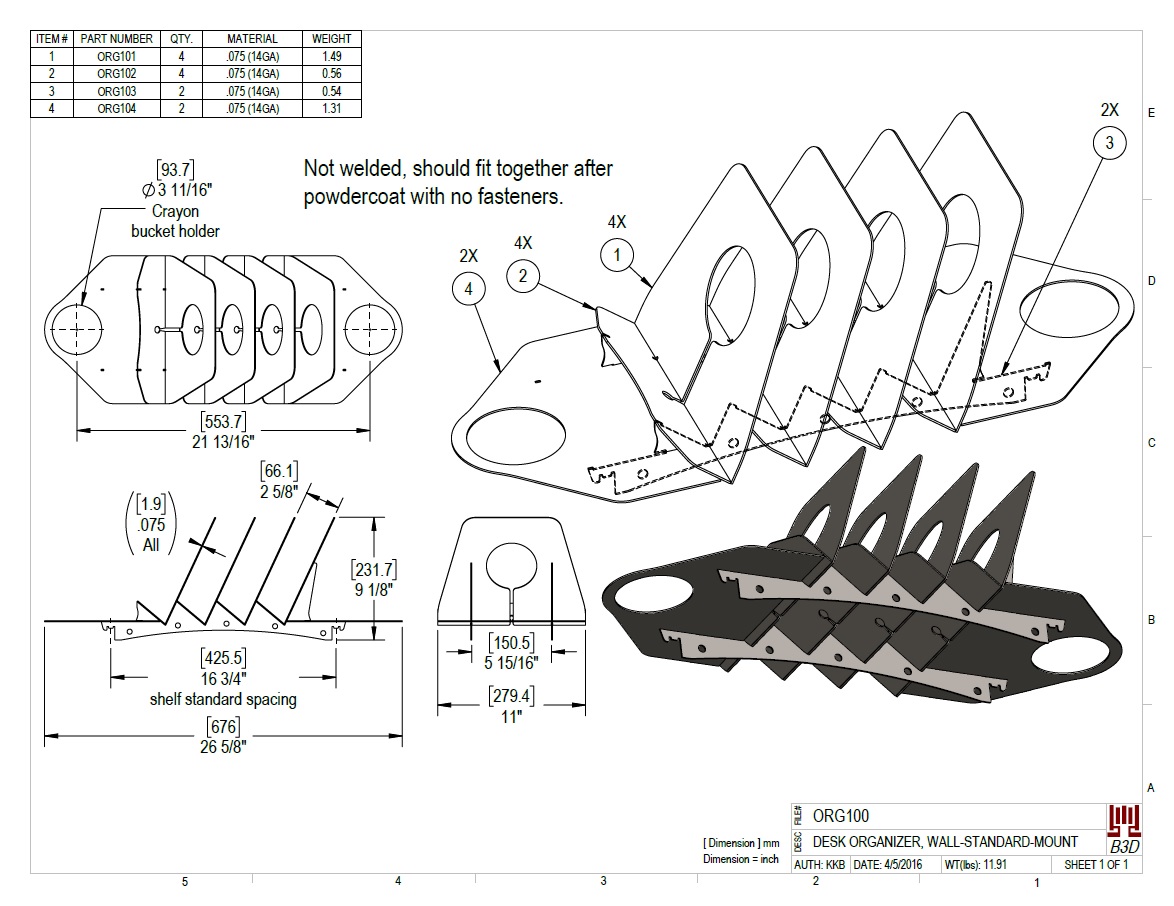
Click here for PDF of Assembly Drawing:
ORG100 – Desk organizer shelf and paper sorter
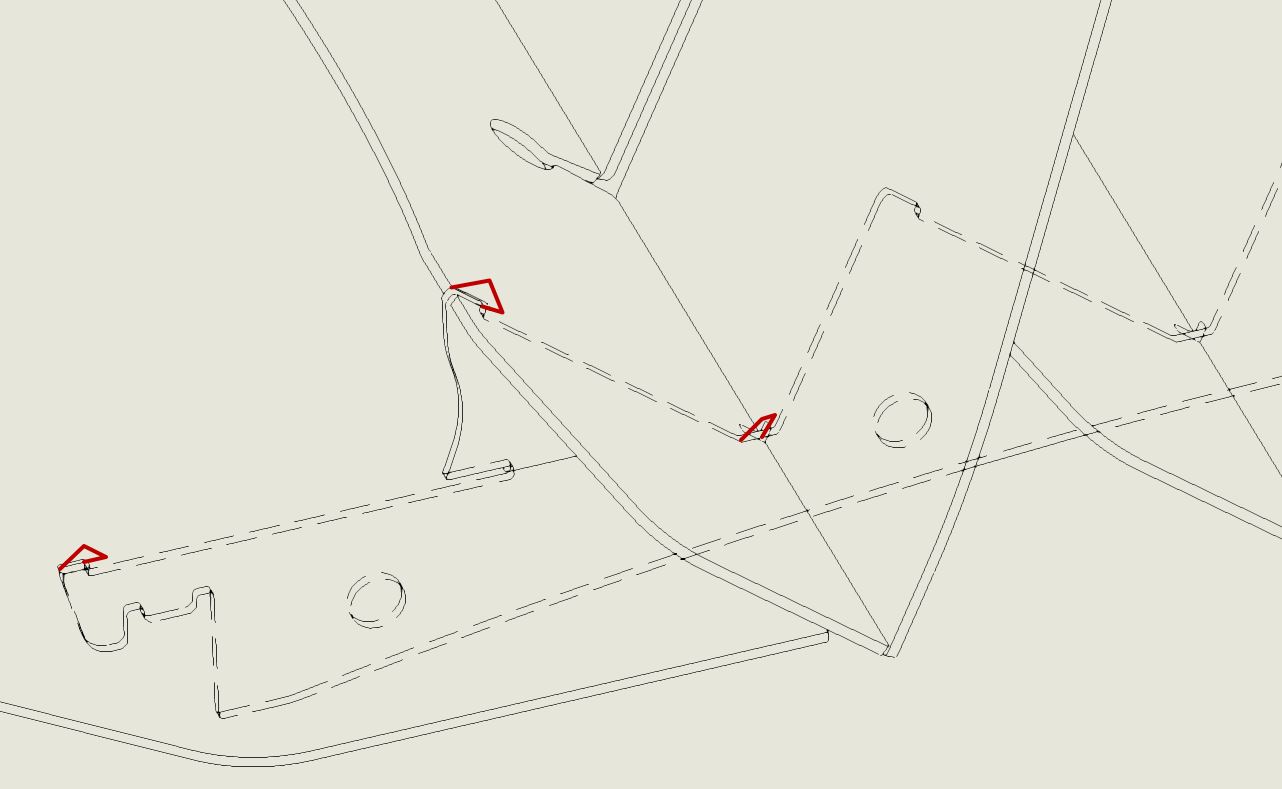
Example of how actual hook profiles that more aggressively grab the mating plates would have been better for requiring no glue or fasteners. Then this design would truly be flat-packable for shipping and re-flatpackable for moving or storage.
At least the kids really seem to use it and like it. I brought it home and showed it to them and then kind of beat up on my design because the hooks weren’t as good as I liked, but they wanted it installed. Notice the cutouts that hold their pencil buckets.
That’s about it…
I threw this post together because I learned a few tricks from researching LED strip lighting and using shelf brackets as a work center, so hopefully you’ve got something out of it too. Feel free to comment or email if you have a question or suggestion.