Some Notes on the Shelving Install
-
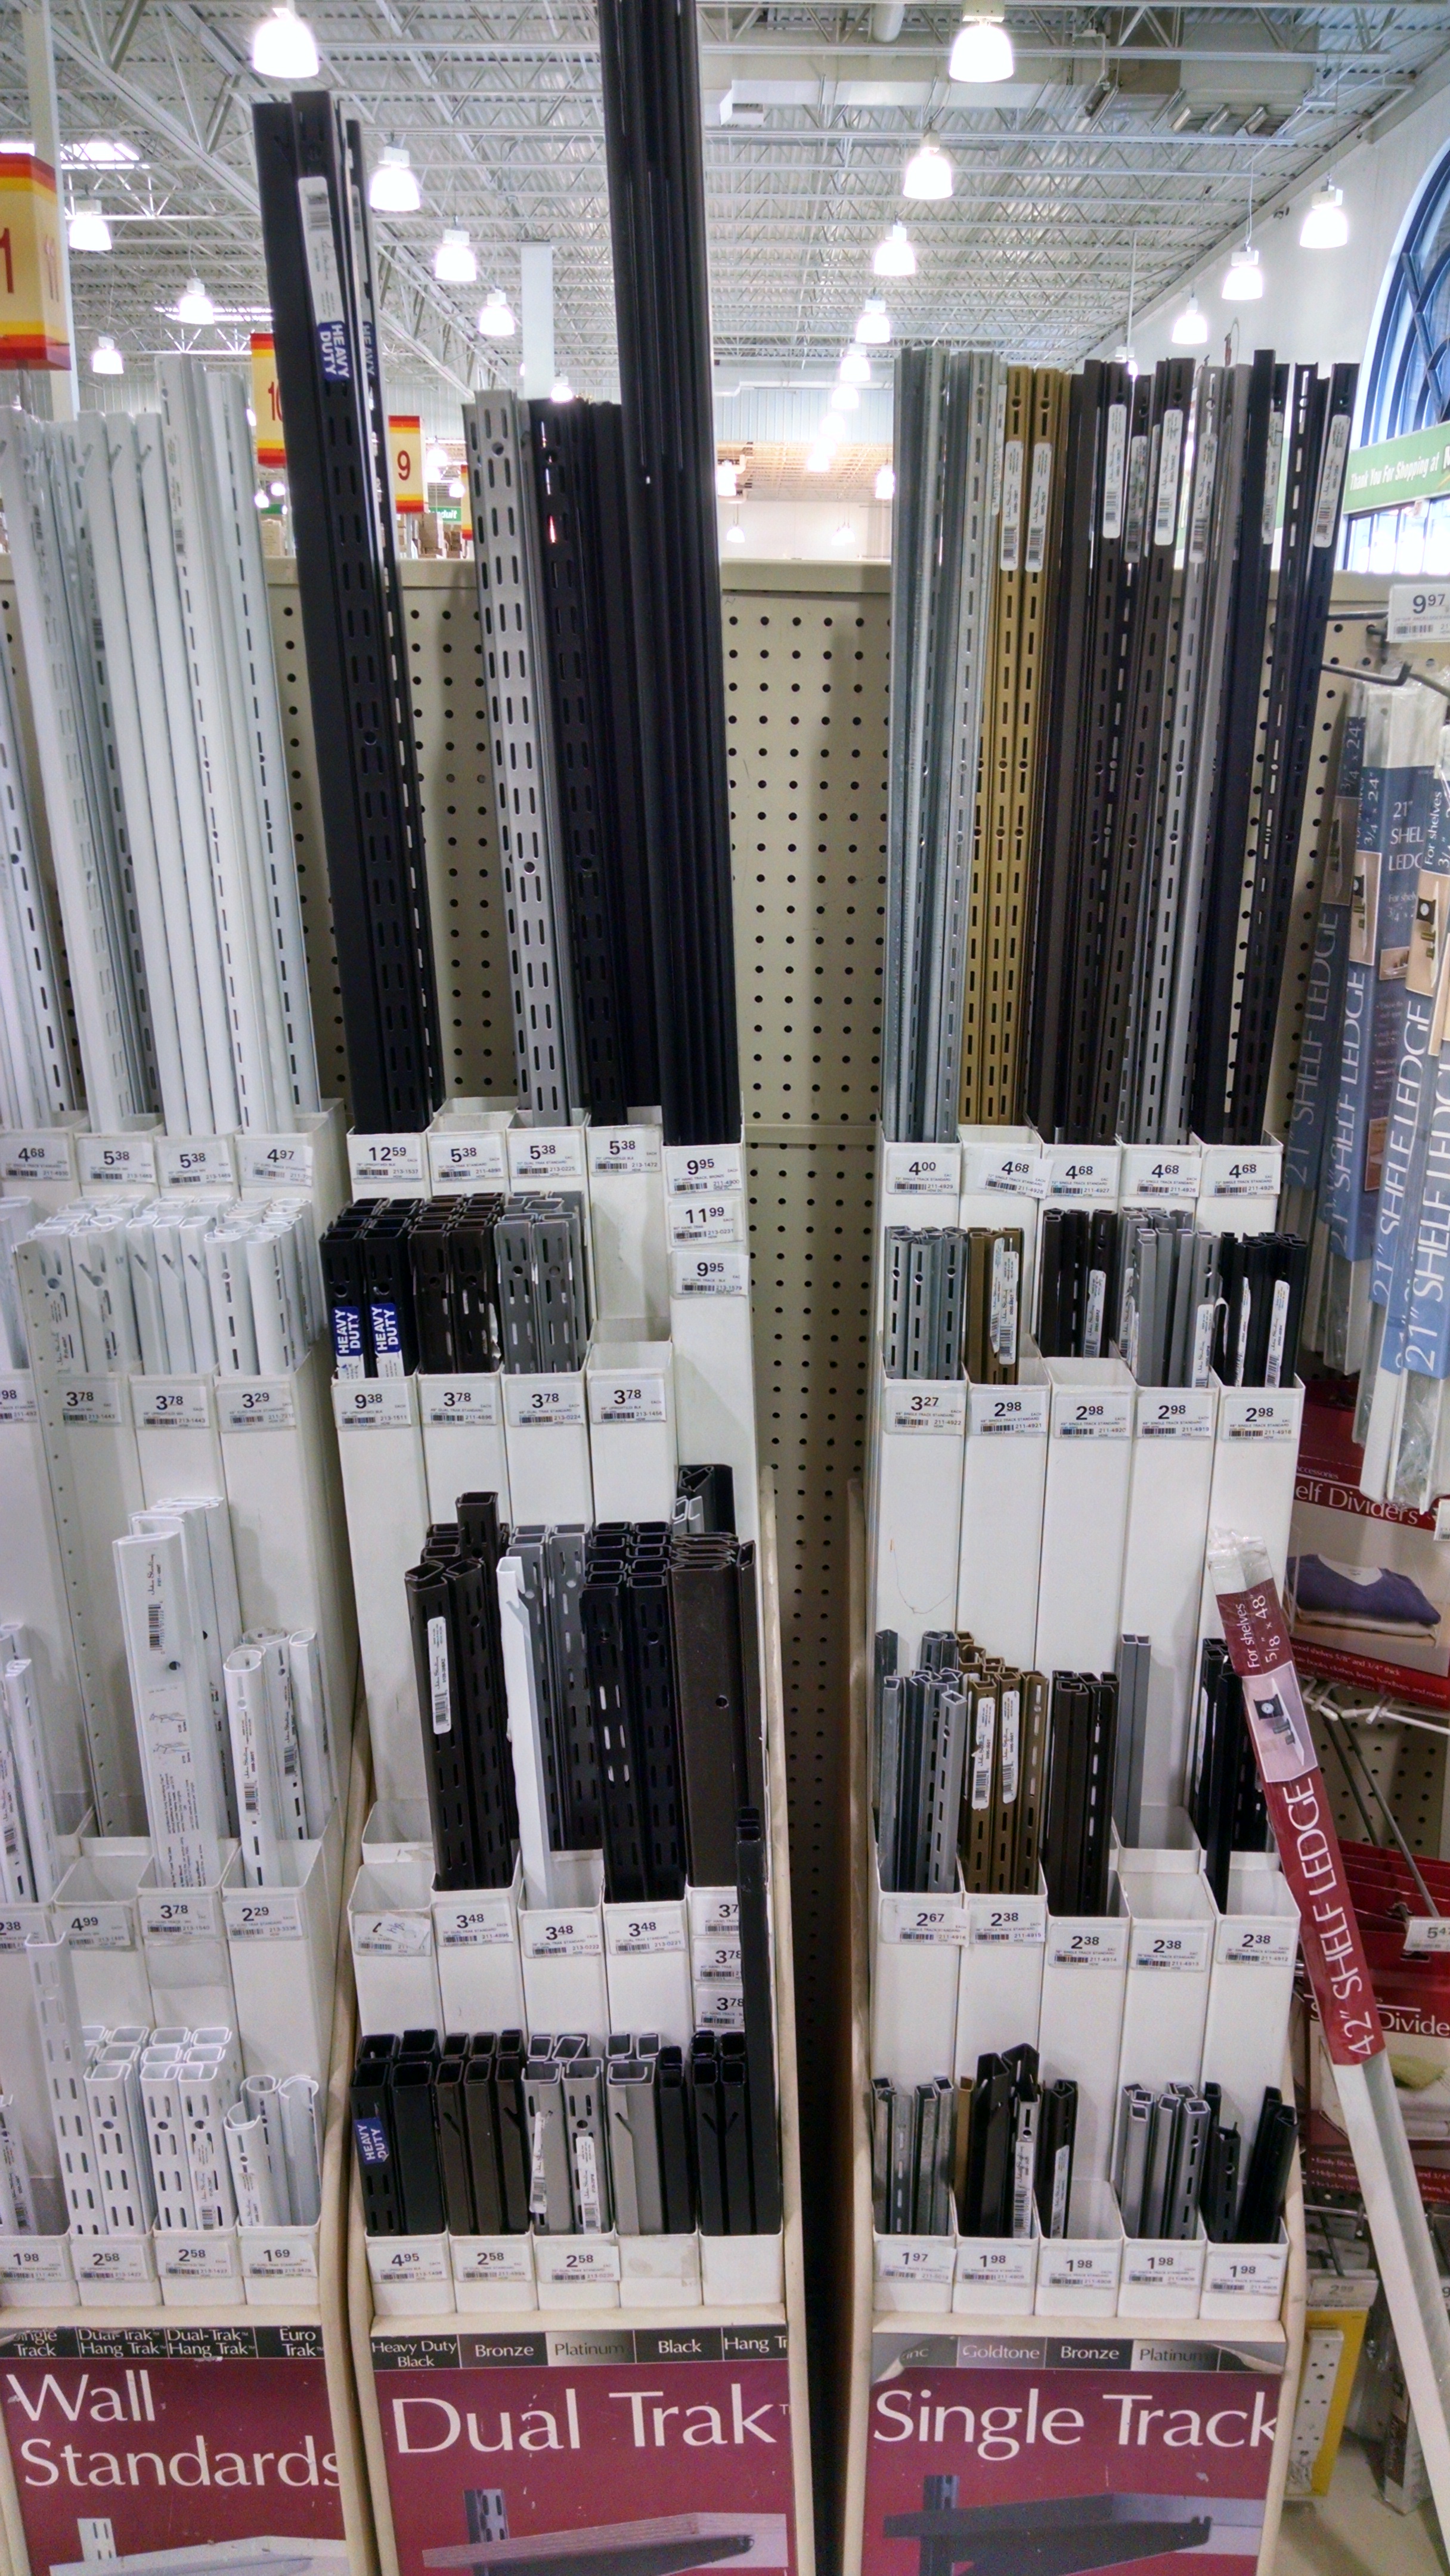
BUY Cabinet Screws
 .
.- I’m glad I bought cabinet screws when I was looking for screws to fasten the shelf standards to the studs at the hardware store, 3″ length. The large pan head has good clamping surface area.
- Since I purchased black standards, I bought black screws, and they blend nicely.
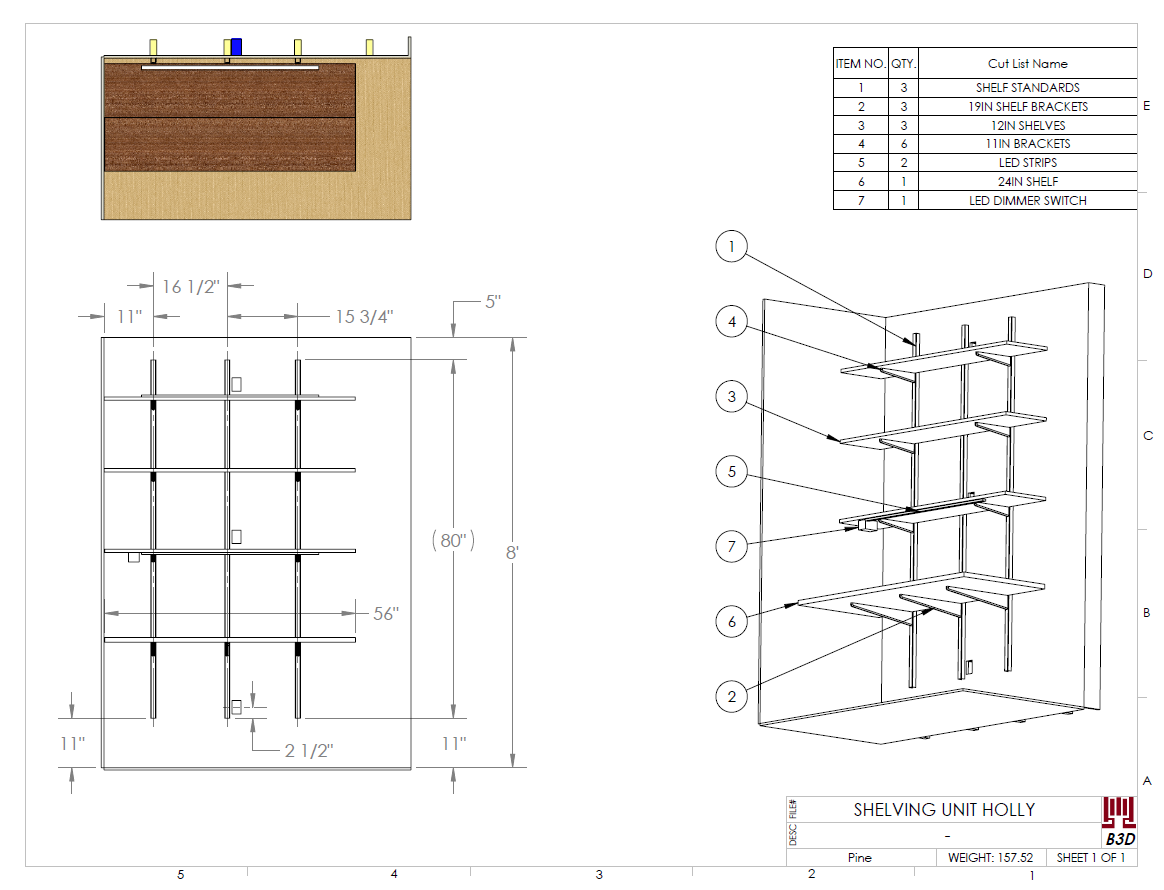
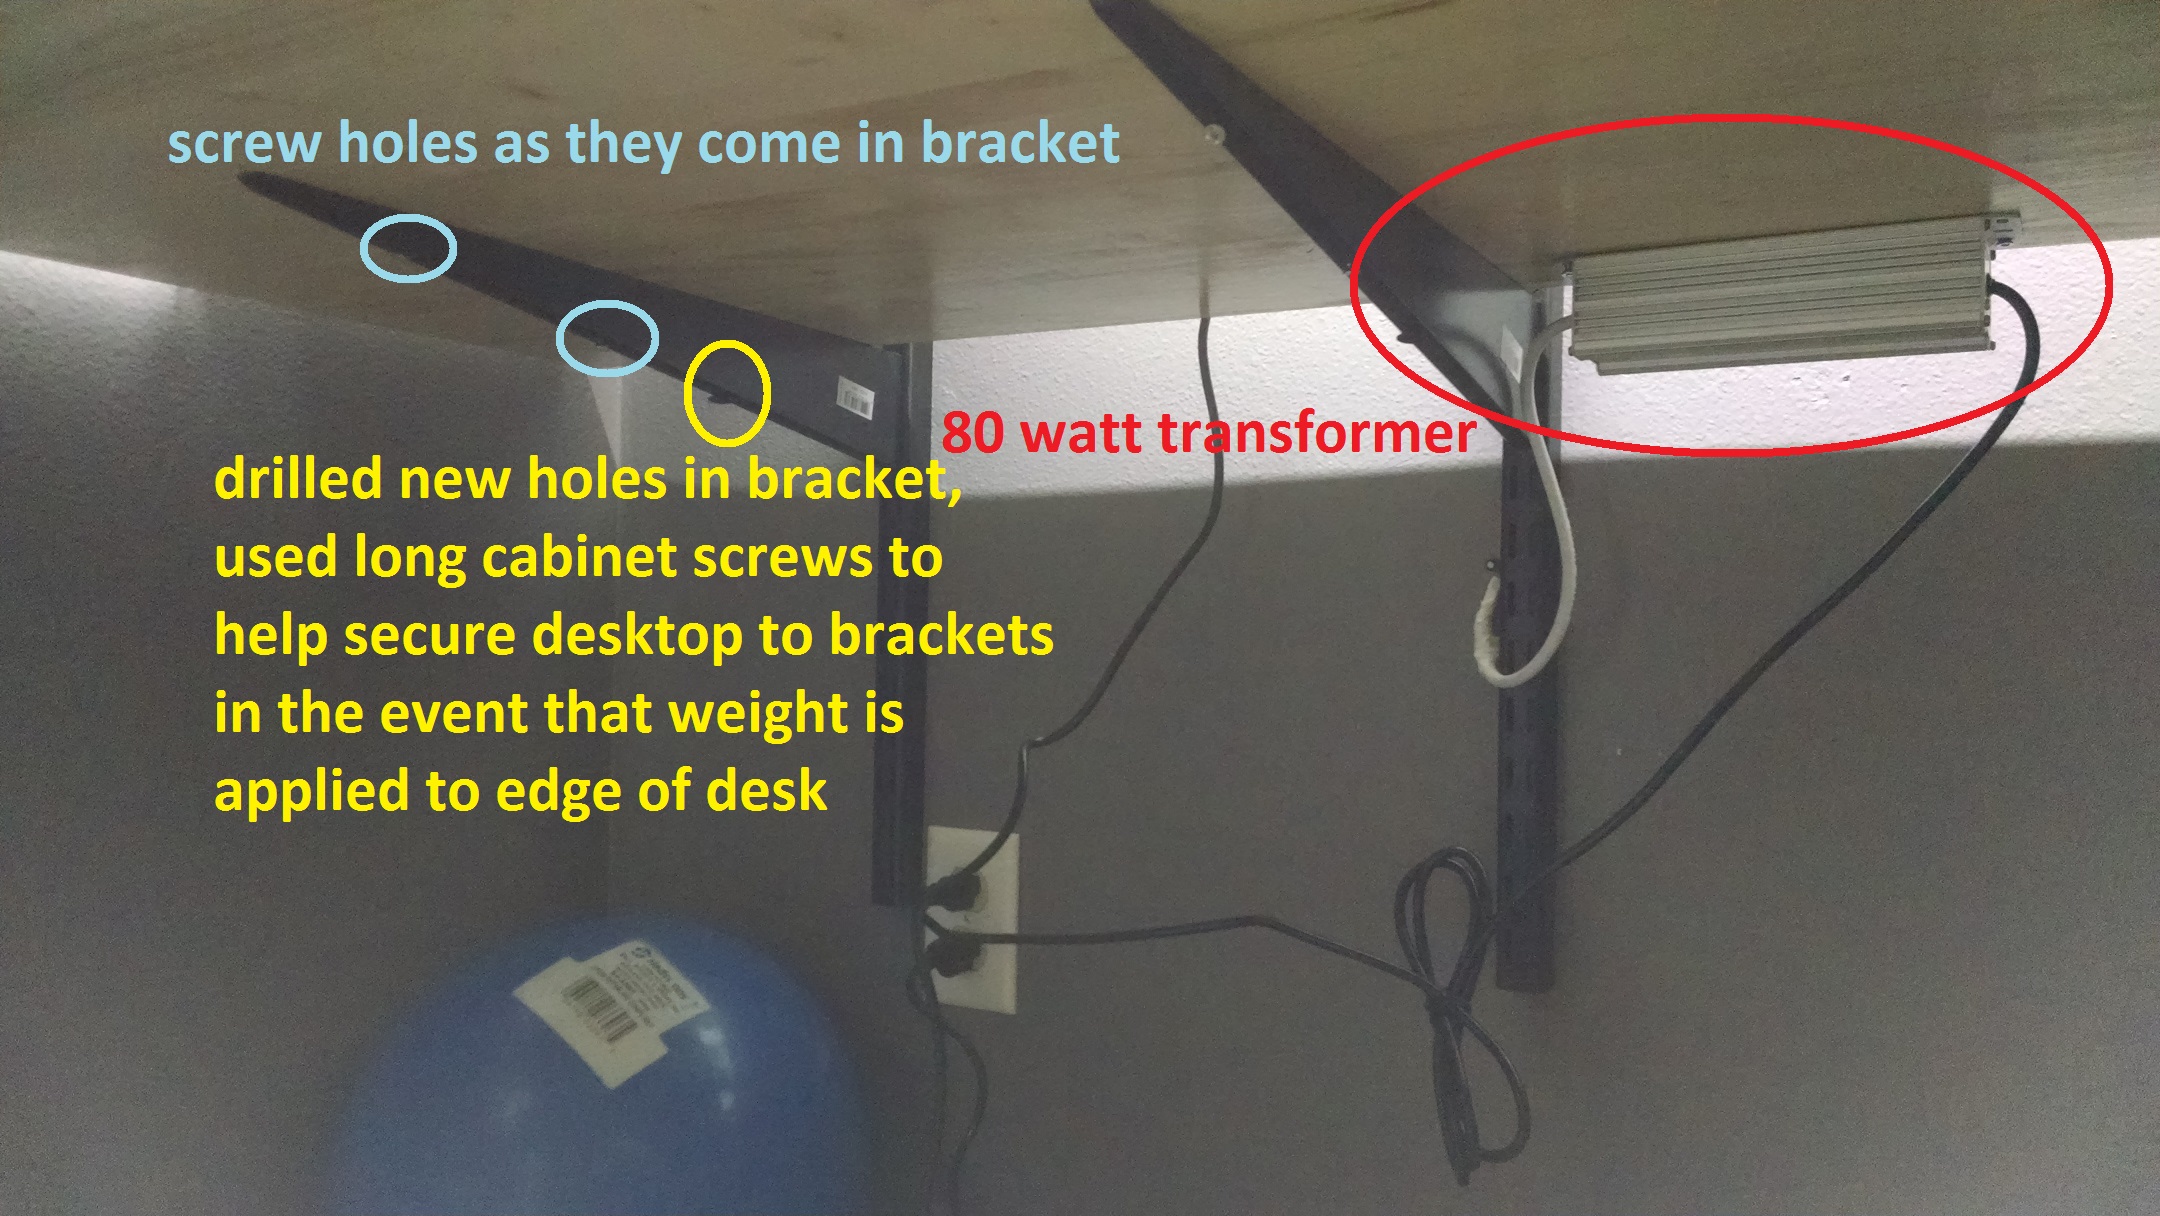
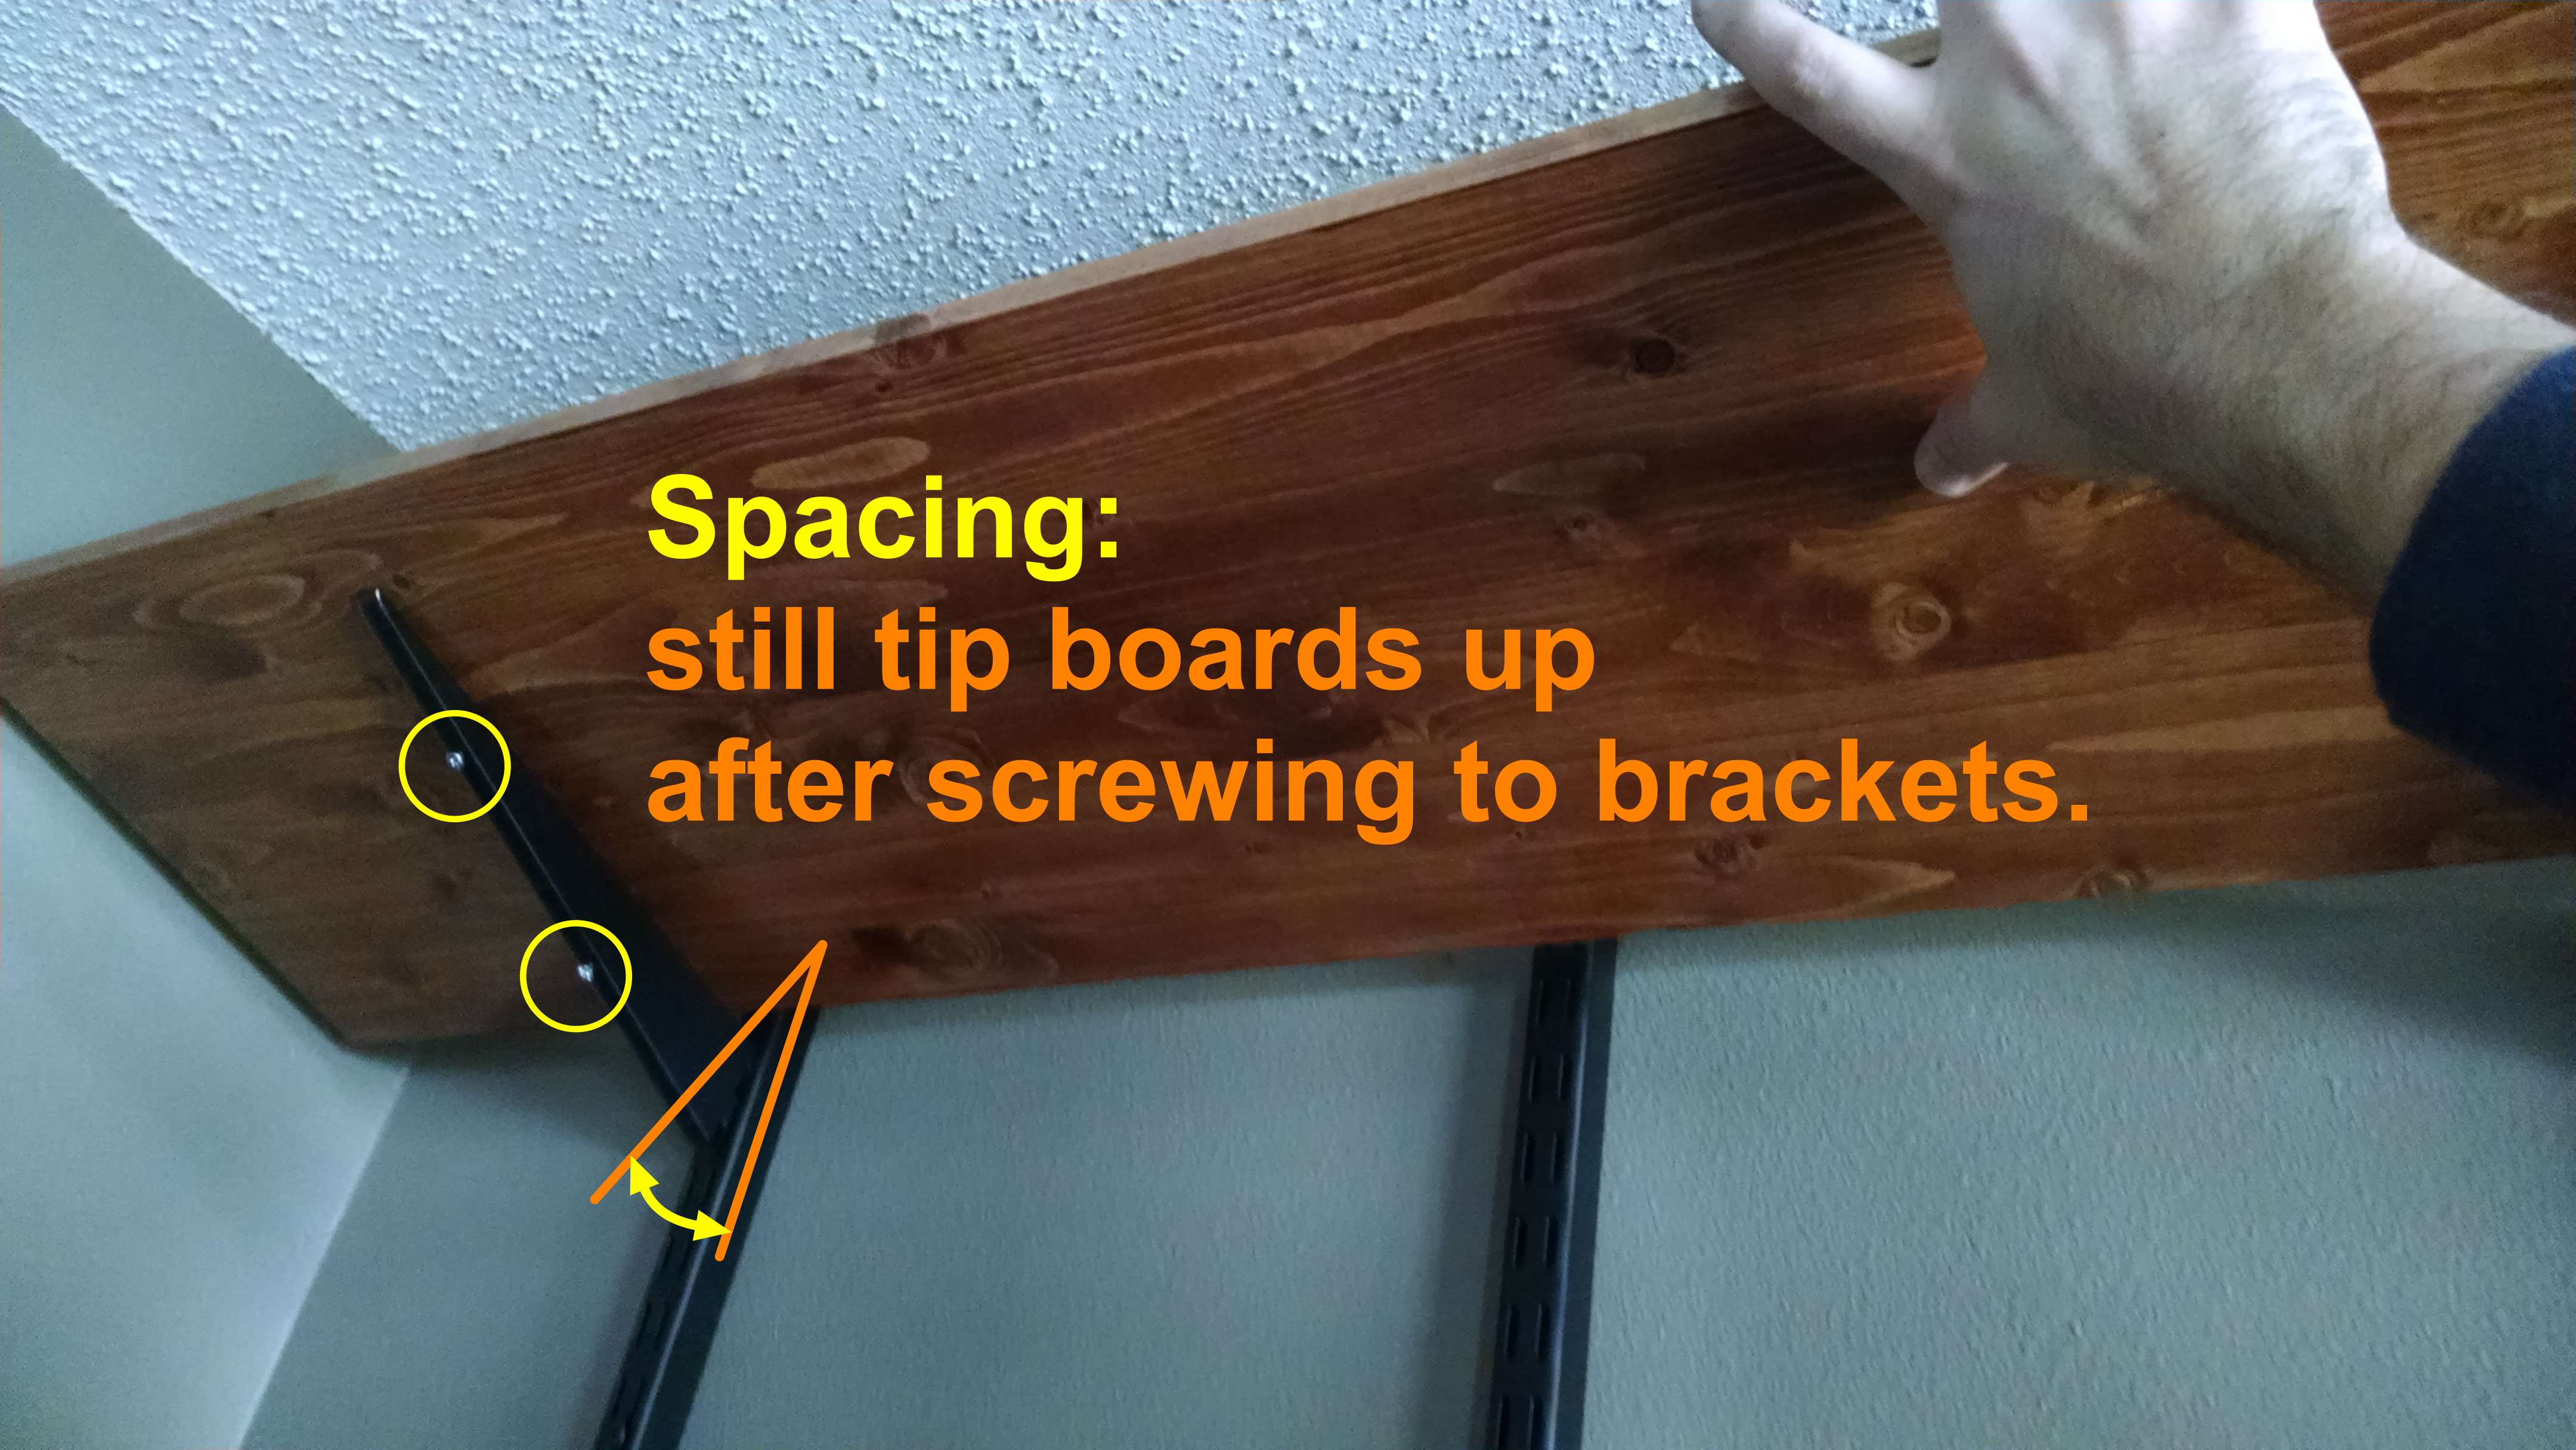
- The long screws also came in handy when I drilled a 3rd hole in the deeper part of the 19″ brackets (the largest brackets I purchased, for the desktops). I felt they provided additional holding force to the desktop (yellow circle & text on image below).
- SAFETY: I was sure the kids would do things like leaning on the edge of the desktop, and I didn’t want it to come loose and flip up. Now, a year later, I’ve seen them stand on the desktop, sit on the edge of it, and there’s nothing you can do to stop that behavior, so accommodate it instead by proper fastening.
 .
.
-
Also BUY: Other Screws
!- When you’re at the hardware store buying brackets, get some screws that will work for the 2 holes in the brackets (the light blue circles in image above).
- I got a couple different little boxes of screws, can’t remember if they were “Number 10″ size, or what diam and thread pitch, but it was the same for both boxes. The difference was their lengths. Let’s say if the short one was 1.5″ long, the longer screw was 2.25”.
- Just get your brackets in the cart before you head to the fastener aisle. Then hold up your brackets next to screws and find what’s going to work.
- You don’t want screws poking through your shelf/desk tops, but you also have the leeway of drilling and screwing at an angle through the boards to compensate for too-long screws.
- I got a couple different little boxes of screws, can’t remember if they were “Number 10″ size, or what diam and thread pitch, but it was the same for both boxes. The difference was their lengths. Let’s say if the short one was 1.5″ long, the longer screw was 2.25”.
- When you’re at the hardware store buying brackets, get some screws that will work for the 2 holes in the brackets (the light blue circles in image above).
-
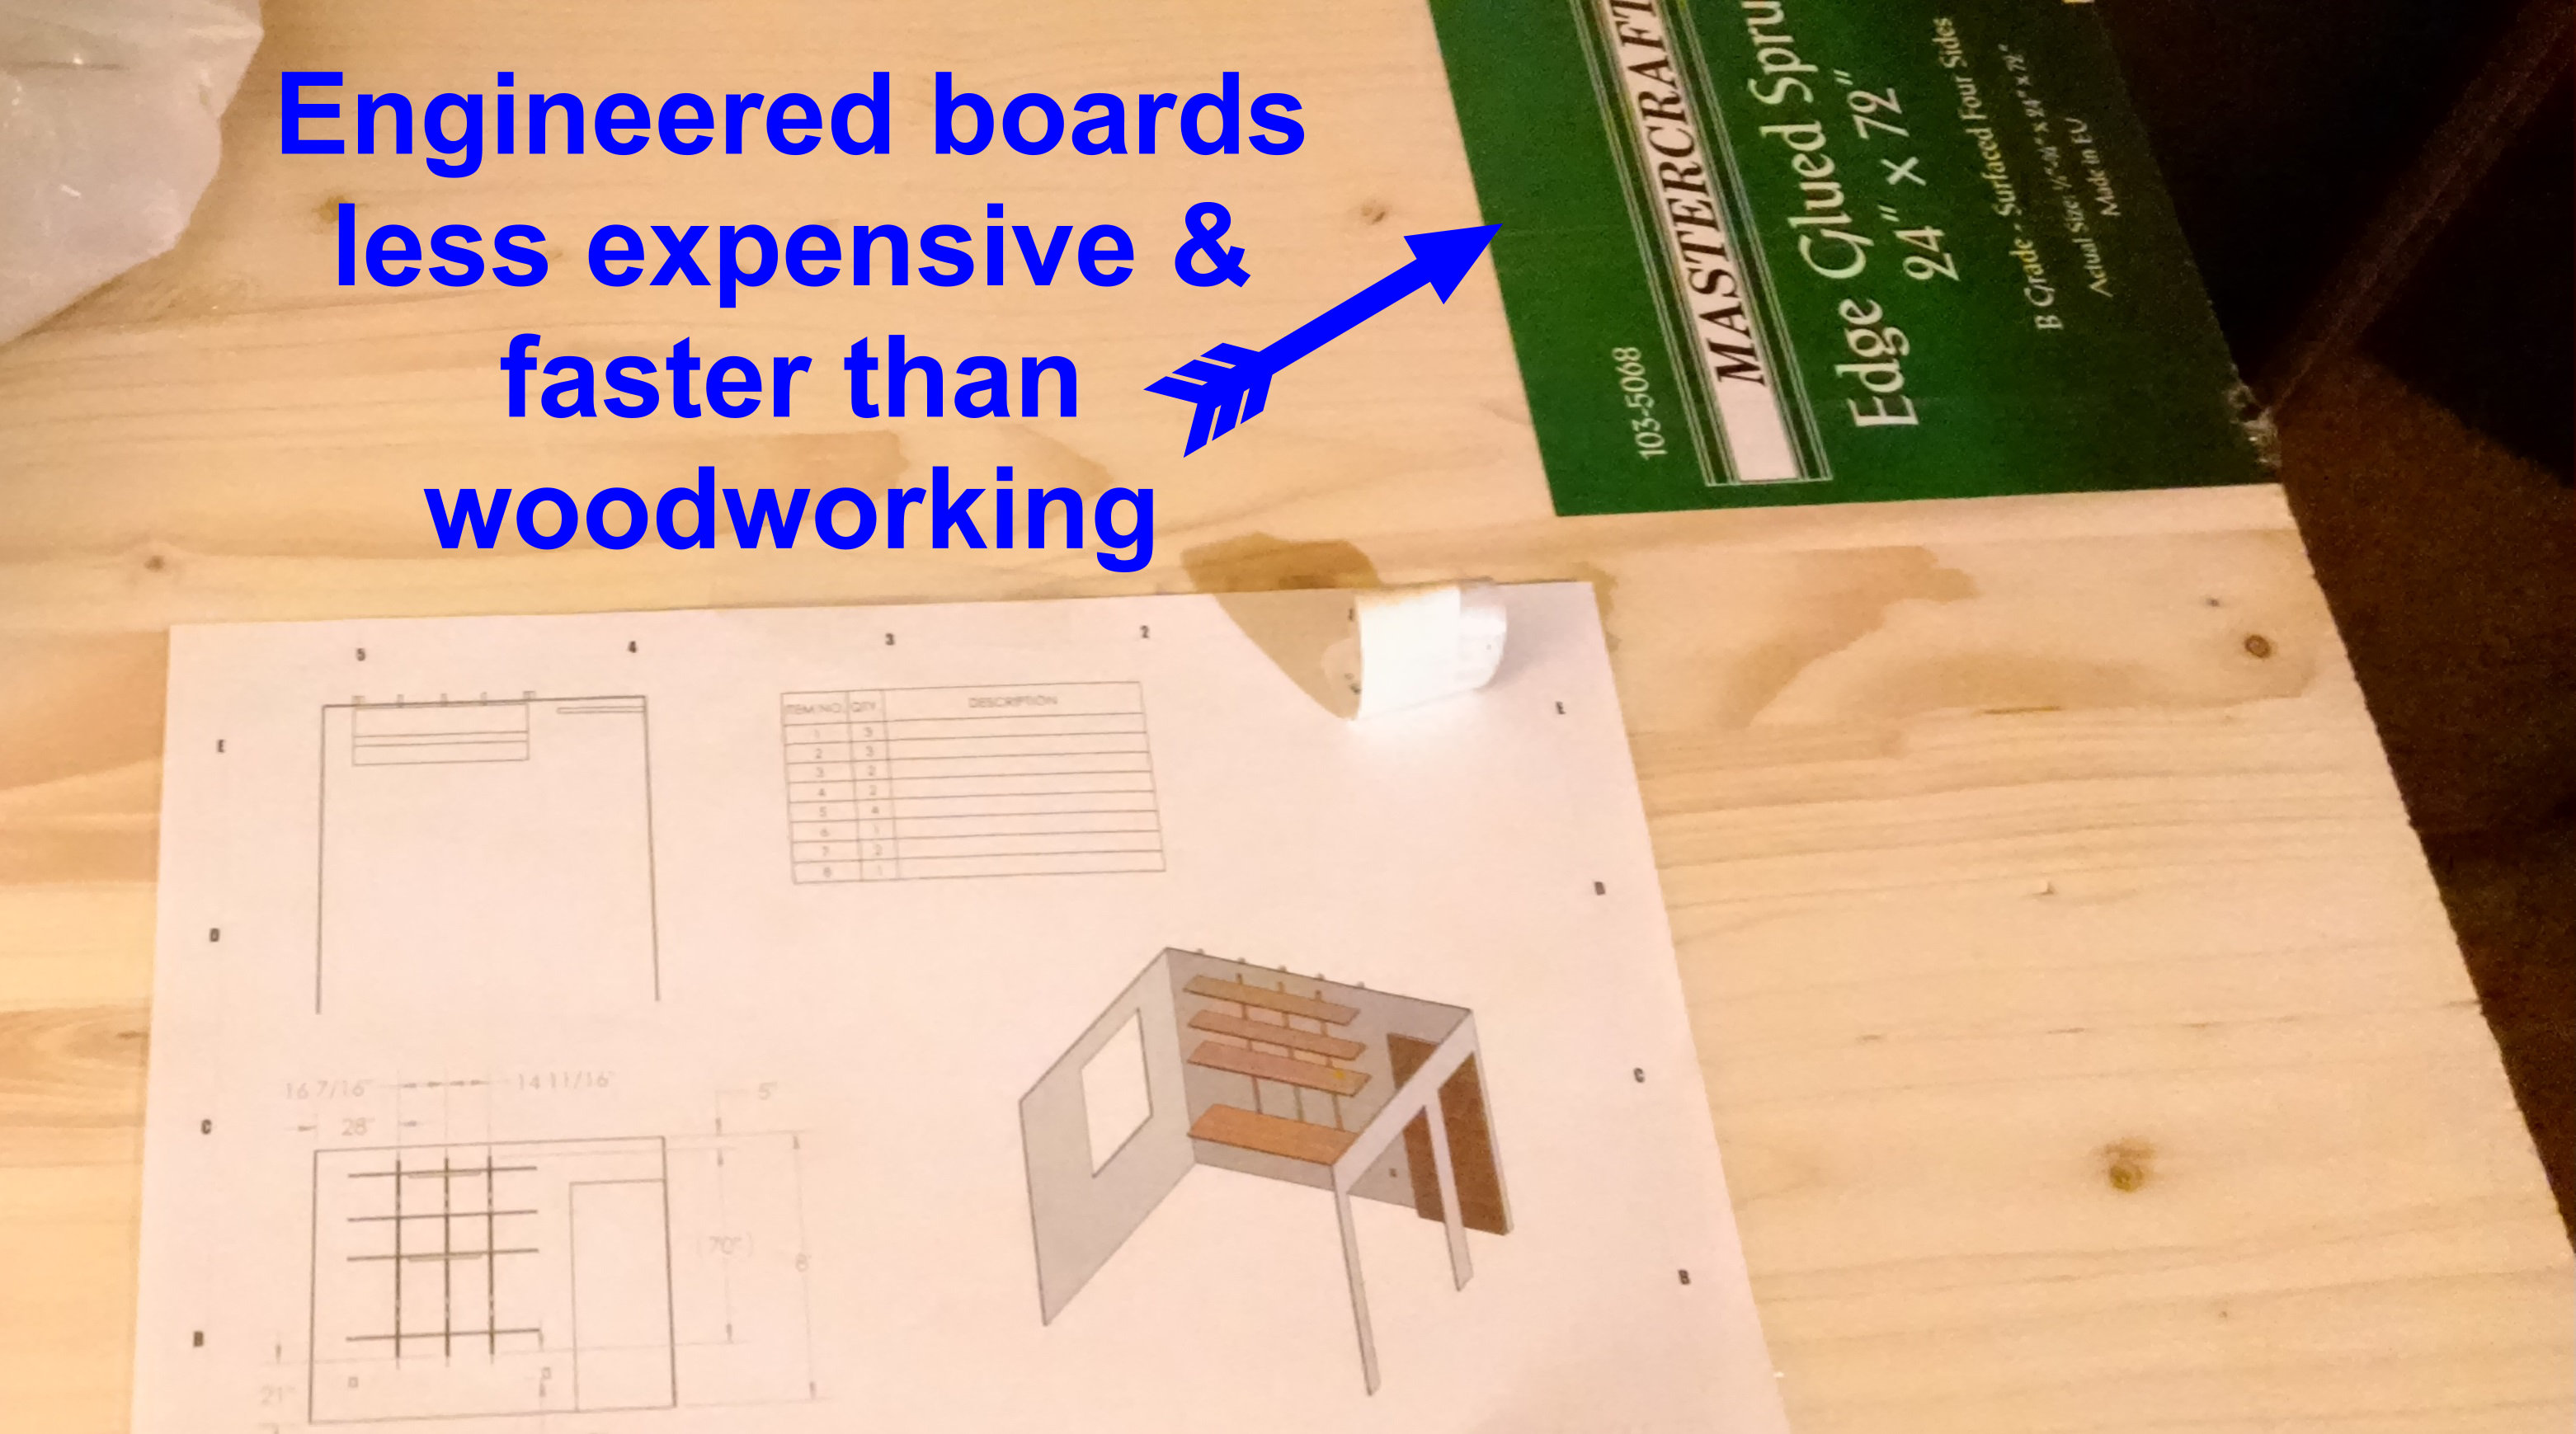
Try Engineered Long Boards!
- WHAT: These are a bunch of what (I’m assuming) would be scrap wood remainders, but they’ve been glued together in a factory to make boards. Think: Butcher block.
- THE GOOD: They were pretty cheap, especially since they happened to be on sale. Also, they come in many widths, depths, and lengths.
- THE BAD: Nothing, really. This is really soft wood, so if you use it for desktop, you’re going to quickly have writing marks and whatnot in it (builds character!). But you can buy harder wood versions of these boards, or even treat it with wood conditioners that supposedly harden the surface.
- THE I DUNNO: Not sure if these boards will cup or warp less or more than regular boards. Remains to be seen.
- WHY: I don’t own a woodshop. I don’t have a biscuit joiner or jointer or planer or belt sander or all that stuff.
- So instead of buying a bunch of boards and trying to glue them together… I just had to get the right widths and cut them to size with a circular saw. Easy.
- WHAT: These are a bunch of what (I’m assuming) would be scrap wood remainders, but they’ve been glued together in a factory to make boards. Think: Butcher block.
 !
!
-
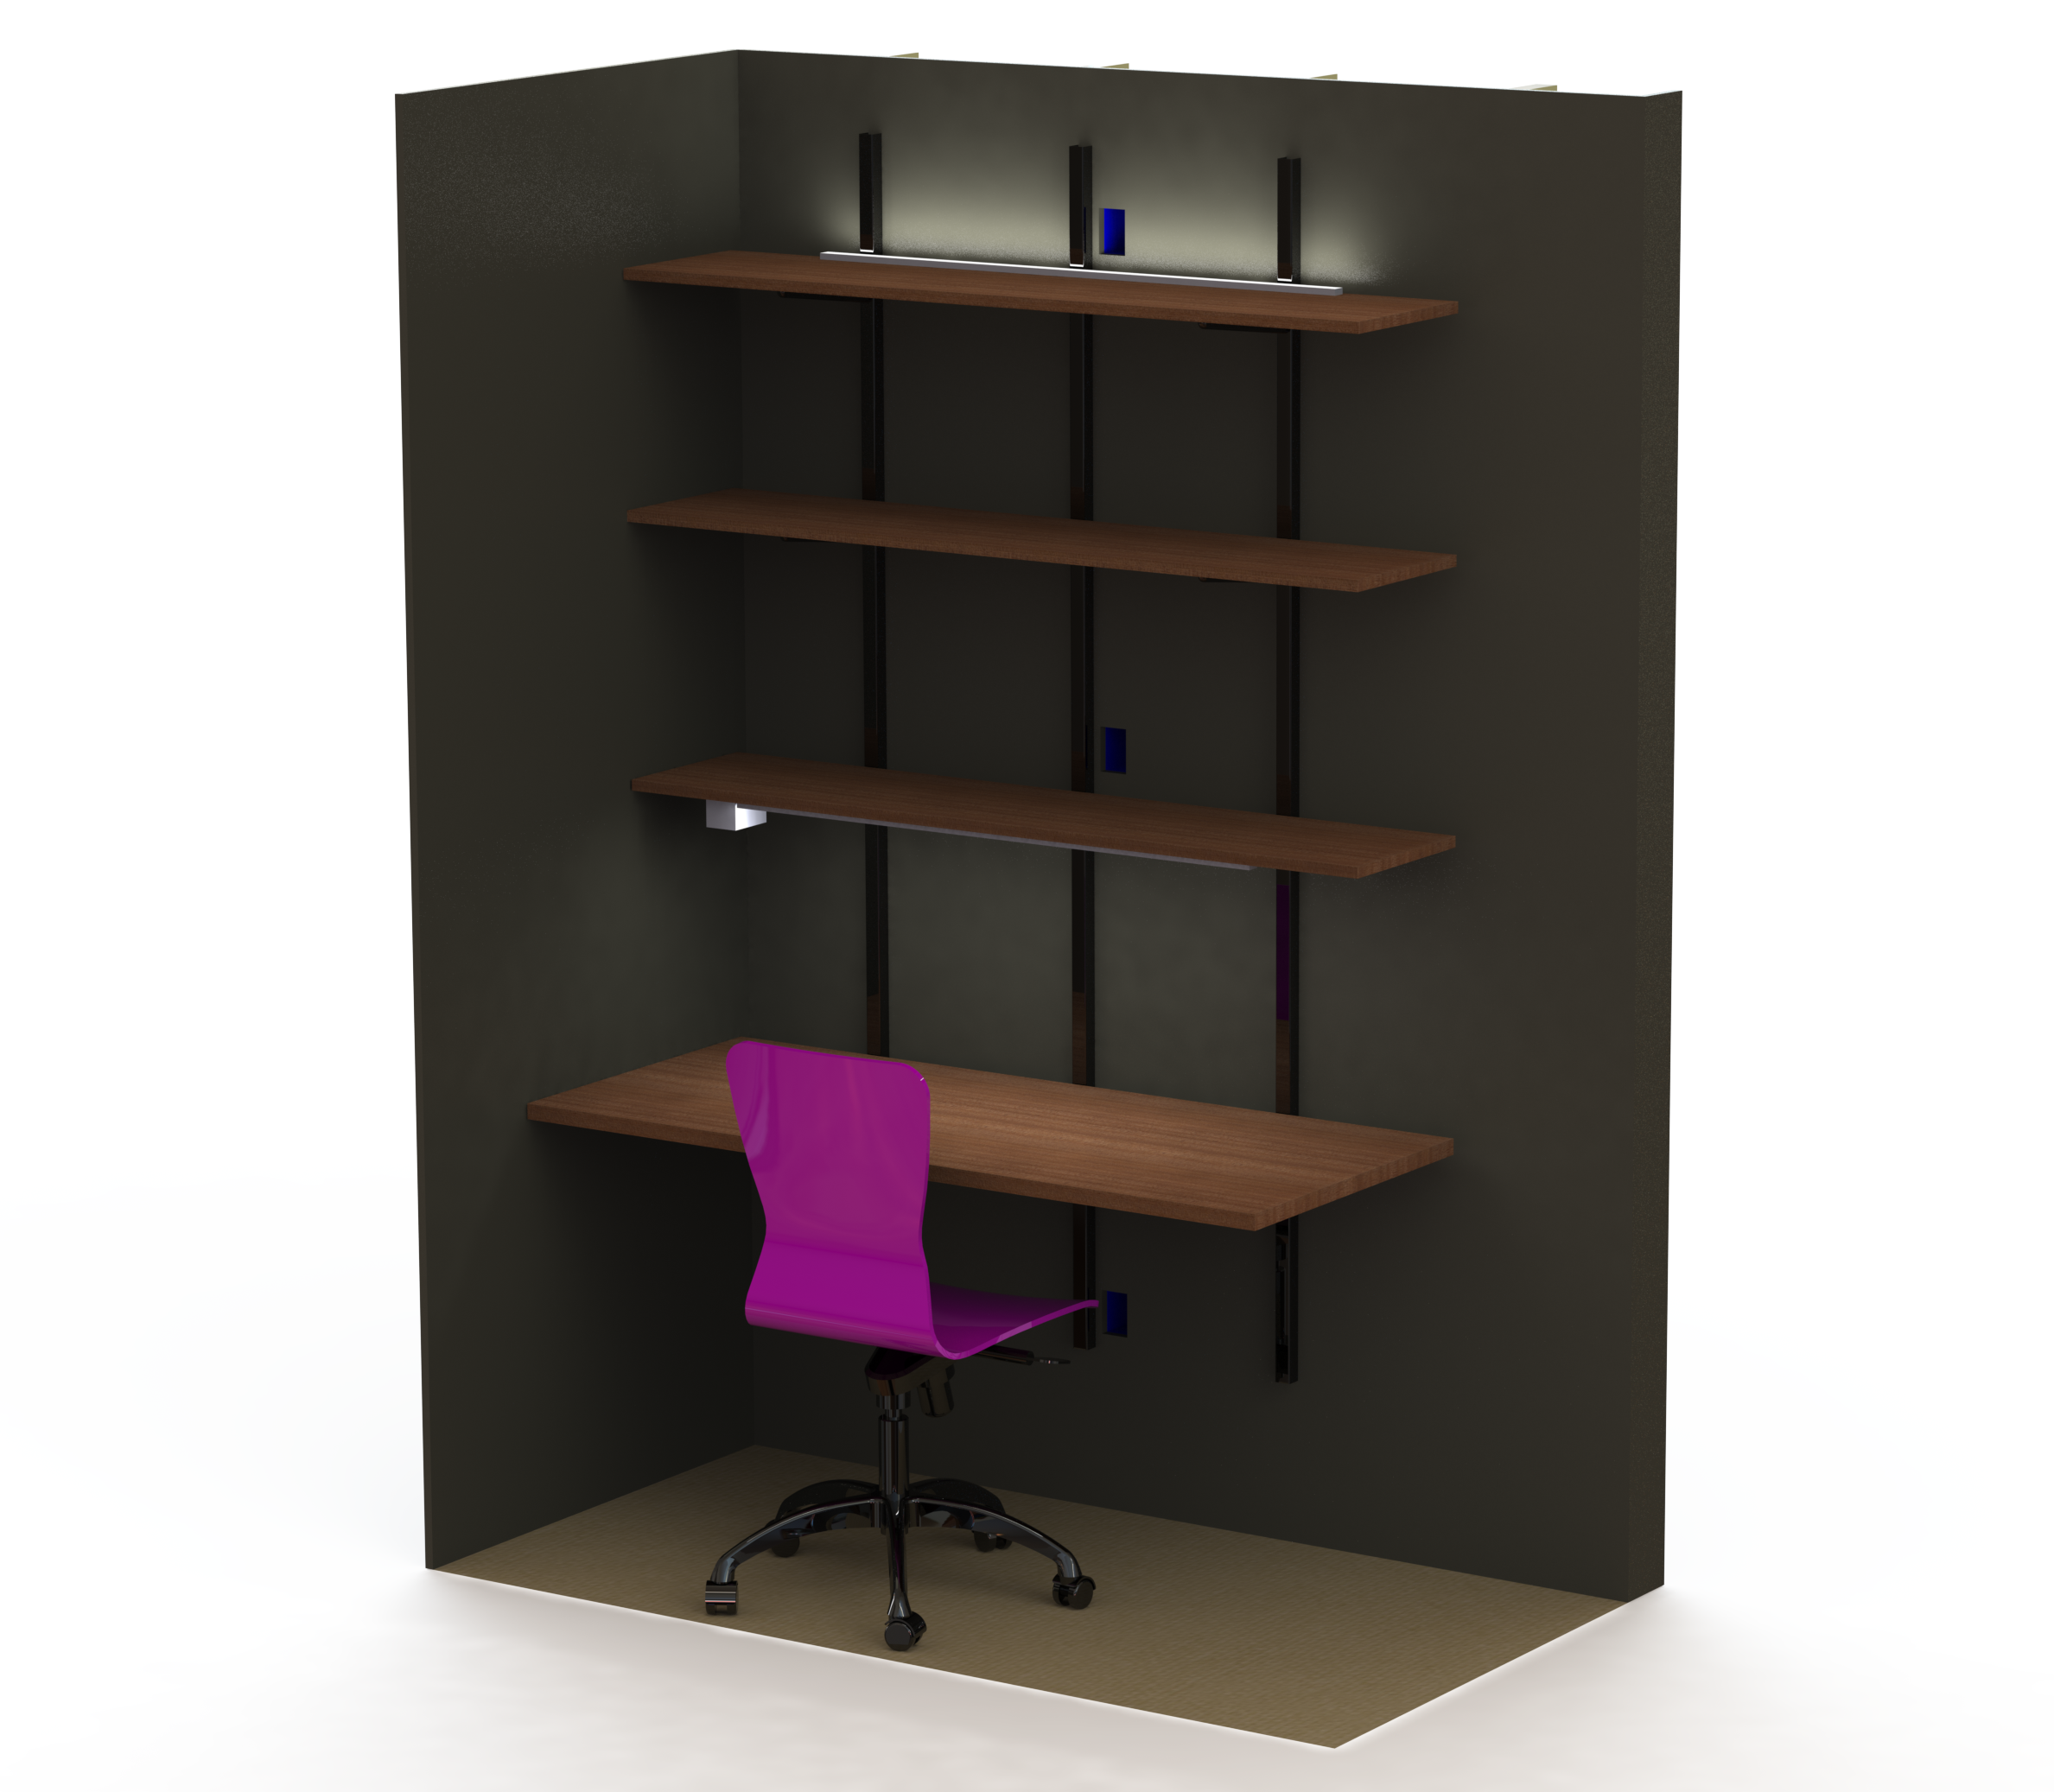
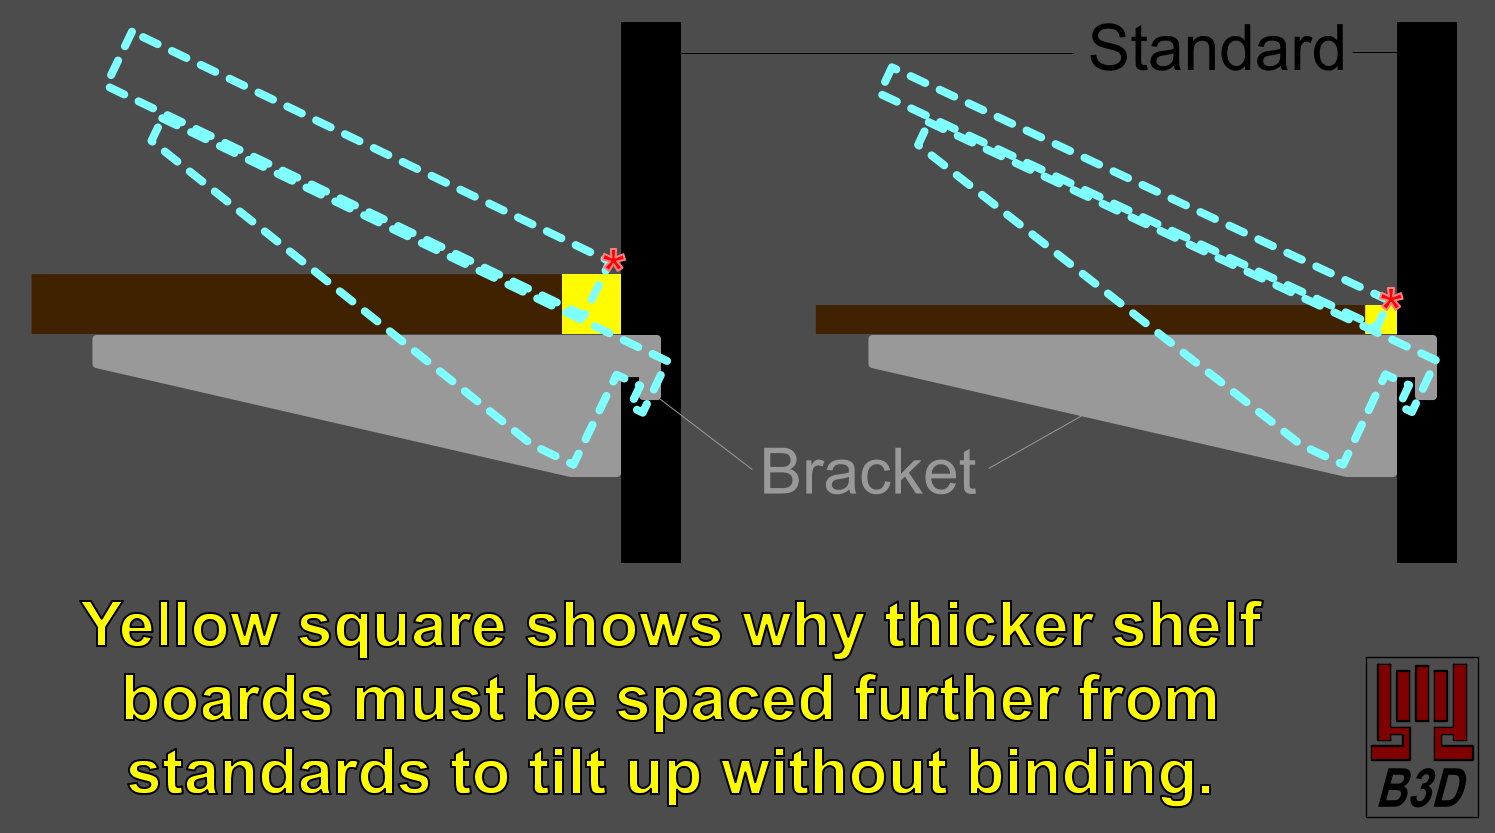
Turning each shelf into a stiffened subassembly requires proper spacing from wall to maintain adjustability.
- I used the screw holes that came in all the brackets to screw down the boards (well, you’re actually screwing ‘up’ into the bottom of the boards), and this turns each shelf into a stiffer subassembly. But each shelf level is still adjustable to other slots in the standards.
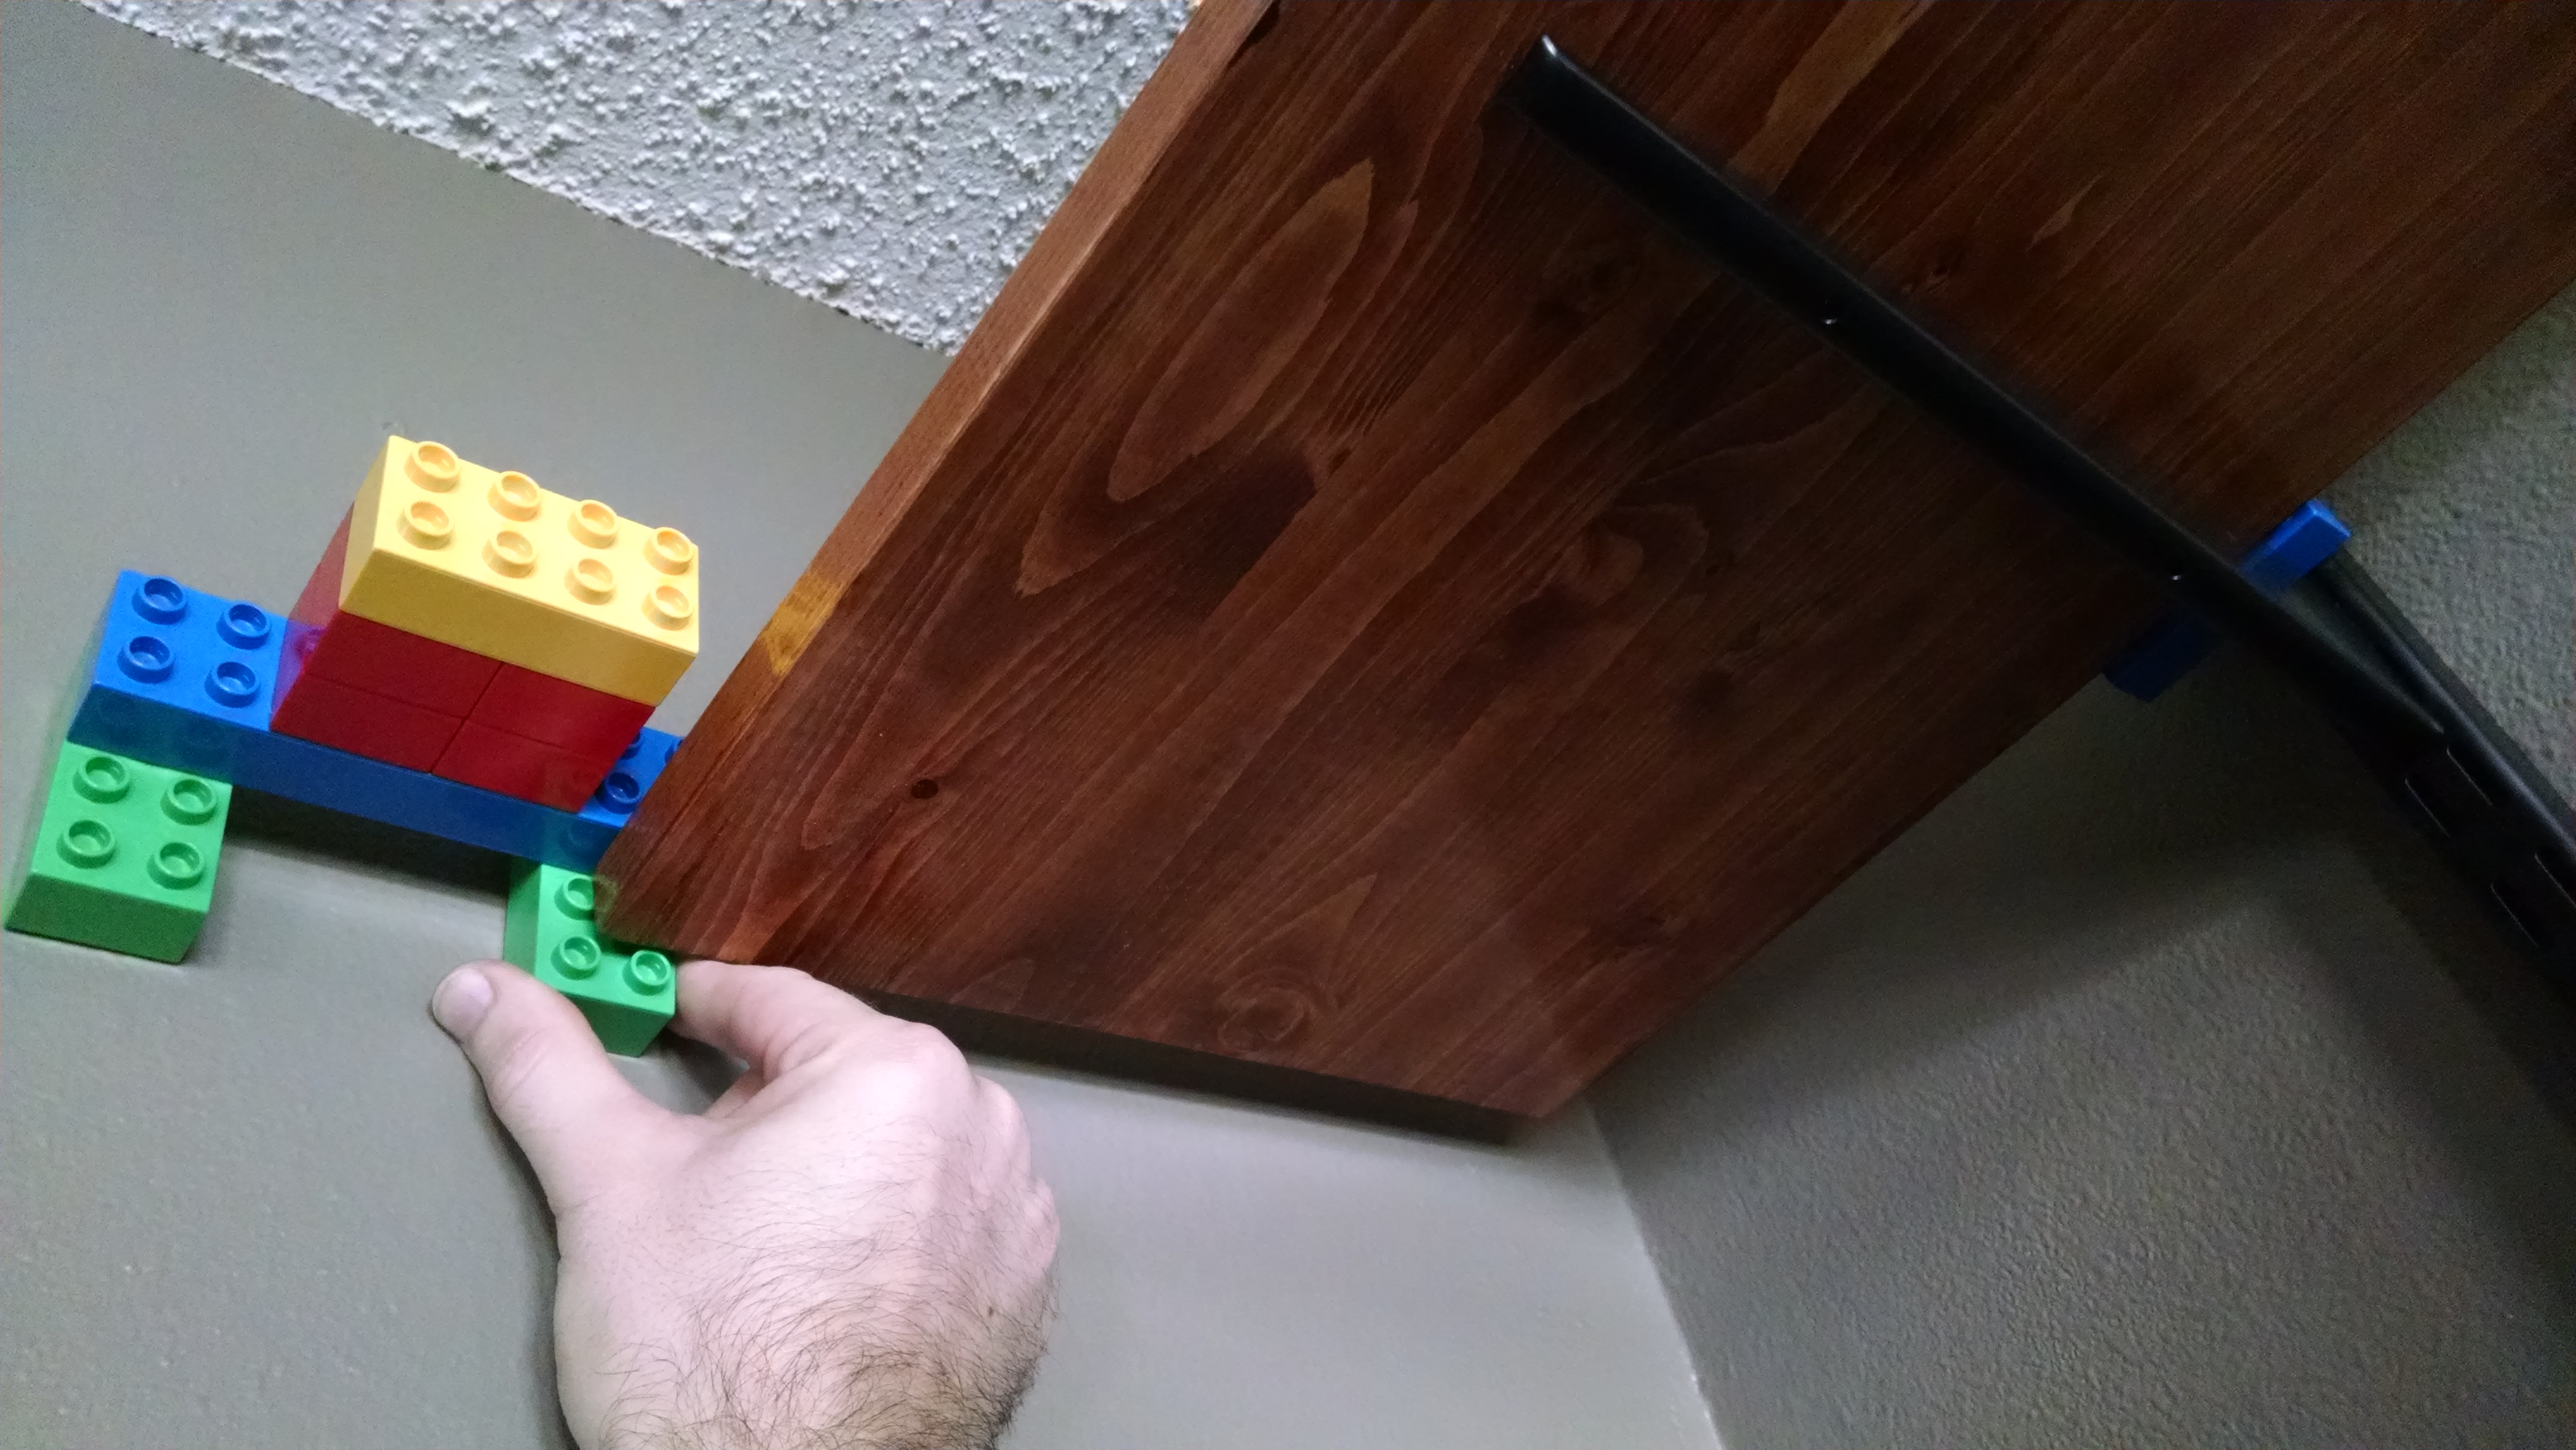
- Find a spacer block of adequate size to move each shelf board out far enough from the standards so the whole subassembly can still be tipped up, pulled out, and removed from the standard slots (for up or downward adjustment.)
- I used “Duplo” Lego blocks for spacers, and that worked fine for my board thicknesses.
- If you don’t do this spacing correctly, your shelf board will bind against the standards when tipped up, leaving it unadjustable.
- This also leaves enough room to run any plugin cord between the shelf/desk and wall.
- (Of course, if LED power wiring is “permanently” installed and clipped to the shelves, it will negate easy adjustment of some levels with lights attached.)
- I used “Duplo” Lego blocks
- Find a spacer block of adequate size to move each shelf board out far enough from the standards so the whole subassembly can still be tipped up, pulled out, and removed from the standard slots (for up or downward adjustment.)
 for spacers, and that worked fine for my board thicknesses.


Leave a Reply