Part 1: Desks & Layout Planning
How To: DIY Kids’ Study/Project Desk Space & Storage Furniture
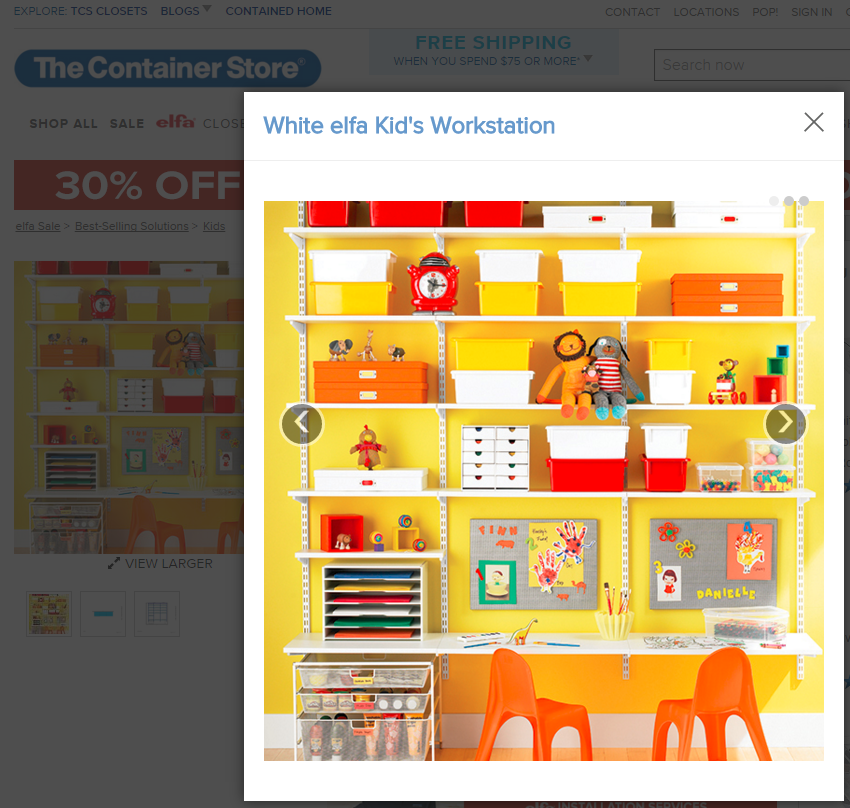
My wife found something online she liked and sent me a link. It was the sort of thing if you get from ‘Cute Storage Barn’ or ‘Kids Pottery Emporium,’ it costs 3 months of car payments. Or you can buy similar parts yourself and get it done at half-cost or less. There’s nothing wrong with spending more when you don’t have time or ability to DIY. I do that, but not this time.
In this case, I told her I could make the same sort of setup for less, mostly from a trip to the big box hardware store.
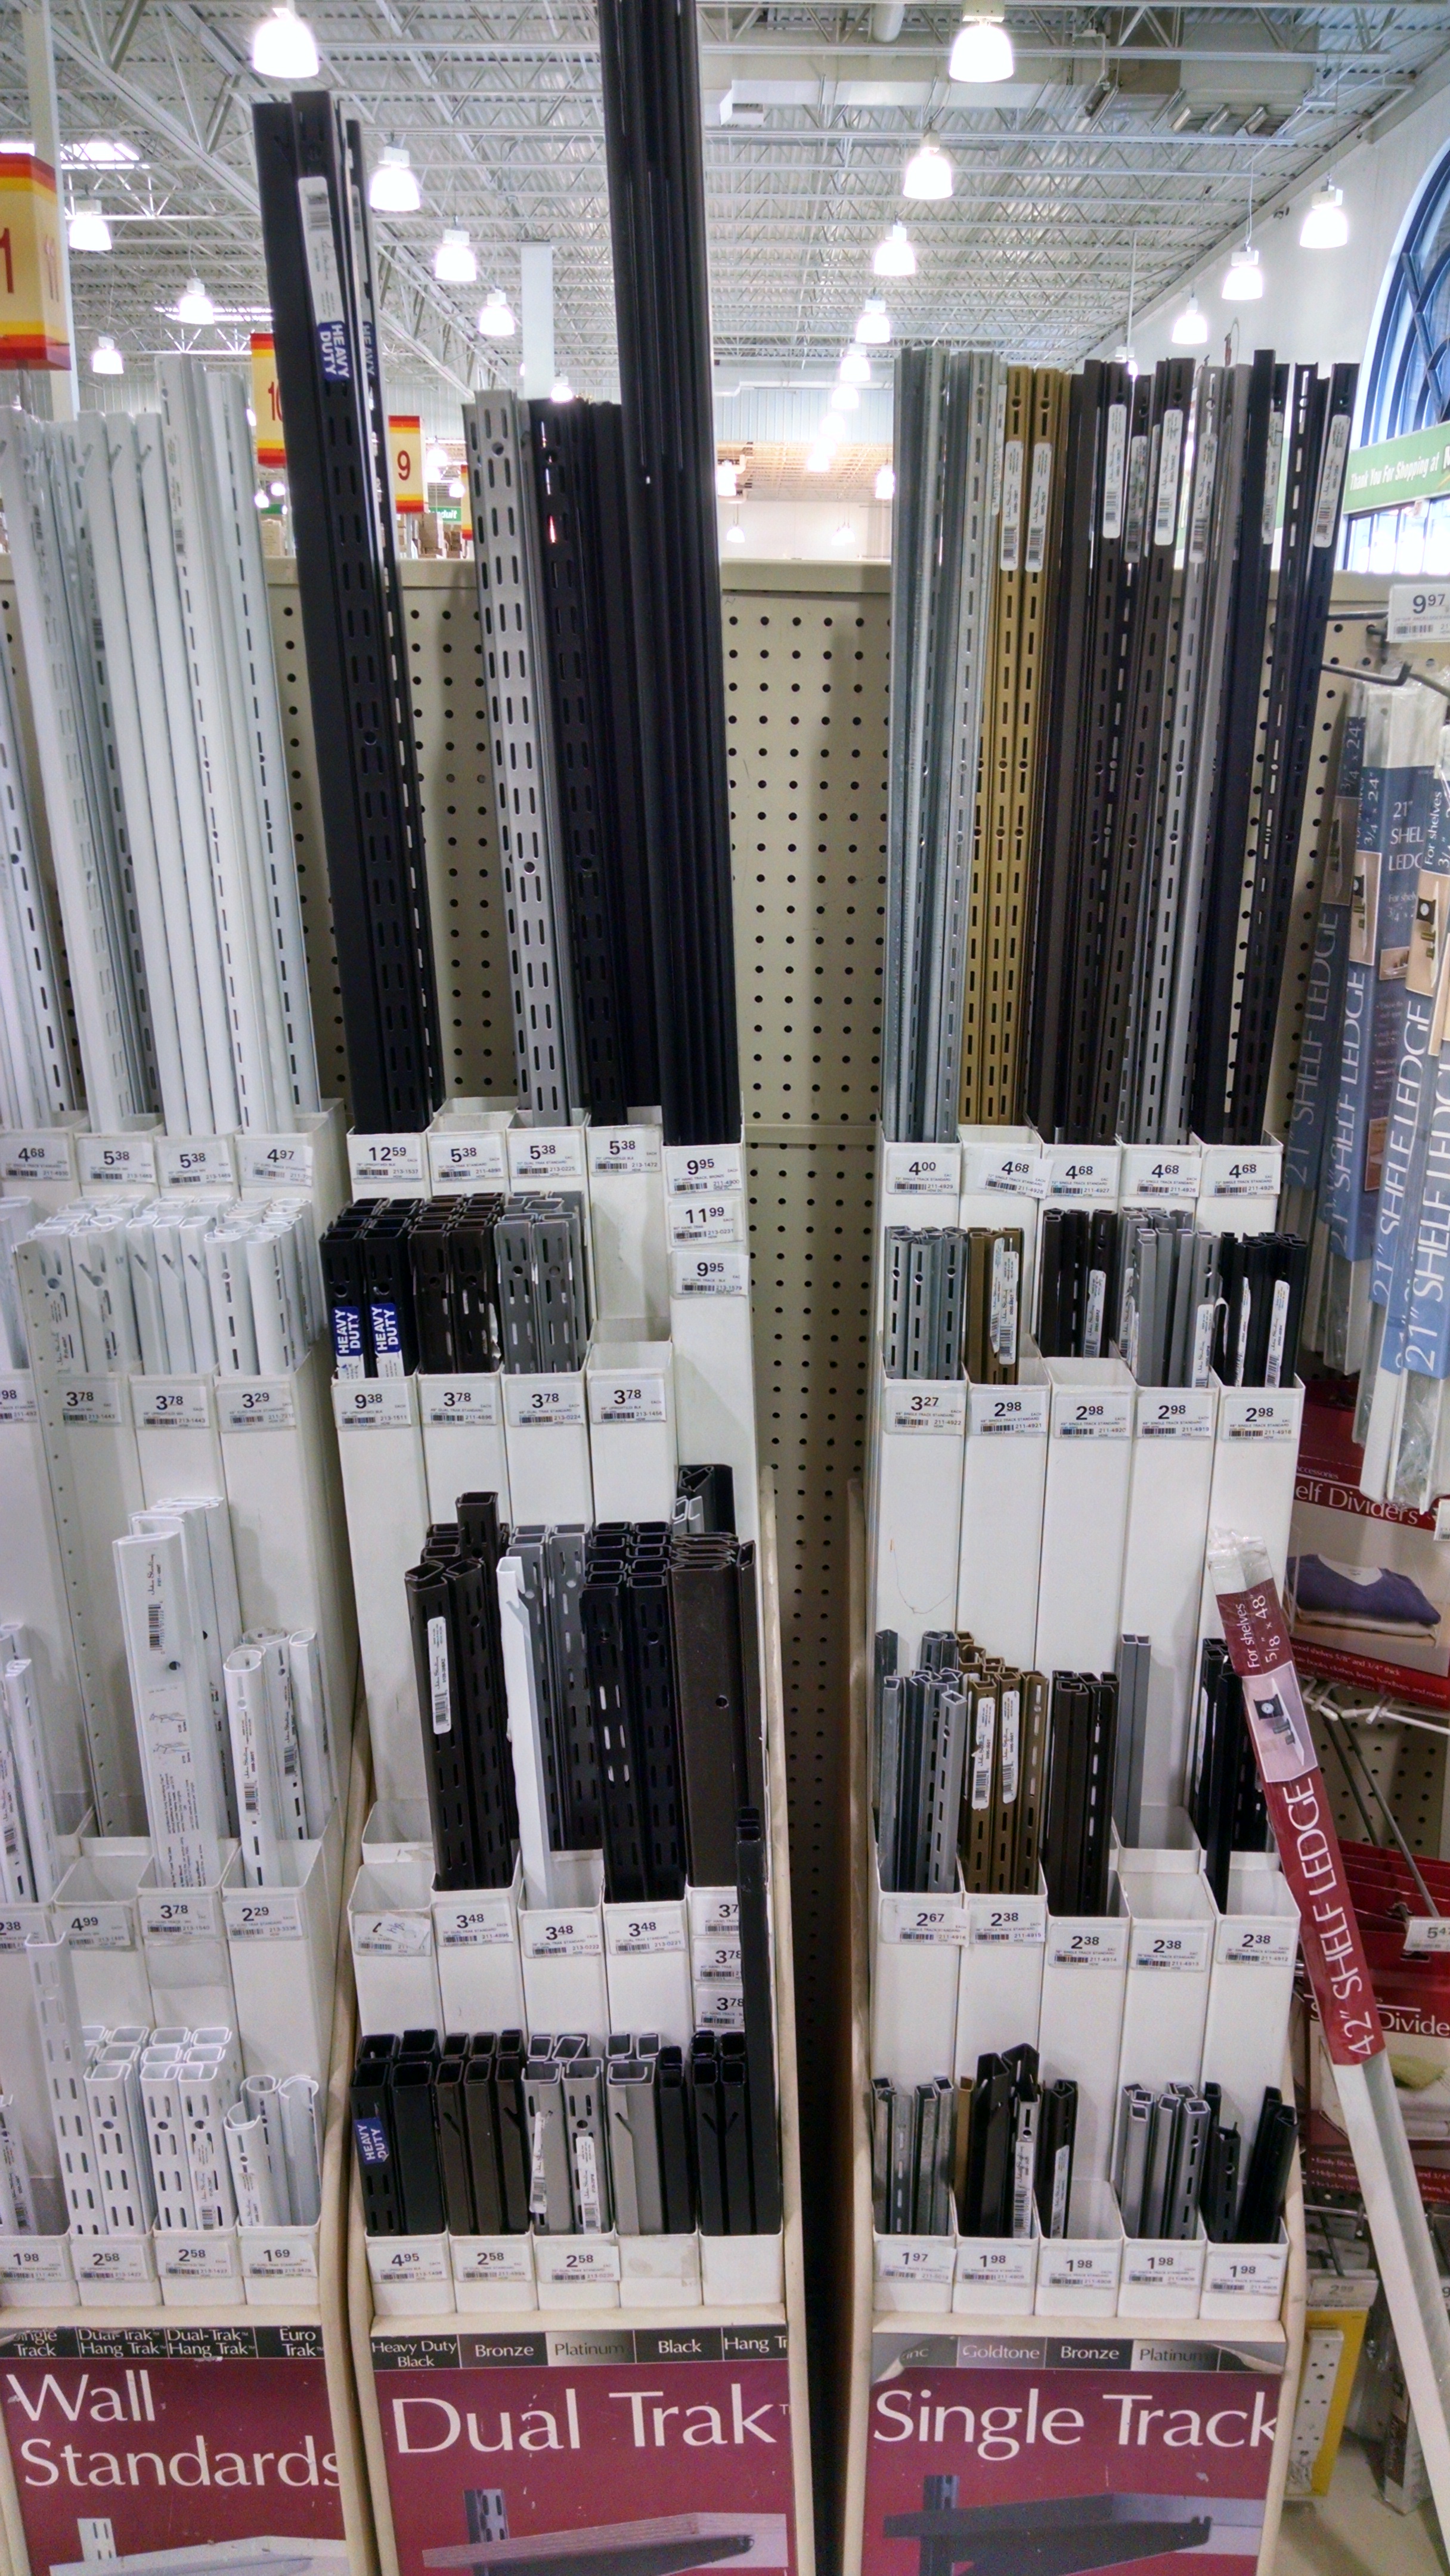
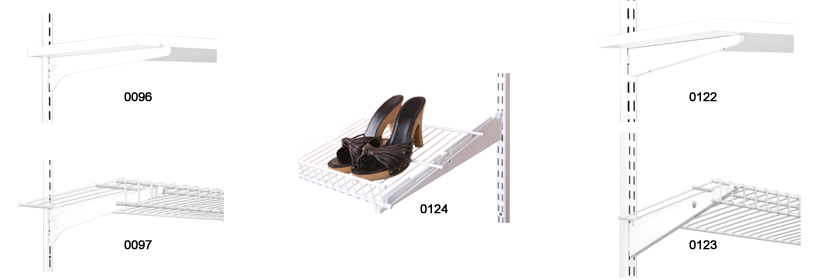
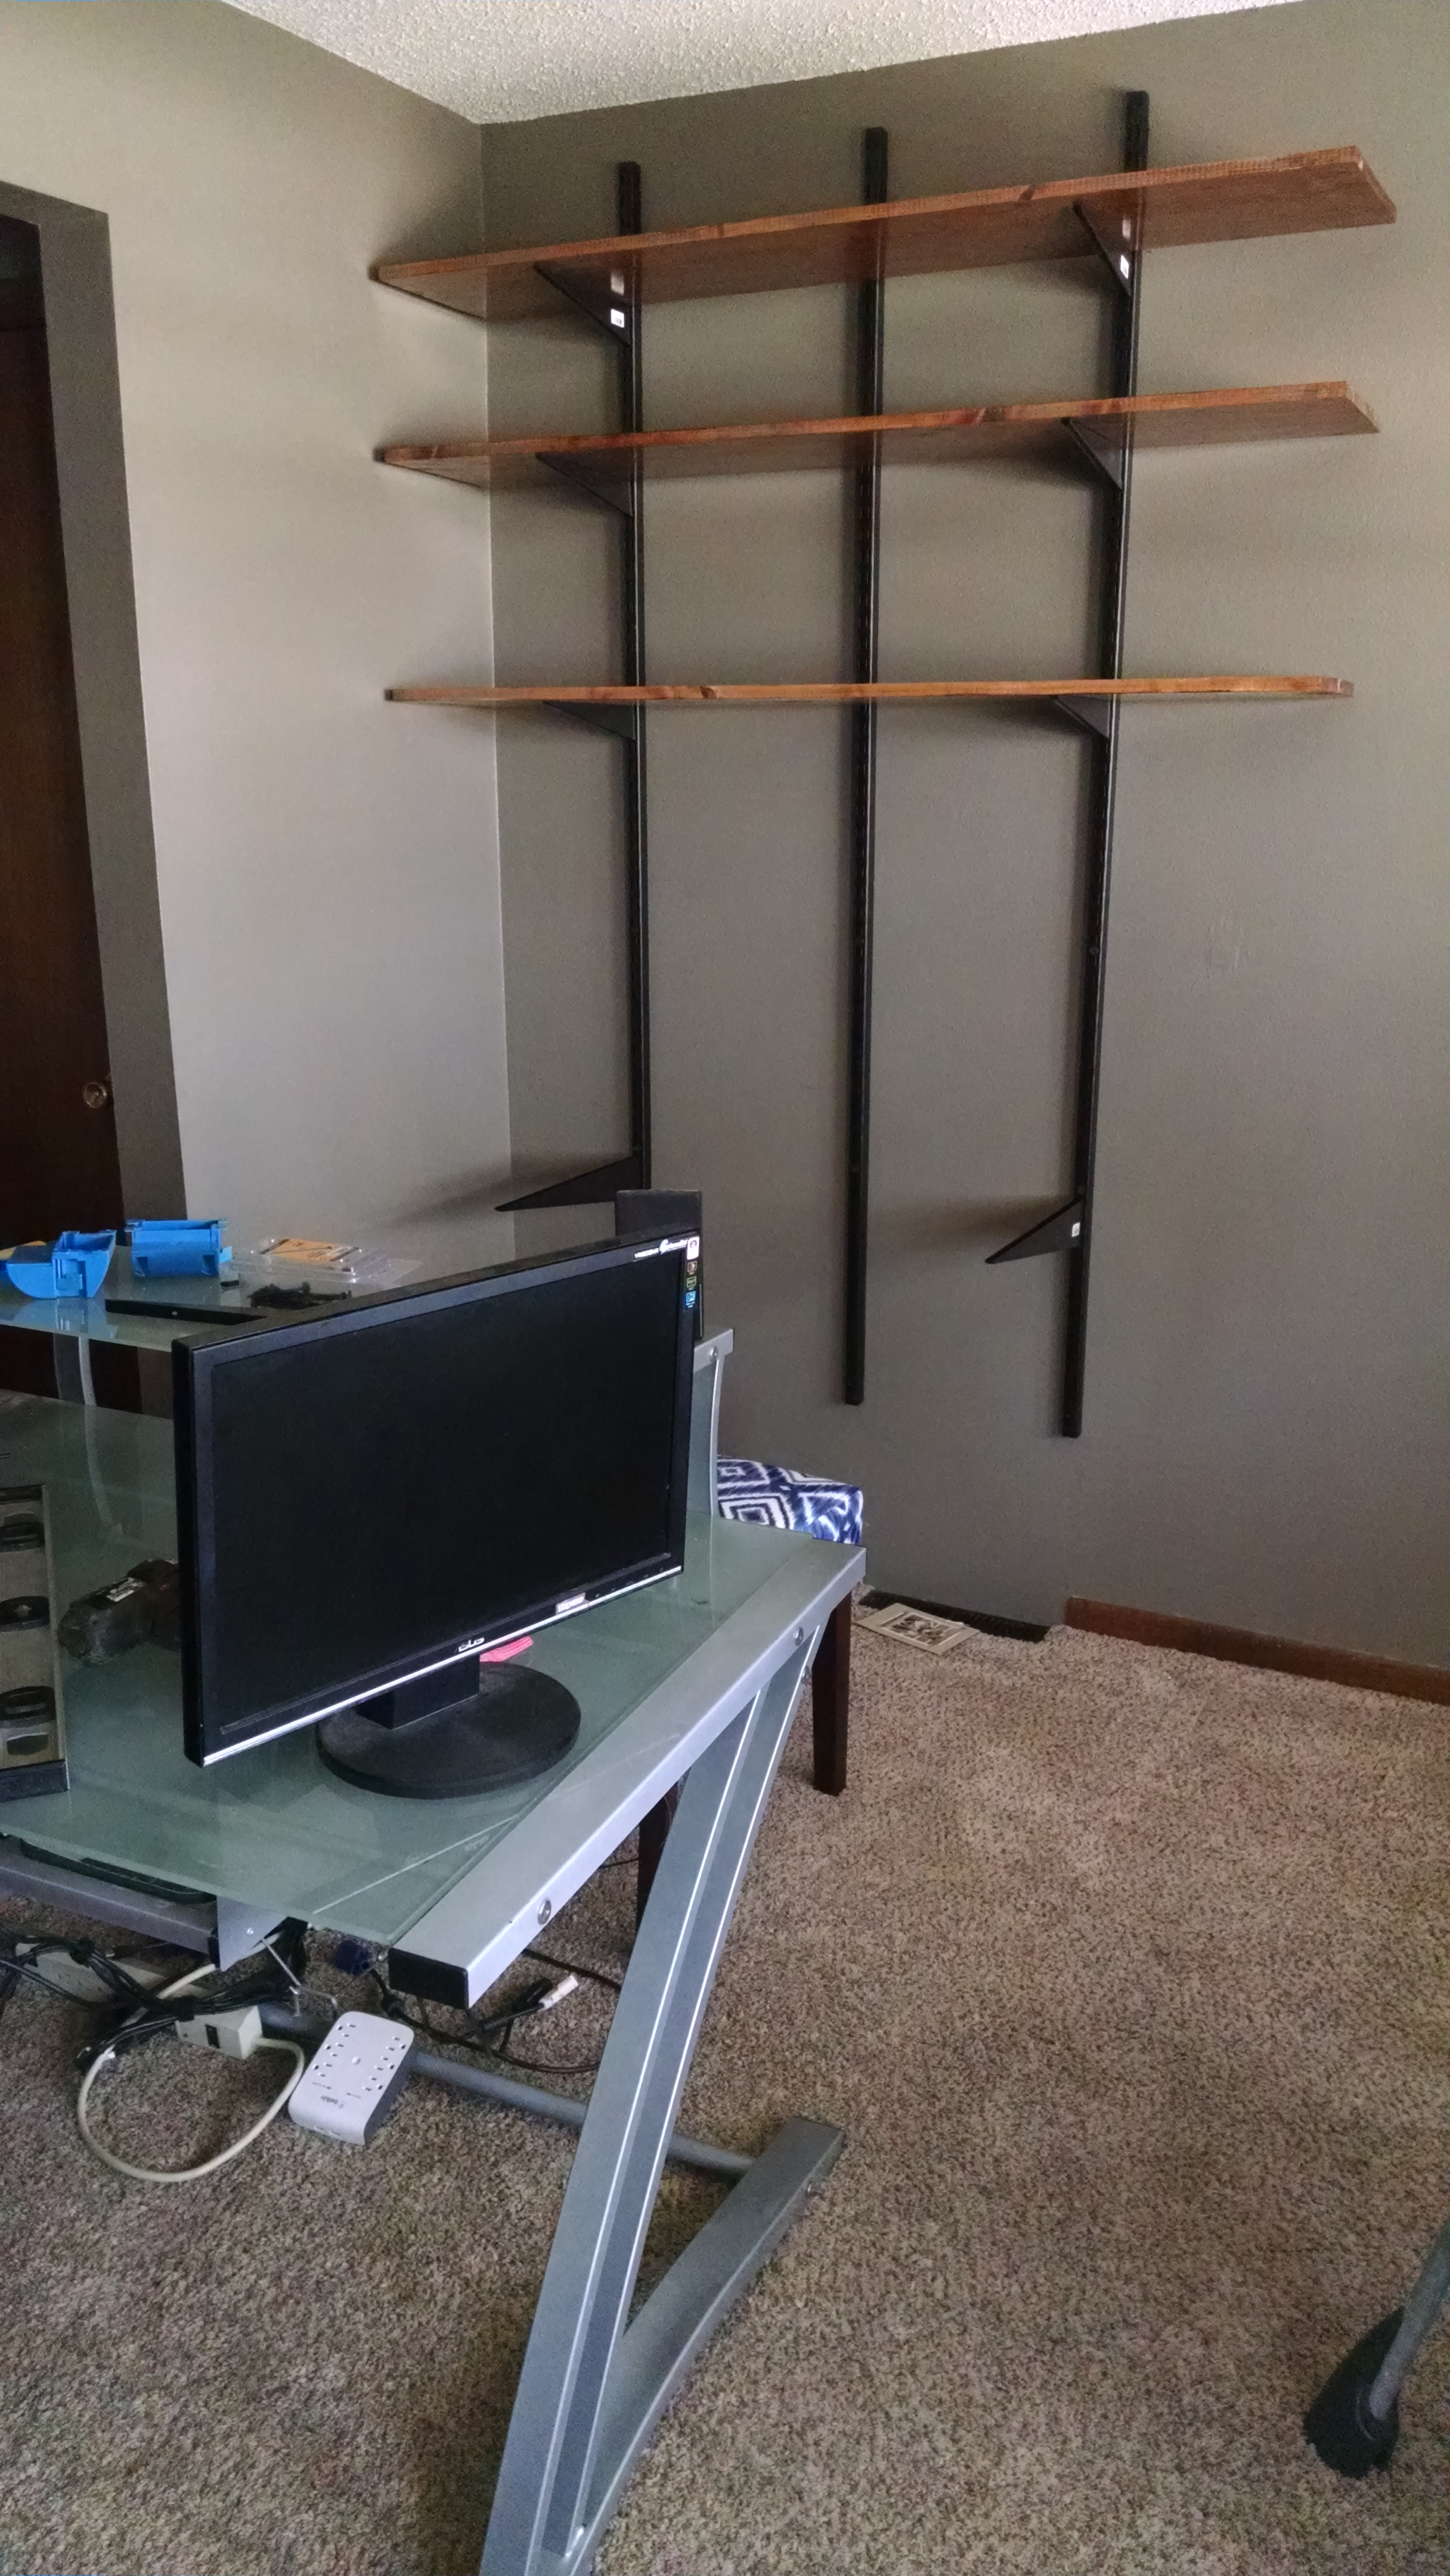
She was originally thinking silver, but I wanted to get the heavy duty standards (the vertical brackets screwed to the wall). The HD standards not only have dual track slots, but enough material to stand 1″ from the wall–a more rigid design–as opposed to the other standards which stand 5/8″ off. So I snapped this pic and texted for permission to do black, as that’s what had the long HD pieces.

The Planning Stage
Measure Twice, Install Once: Make a quick Dimensioned Layout Sketch
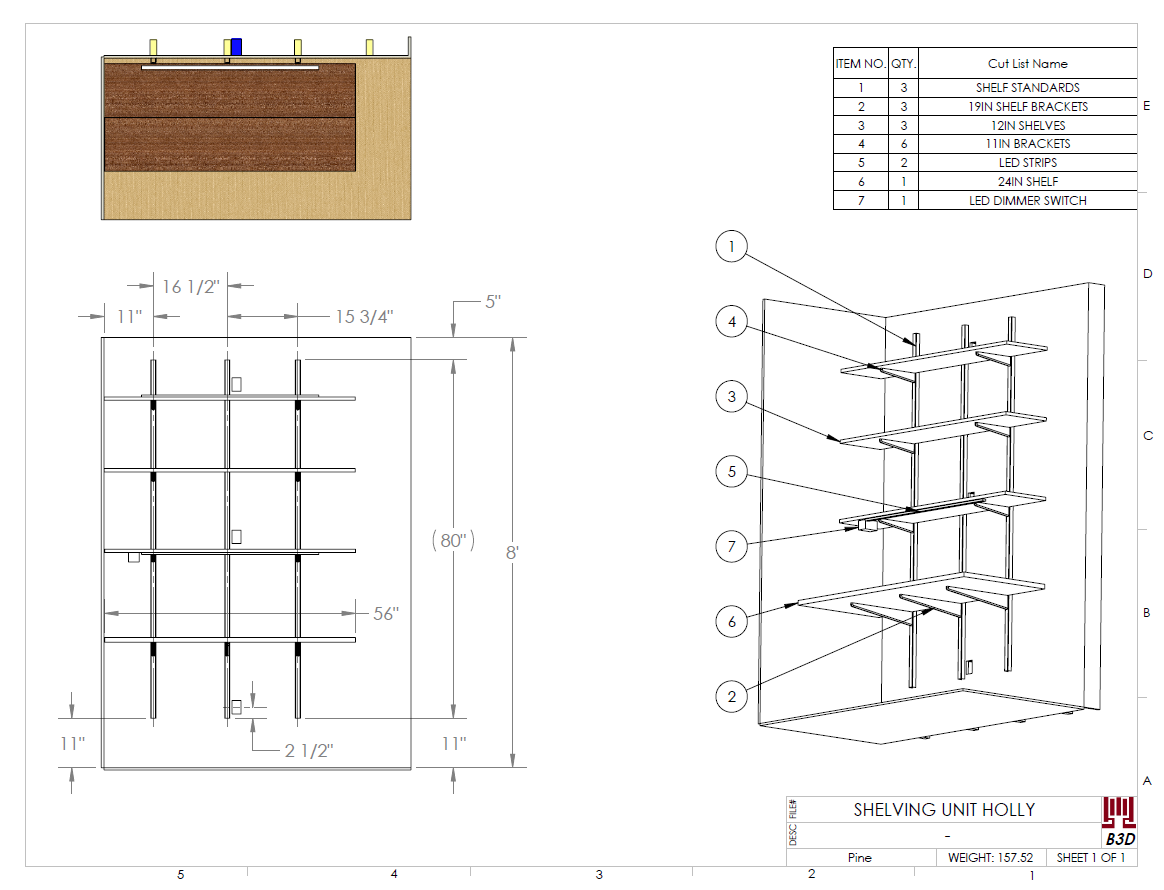
Make a napkin sketch to help you make a shopping list and avoid interferences with outlets or other features. You can make a fancier version like I did in CAD if you’re so inclined, but not necessary.
I took some measurements of:
- wall sizes (HxW),
- electrical outlet locations,
- and used a magnetic stud finder
 to make dimensions of where the studs are (on centers).
 to make dimensions of where the studs are (on centers).
My concerns were to make something that wouldn’t overtake the room and be in the way of foot traffic flow from the room entrance.
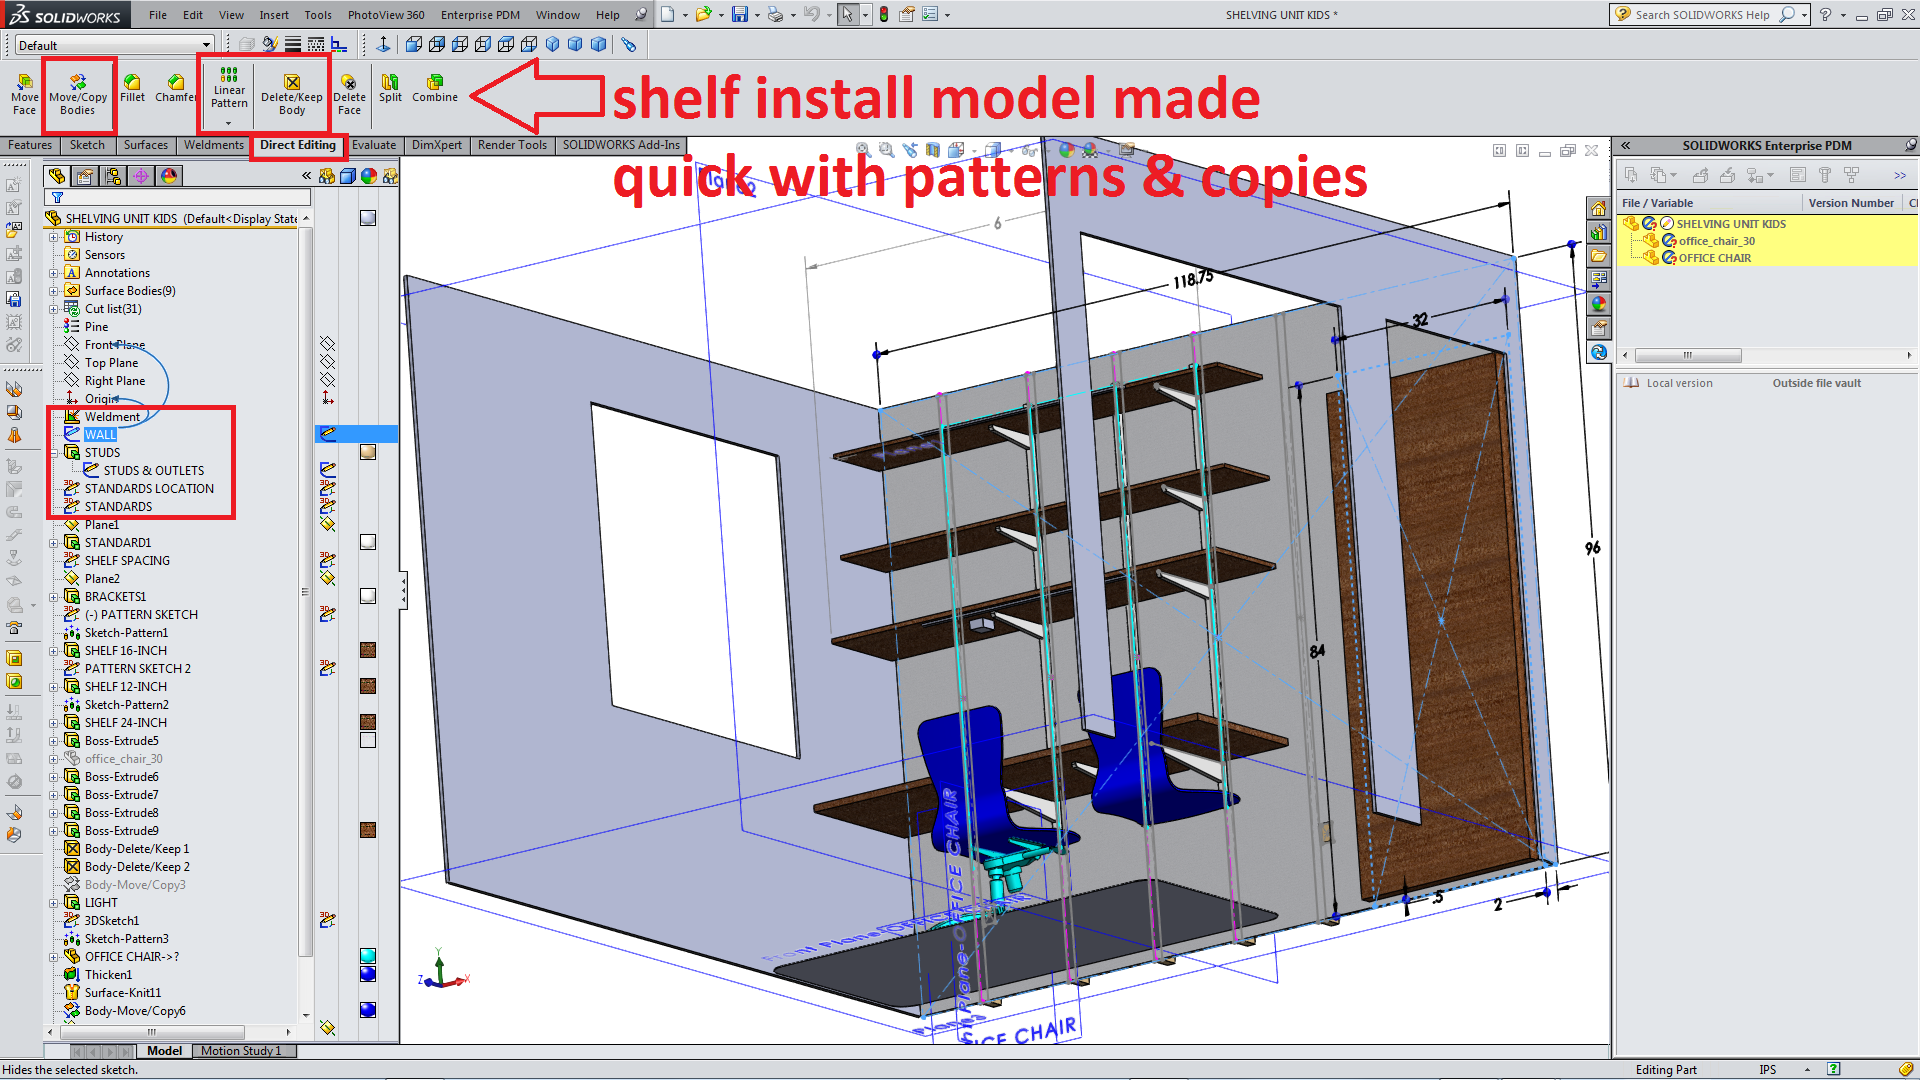
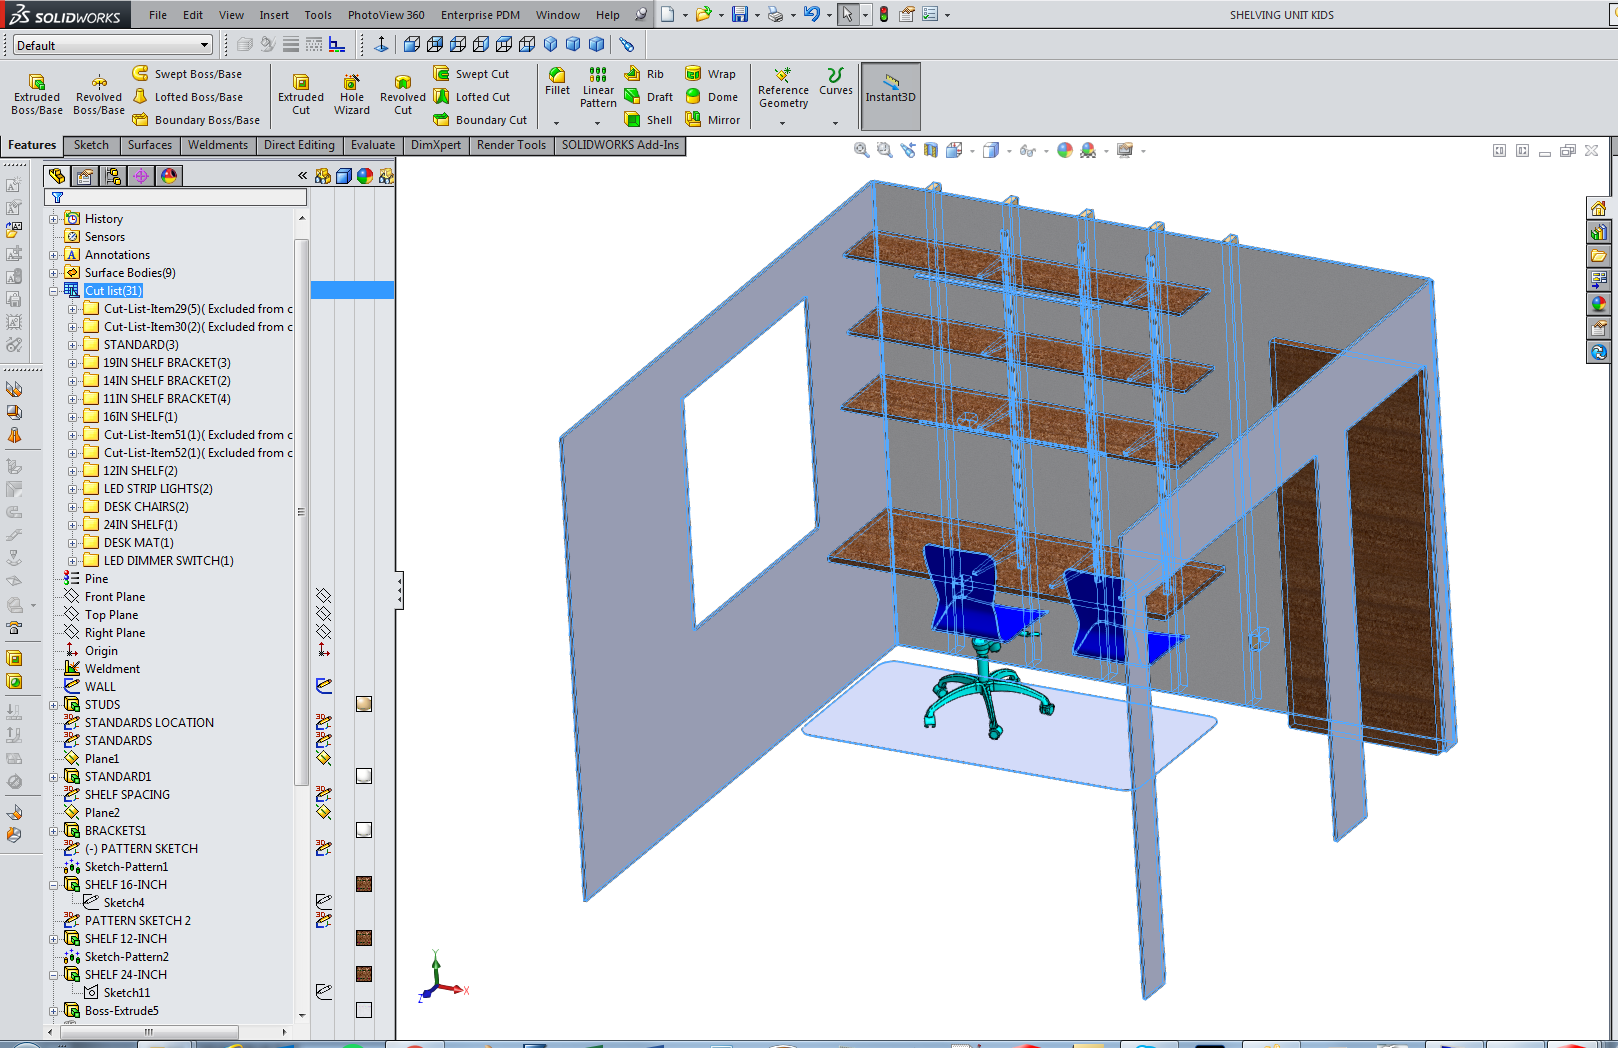
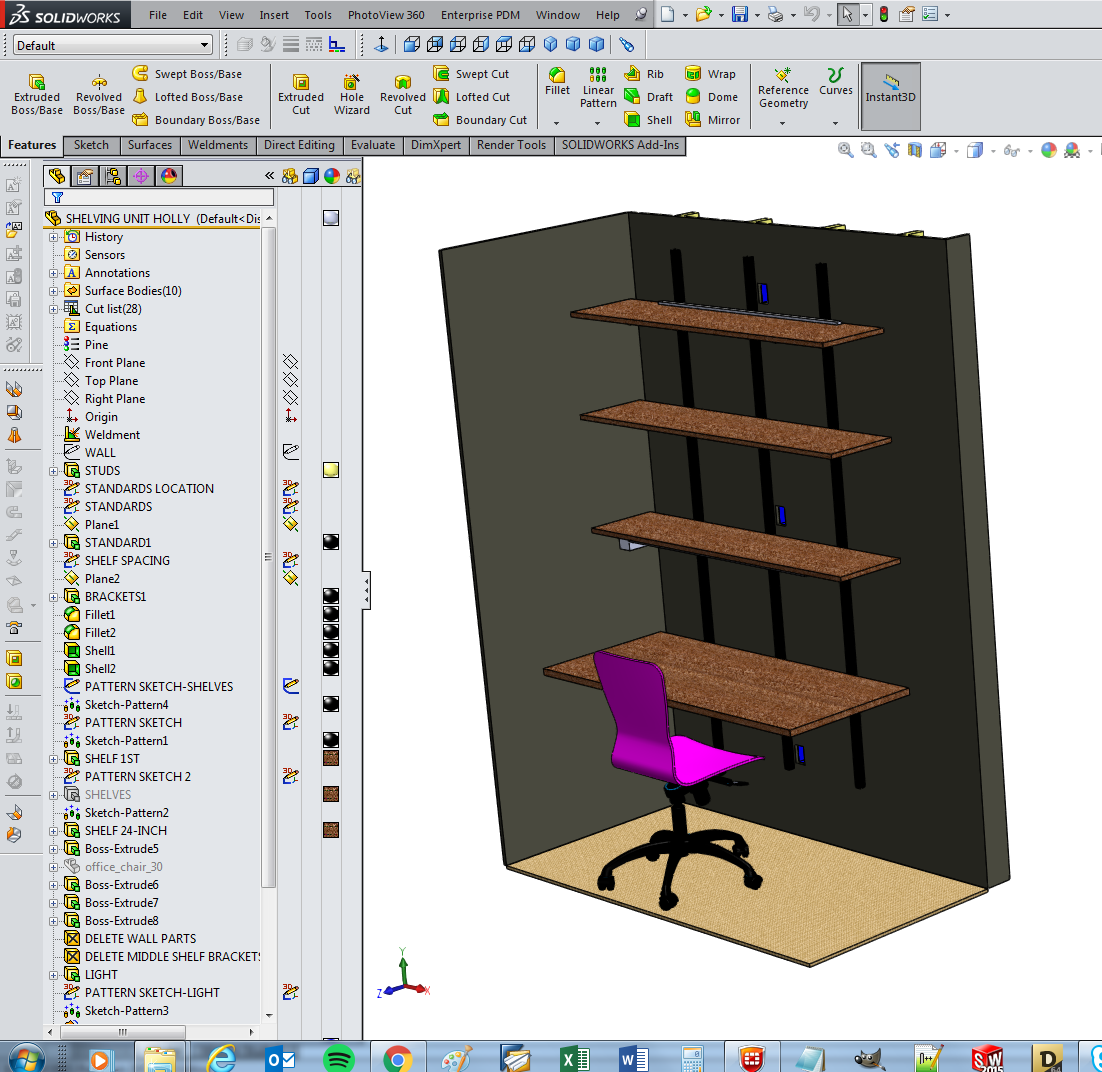
- I used my scratch diagram as the basis to build and draft this idea in SolidWorks.
- I used a “Weldment” multibody part file to make a quick all-in-one plan model inside a single “Part” file (*.SLDPRT), driven by sketch patterns.
- No need to go to the time-consumption of making individual parts in an Assembly file.
- I used a “Weldment” multibody part file to make a quick all-in-one plan model inside a single “Part” file (*.SLDPRT), driven by sketch patterns.
Kill 2 Birds: Floor Plan AND a Shopping List
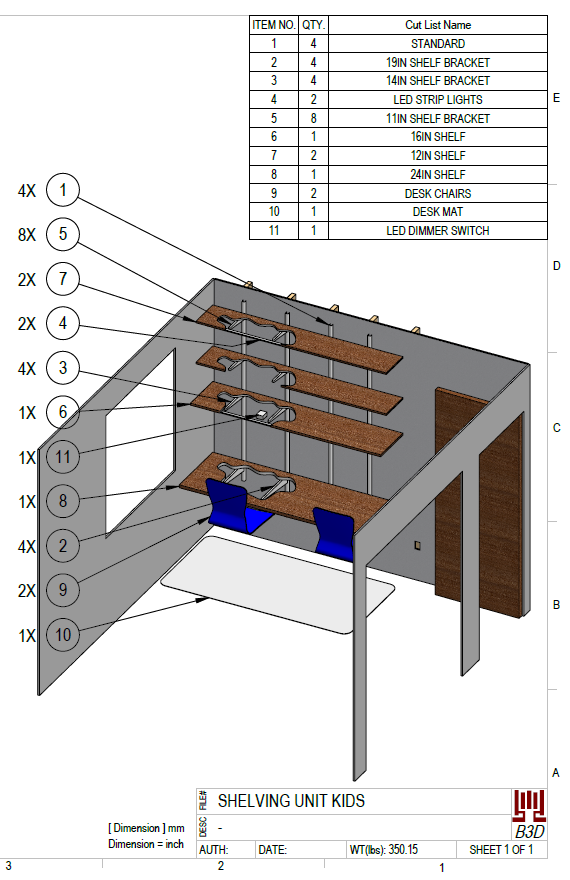
I prefer to make a model whenever planning certain DIY projects because a quick shopping list (with quantities!) can be made from the Weldment “Cutlist” when inserted as a cutlist table into a drawing:
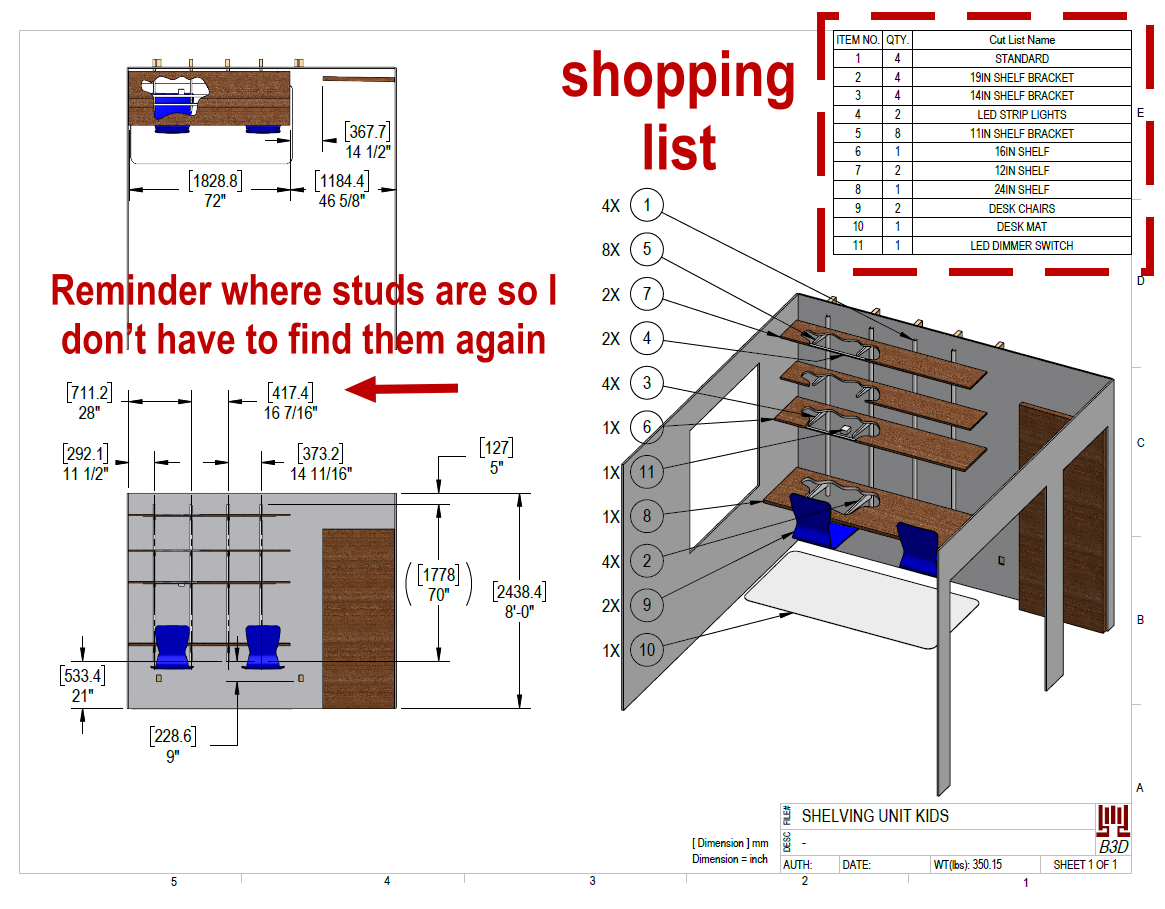
I don’t like going to the big box hardware store and walking around aimlessly, and I especially dislike getting home to realize I forgot something because I didn’t have a list. Usually these projects change over the course of installation and I’ll need to go back there anyway, but those trips happen less when I make shopping lists from models.
Be Prepared.
Even If you don’t use CAD and you’re no carpenter, I still recommend:
1.) Draw out your plan, complete w/ dimensions to studs and other pertinent locations.
a.) Studs are often not 16″ on center in real life. Find your studs, write down dimensions, then you won’t have to repeat this activity later.
b.) We don’t need DaVinci, just a scratch diagram you can understand later.
2.) List the parts you’ll need to buy, and write the quantities next to each line item.
a.) It’s a significant time saver when used as a shopping list.
While I’m At It… Make 2 Work Centers!
I made another workstation for my wife. She’s recently taught herself sewing, but didn’t have a good space with proper task lighting. She also hated the look of the glass & steel desk she had for her desktop computer, so this replaced that.
She sanded, stained, and sealed all boards for these workstations after I cut them to length. She’s good at this and house painting in general. Play to your strengths!
Good Task Lighting Considerations: Will these LED Strips be bright enough?
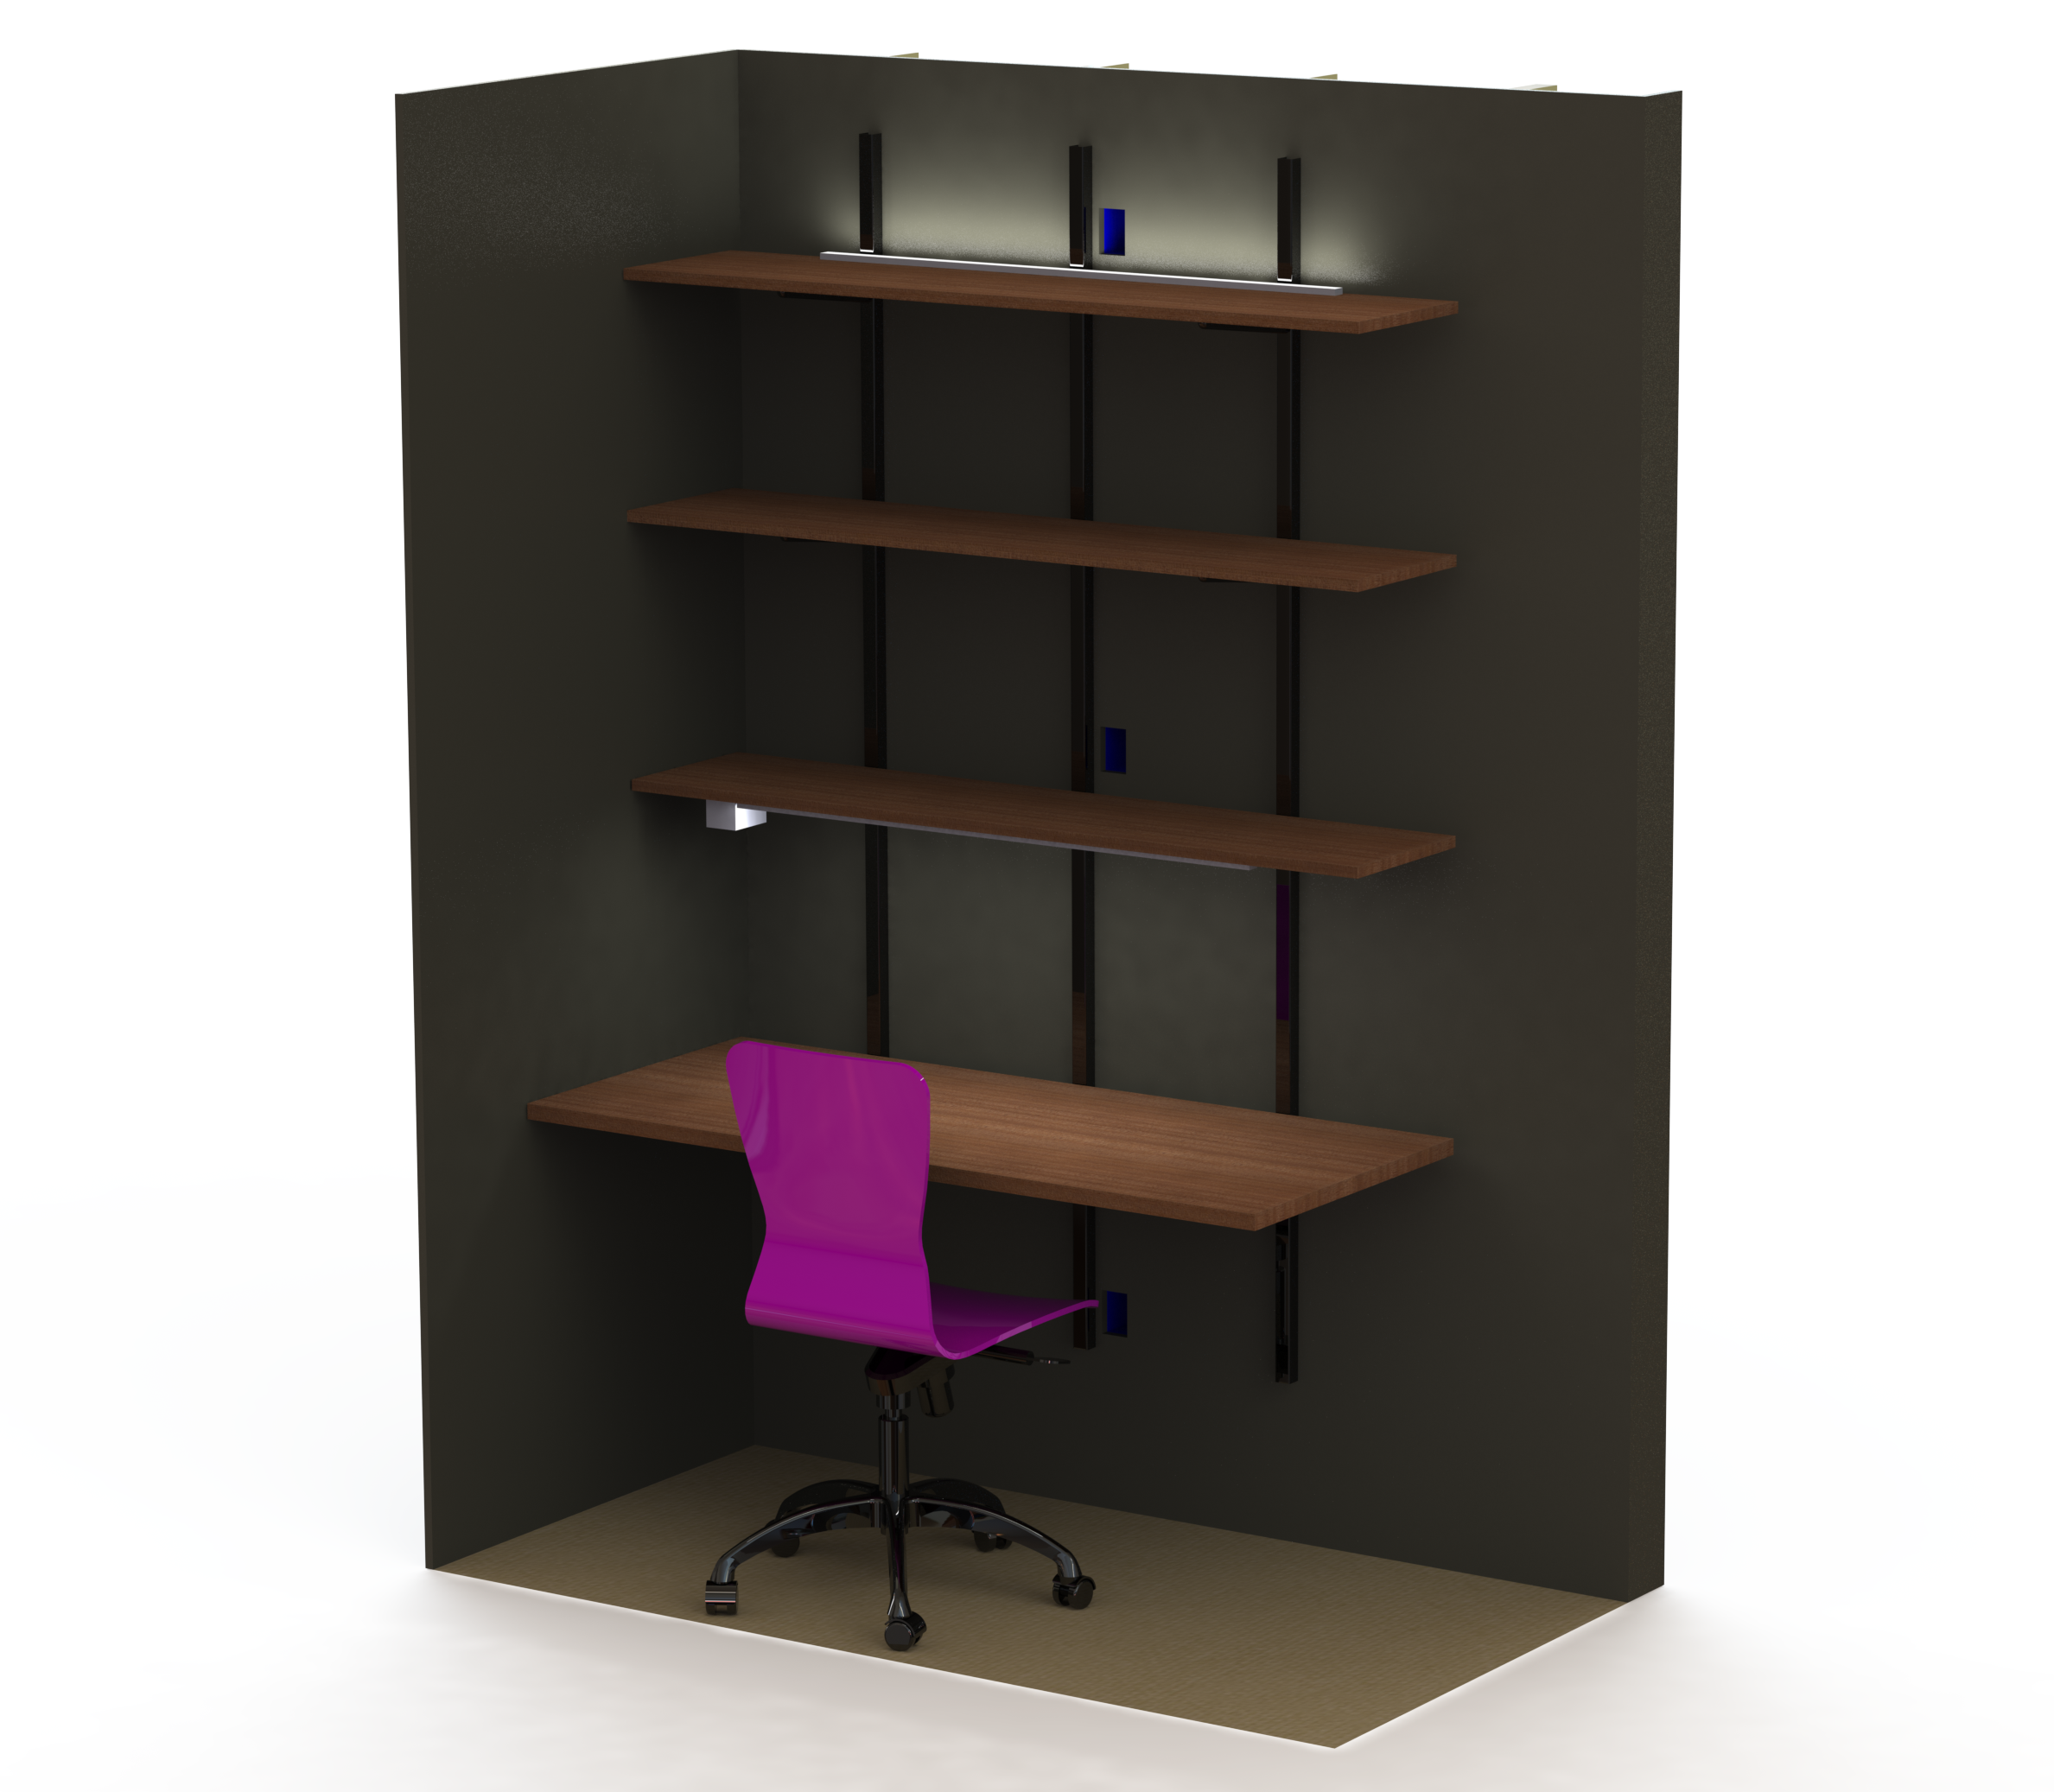
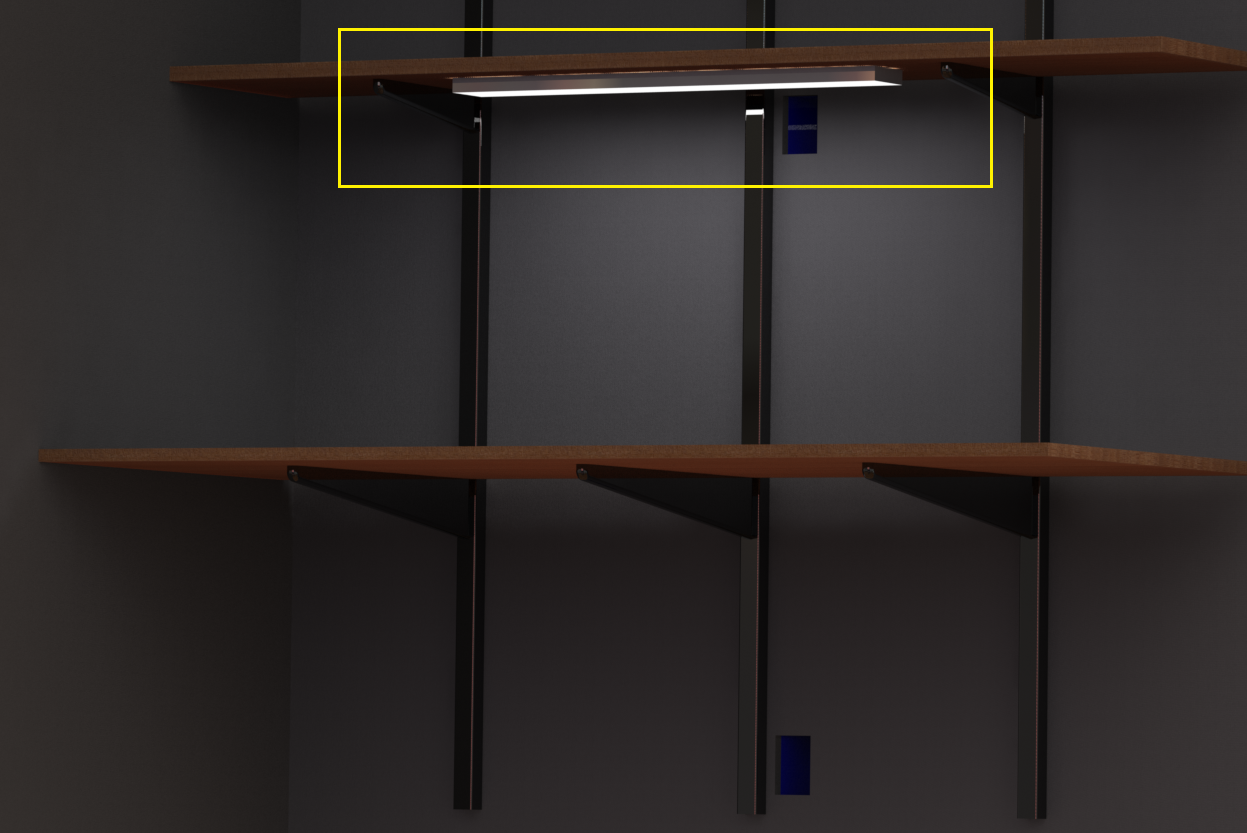
Rendering for Testing an LED Strip’s Lumens Output:
This is not an exact science. I just had never bought LED strip lighting, and wondered how it would do as task lighting. I wanted to see a strip illuminating the area I was going to build.
It’s been a couple months and memory is fuzzy, but here’s how I remember doing this:
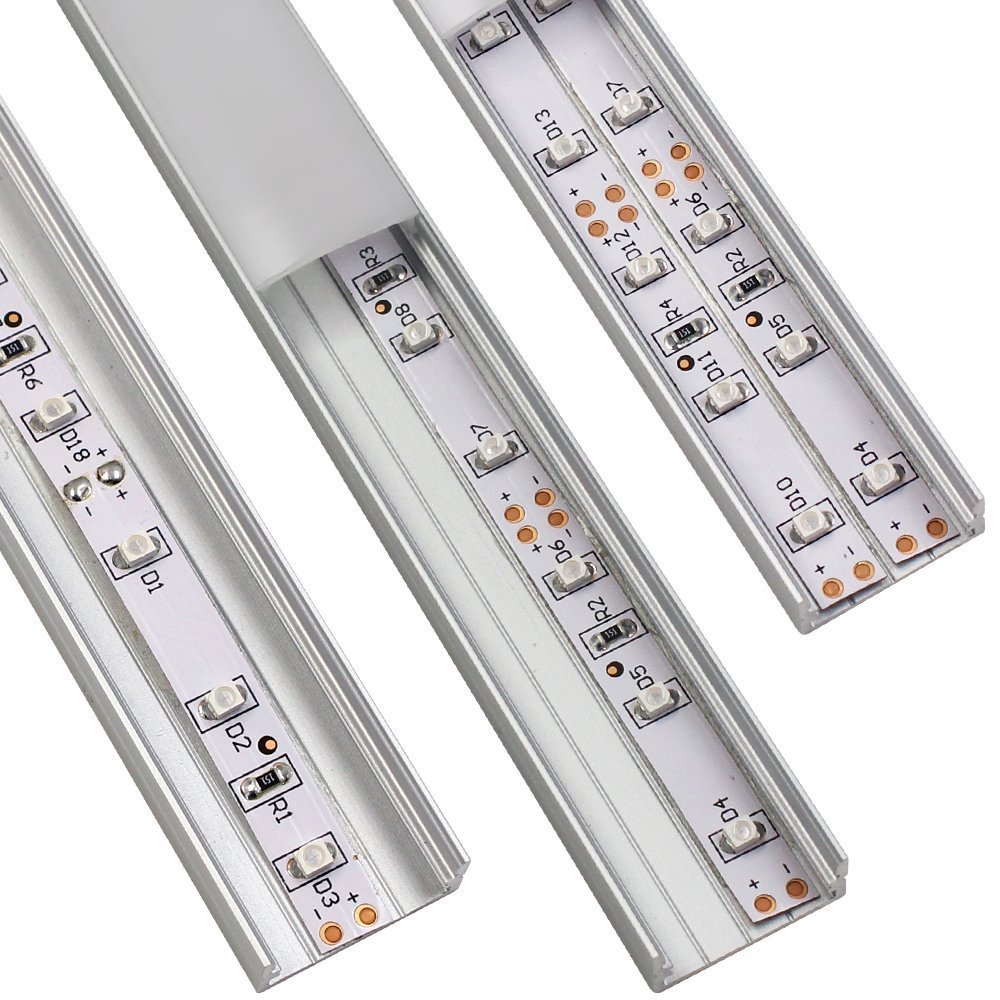
- Make an extruded feature sized for your LED strip aluminum extrusion.
- Locate the feature in your model where you’ll want it IRL.
- You may find dimensions of the extrusions on the retailer’s or manufacturer’s website.
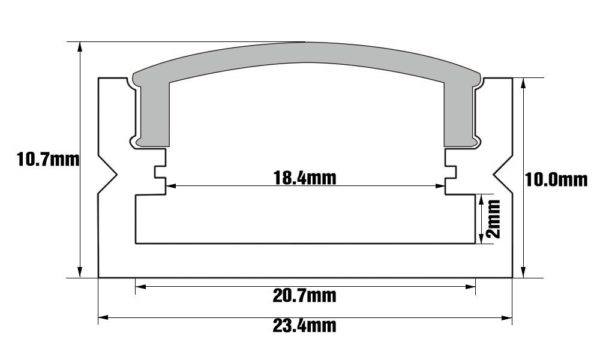
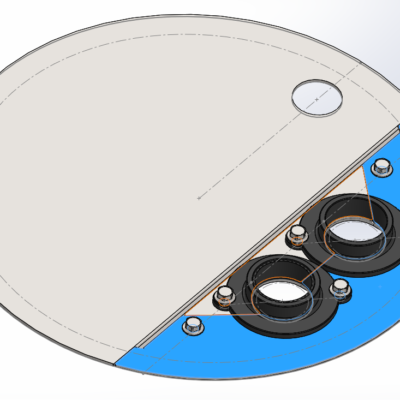
 Torchstar dimensioned cross section U07, Dimensions found on Amazon page.
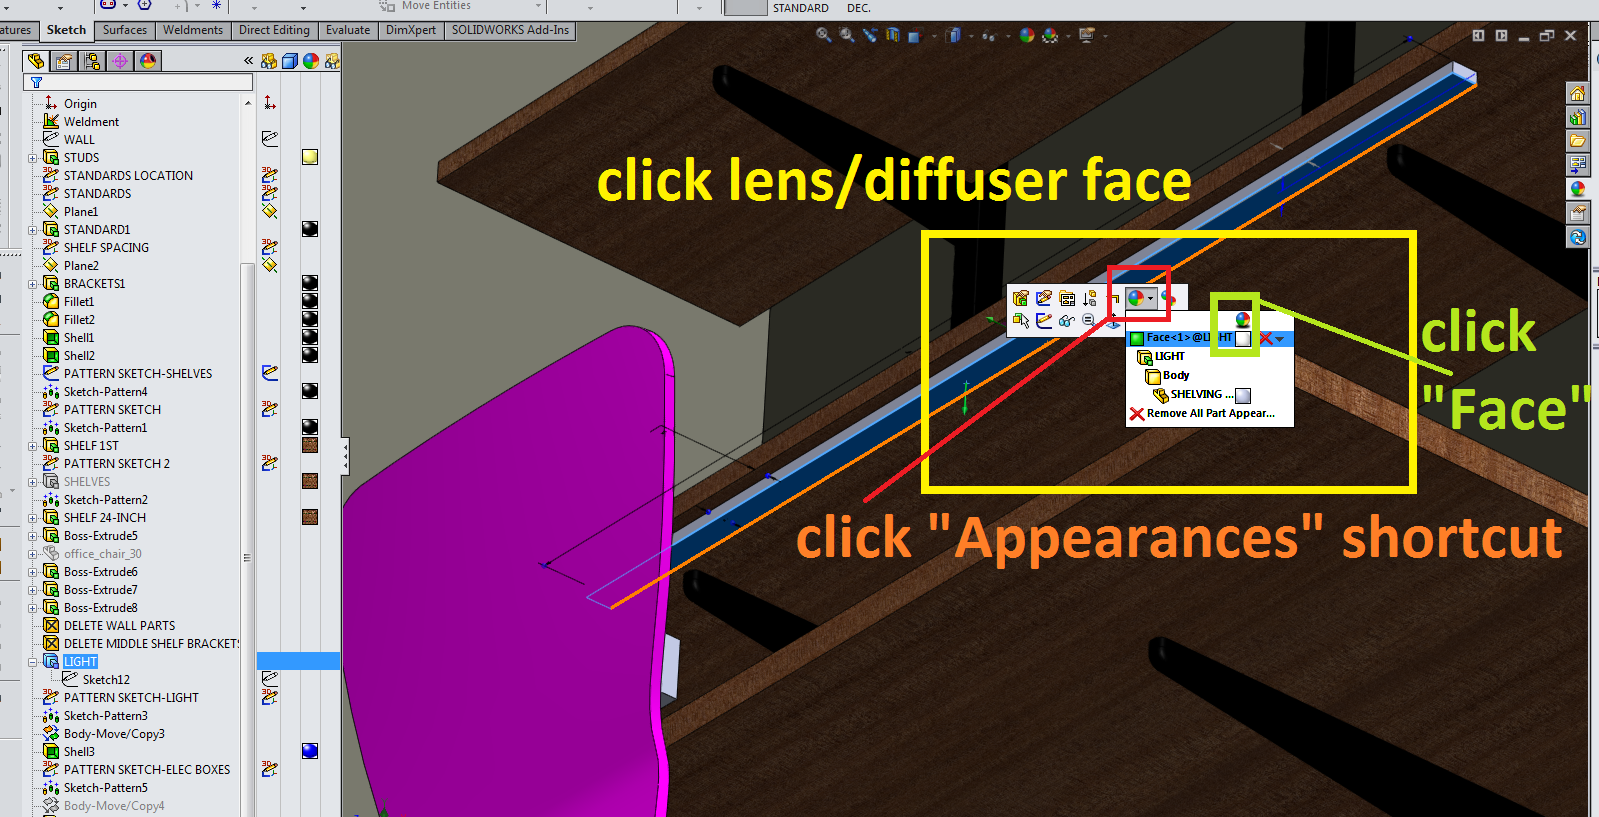
- Click face of your extruded body that would serve as the plastic diffuser lens.
- On the flyout menu, click the “Appearances” shortcut (multicolored “beach ball”-looking icon).
- Select “Face” for type you’re applying Appearance to (not “Body” or “Feature.”)
- On the right menu I chose “Lights>LED”, and then chose the “White LED” image for color.
- I entered the amount of “25” w/srm2. Did that come from some calculation of wattage of the strip? I think so, but can’t remember…If you’re still with me on this, Google how to convert lumens or wattage from the type of LED strip you’re buying to w/srm2.
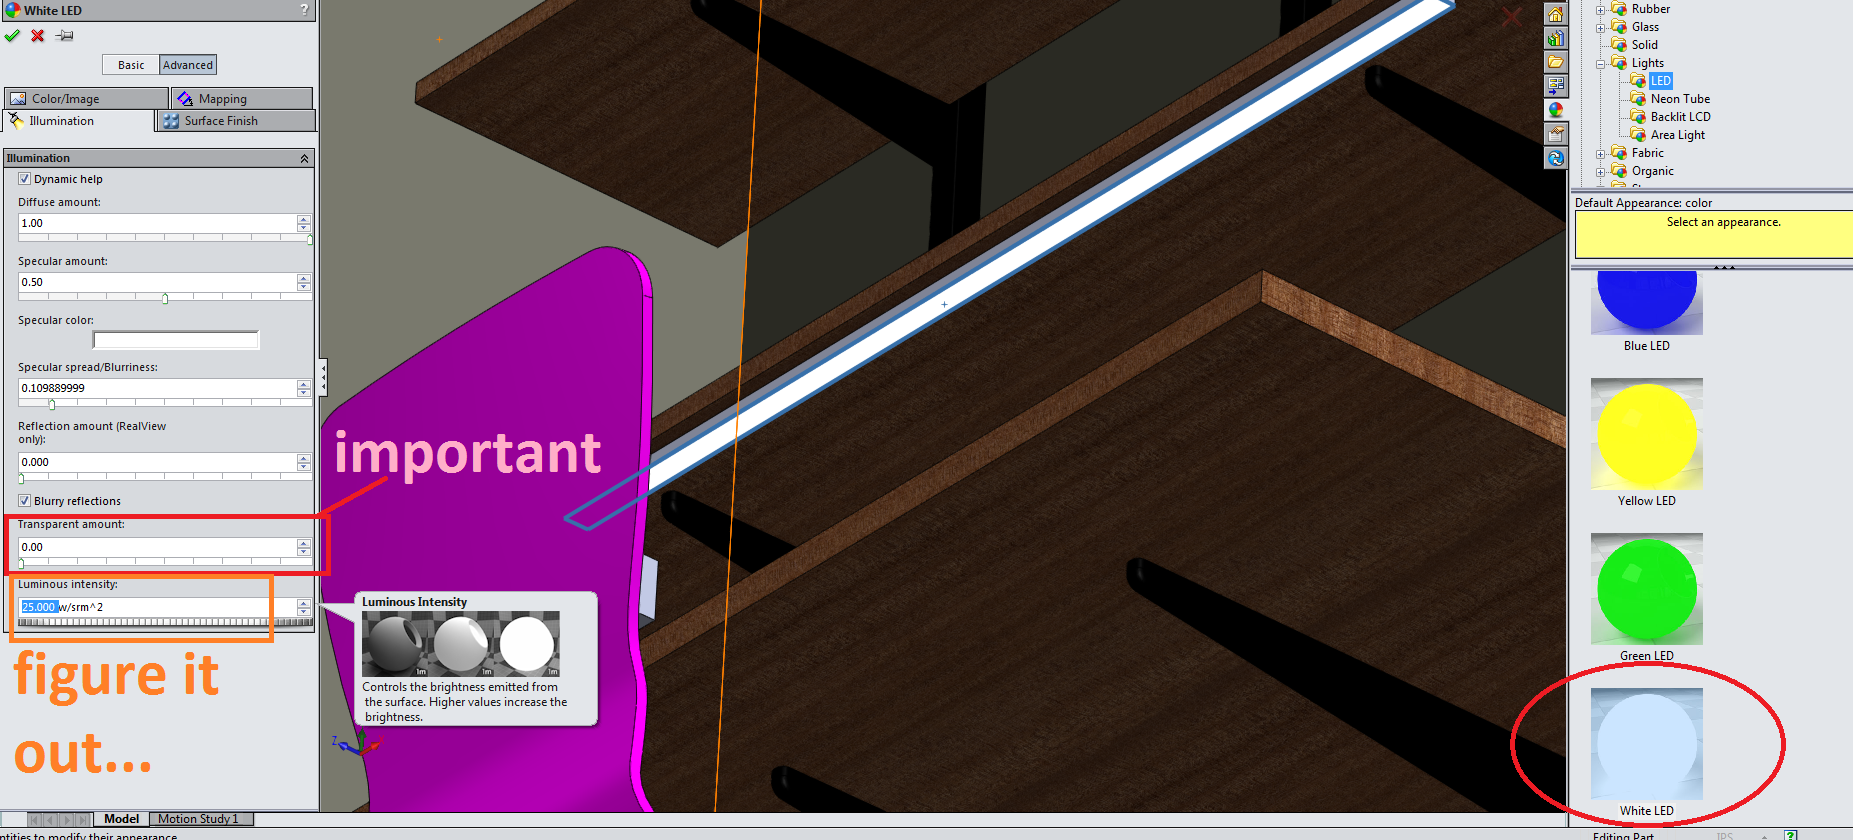
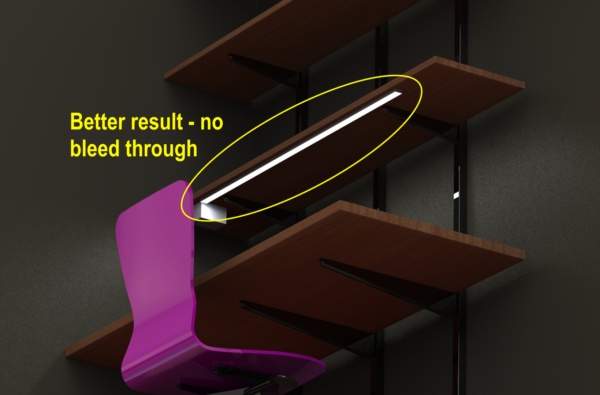
- Setting the “Transparent Amount” to zero was important because otherwise the light will also shine backward through the diffuser and extrusion body and make everything look even faker than a normal render. You’re essentially saying “Only the lens face I clicked should emit light, but not the opposite side of the face or body feature.”
- Otherwise, you get light bleeding out of the opposite side of the extrusion.
- See 2nd rendering, with no bleed through at the top.


Leave a Reply