Lift Station Explained
There’s a hole in my basement that the downstairs toilet, shower, sink, and washing machine empty into. There’s also a submersible pump in the hole which pushes all that stuff up a pipe, where it begins to slide down into a septic system. This hole is called a “Lift Station,” and it needs a pump because it’s actually below the grade of the septic tank.
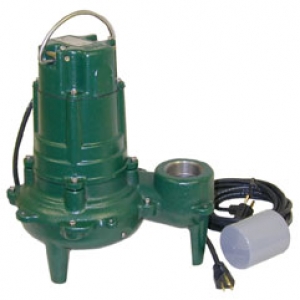
The previous lid for my lift station, probably the original installed about 30 years ago, had rusted to the point that it was literally more holes than lid. I’m not sure how thick the original steel was, but it was almost an interesting case study in corrosion by the time I threw it away. And that meant I needed a new one. Allow me to walk you through the iterations of an afternoon of lid design.
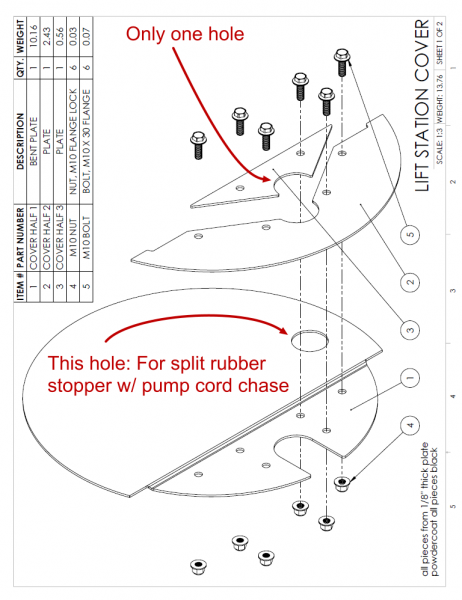
Step 1: Half-Baked
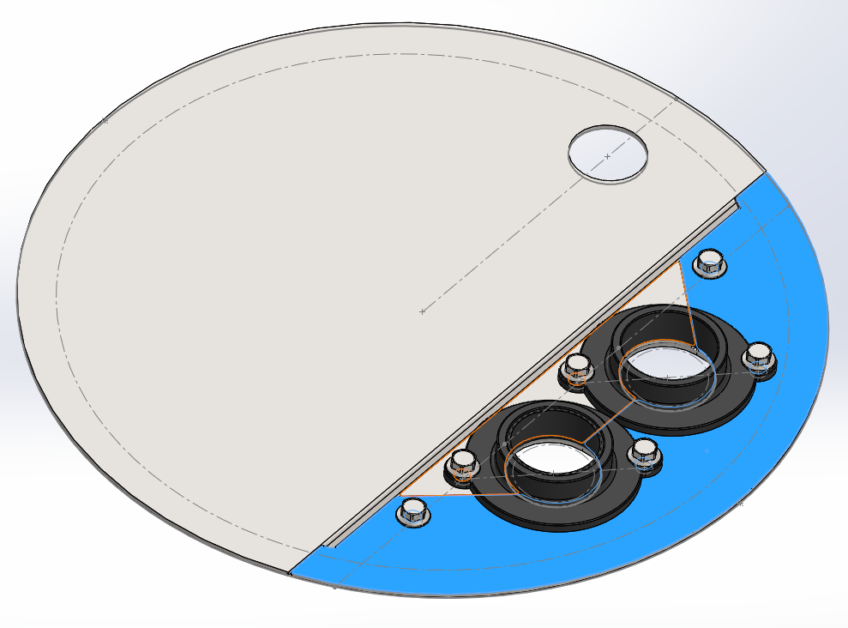
In my experience, the first iteration of a new assembly design (not a revision) will have at least a major flaw or flaws that for some reason were not apparent to the designer before first review. If you look at the lid assembly below, it has 2 holes, which sounds good as far as lift stations go, but one of those holes is actually for a rubber stopper with a cord hole to plug the pump into the wall. So there’s really only one hole to run 1.5″ PVC piping out of (for the pump to send up liquids and sewage). In other words, no vent outlet.
What’s the problem? Well, there are all sorts of smelly gasses that want to belch out of a lift station, and you might as well give them somewhere to go other than inside your house. Seal the crock airtight, and make a route to pipe them to outdoors.
Unfortunately, the original installer never ran a vent pipe, which is probably why I didn’t account for one initially.
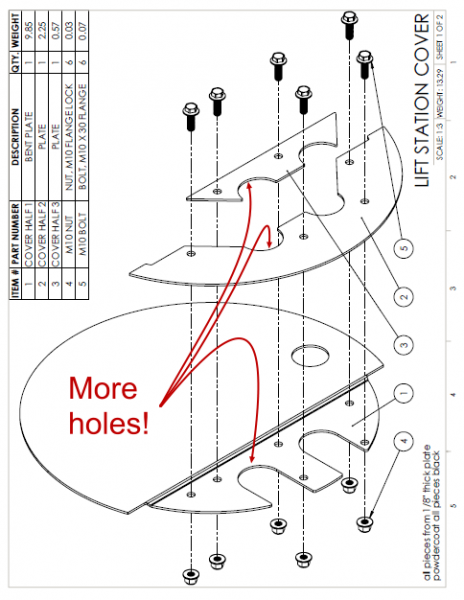
Step 2: More Holes
I added another hole. Of course, that means changing everything and it’s never just as simple as “add another hole”.
BTW, if it’s not completely obvious, do you understand why there’re 3 plate pieces to this lid? It’s so the lid can be removed w/out having to remove the pipes. You’ll still have to break the caulk seal between the lid assembly and the basement floor though, since it’s not a bolt-on lid.
Step 3: Source Special Parts
I had a surprisingly difficult time tracking down the plastic pipe flange parts that I could purchase separately for this project (as opposed to kitted with an expensive lid assembly). Apparently they’re a specialty item, or I’m just bad at Googling. I found some 2D prints of some flanges online first, and then later finally found a distributor of the product that didn’t only sell to plumbers or contractors.
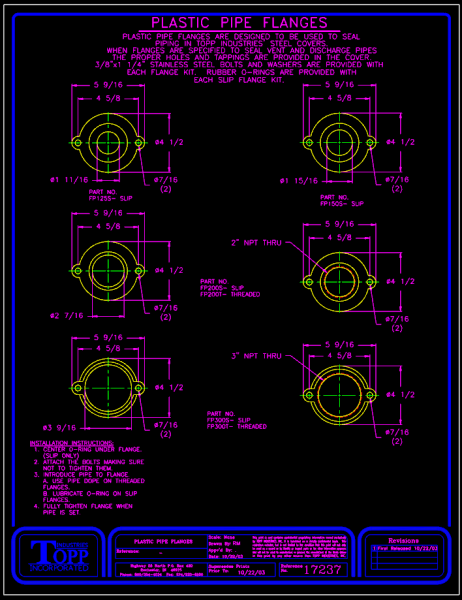
I used the DXF from the manufacturer to make 3D models of the flanges to ensure proper fit up.
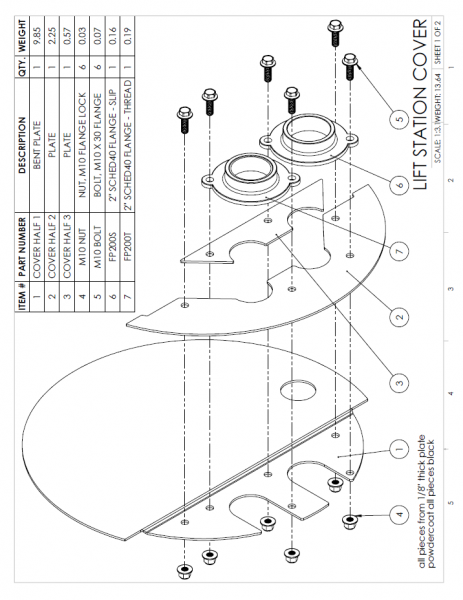
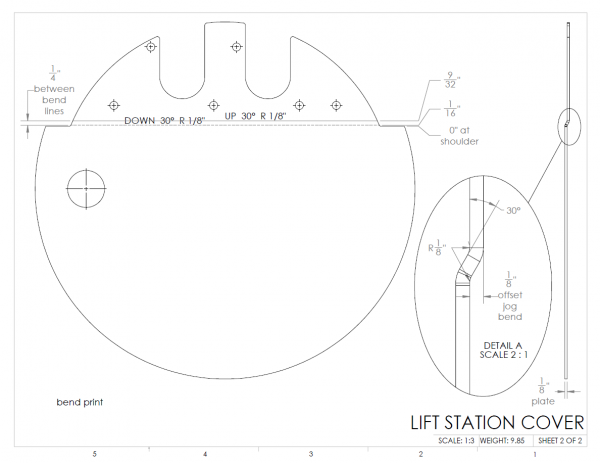
Step 4: Improvise
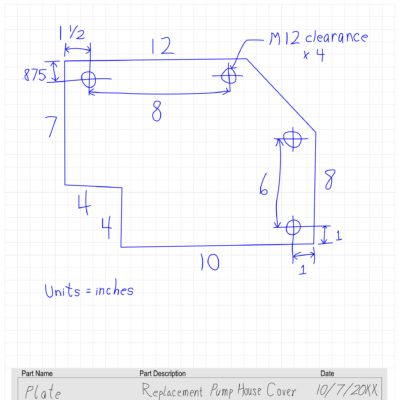
Later we realized it was going to be too difficult to make this severe jog bend, so the fabricator decided on the fly to just cut the part where the offset bend was to be and weld it back together (still creating a 1/8th jog because that’s approx. how thick the plate is.
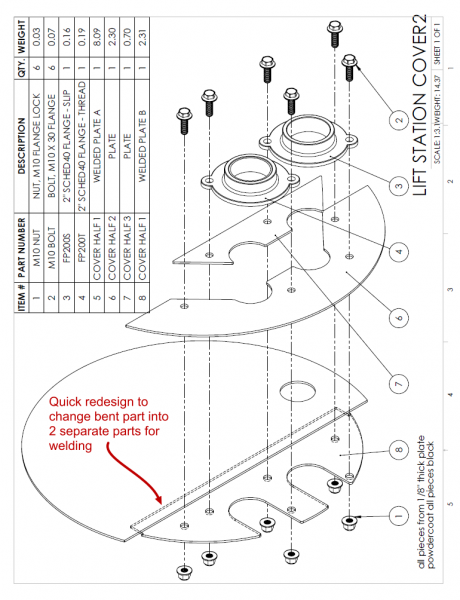
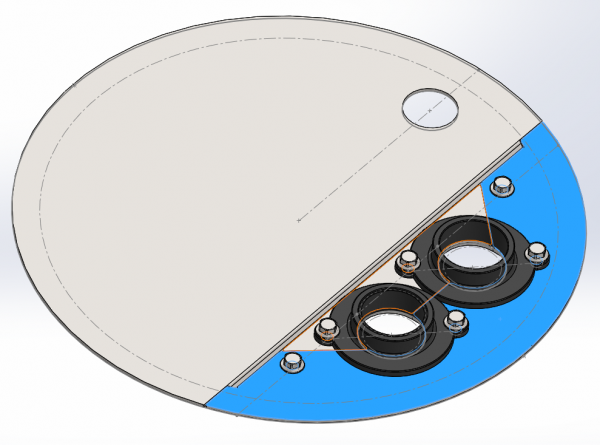
The welding warped it a little, but it still got powder coated and installed (caulked in place to create a seal). Works great.
Hardware & Gasket
The bolts are zinc plated hex cap 3/8″ with matched gasket washers–they’re used to screw grain bin sheets together, and come by the bucketload when you order a new grain bin. I also used some of the caulk-on-a-roll to seal the lid to the concrete–picture a thick bead of caulk that stays sticky and pliable on top of a long strip of wax paper, rolled up in a big round disk–it’s actually pretty handy for the application of sealing overlapping grain bin sheet seams.


Leave a Reply about how this blog changed your life.