Why Sealing Up Your Rim Joist is Smart (Not Just Because it Saves a Surprising Amount of Money)
I live in the Midwest, and it gets very cold in winter, and very warm in summer. If you’re not insulating well, you’re losing more energy dollars than you should. This year I pulled down a ceiling in my basement due to water damage, and then decided to pull down all the gross old fiberglass batts from the band joist bays (also referred to as “band sills,”) and I’m glad I did.
I found ancient mouse nests, insects, ice (!) that formed on condensation created by temperature differential on either side of the band joist that the fiberglass batts weren’t alleviating, and even places where I could see a sliver of daylight between the sill and the band joist. Who knows what creatures and elements found their way into my living space due to that!
This will be an all-around How-To, and the 4′ x 8′ board cutting info will be toward the end.

Basic tasks:
-
Cleaning out Band Sills
- So I pulled those old fiberglass batts and threw them away, and then shop vac
‘d everything very well.
- Wear dust masks
, gloves
, and long sleeves (keep the irritating fiberglass away from skin).
- Some of the batts had disgusting mold, ice, moisture, mouse droppings, etc. in them, so be prepared.
- Wear dust masks
- So I pulled those old fiberglass batts and threw them away, and then shop vac
-
Calculate Your Rim/Band Joist Size & Which Material to Buy
- I attached a calculator spreadsheet (somewhere below) and some instruction how to use it.
-
Re-Insulating
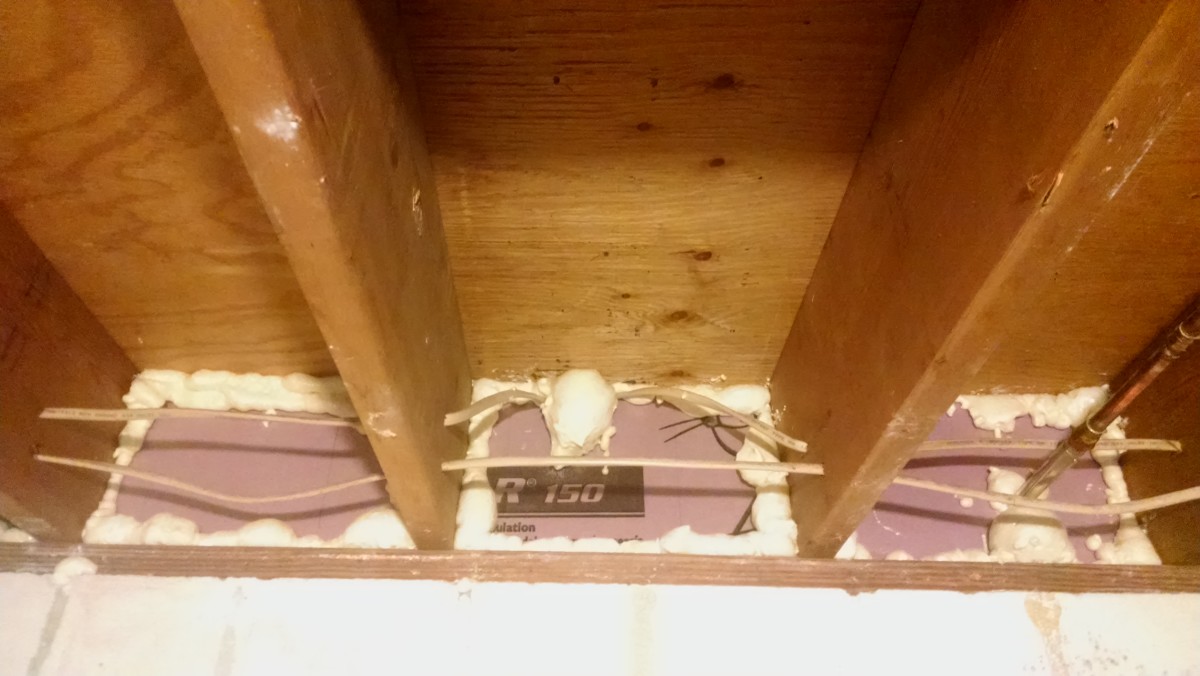
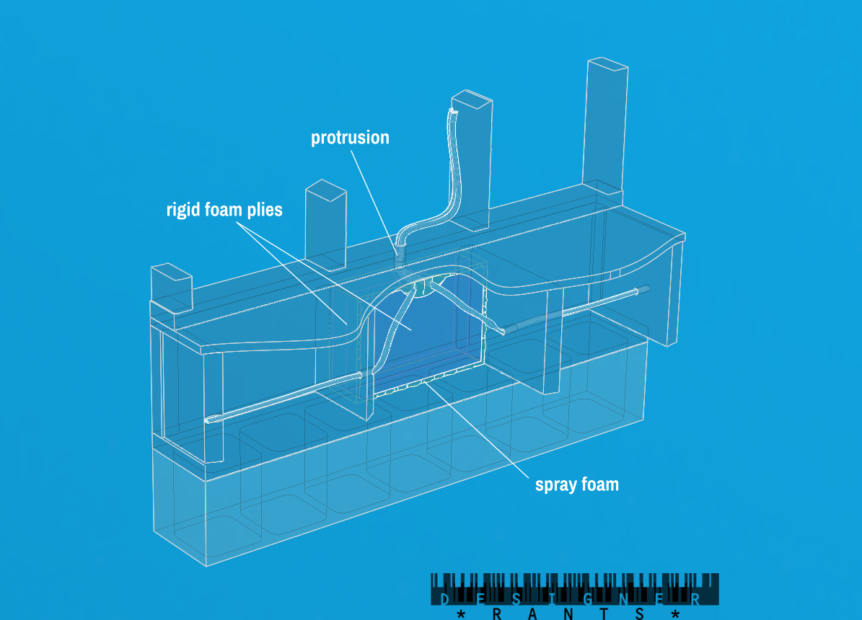
- Then I put 4 inches (2 plies of 2″ thick foam board) in each bay and spray foamed around their perimeters.
- I wasn’t going to put a whole 4 inches of foam thickness in each bay originally. But after doing some research on appropriate R-values for my climate zone, I eventually realized to do this right, I needed more than just 2″ of foam.
- It also may have been a requirement of the utility’s reimbursement policy to have a certain R-value. So look up your utility’s policy on efficiency reimbursements, and find out how to meet their qualifications.
- Then I put 4 inches (2 plies of 2″ thick foam board) in each bay and spray foamed around their perimeters.
-
File Your Utility Rebate
Animation:


Leave a Reply about how this blog changed your life.