Why do this?
Because plants inhabit a 3D space, and grow many times larger than when you plant them, I wanted to visualize that.
From watching Roger Cook from Ask This Old House
 , I know you must consider how large plants will get when you’re planting them. Not how small they are the day you plant them.
Why SolidWorks?
The few landscape architects whose work documents I’ve seen firsthand did not create it with SolidWorks. They used SketchUp or AutoCAD
 , or even more specialized suites that I don’t remember, but not SW. But since I’m used to working SolidWorks
 , I went with it to create my landscaping plan.
On that note: In the past, when I used SketchUp for making floor and site plans, it was handy to grab plant and tree models from their user library and plop them in a file. Last I remember, they even had models that may be 2D-ish, but would continuously turn to face the viewer for renderings.
Making drawings with SketchUp is clunky compared to SW, in my opinion. And I could use an SW multibody file to create a BOM (for a shopping list of plants). I don’t remember how to do BOMs in SketchUp, seems like it involved 3rd-party extensions.
How?
I’ll explain how I did this strange thing in case you want to do it too. Otherwise, just enjoy the images. And if you’re a landscape architect, don’t laugh too hard. More on you at the end.
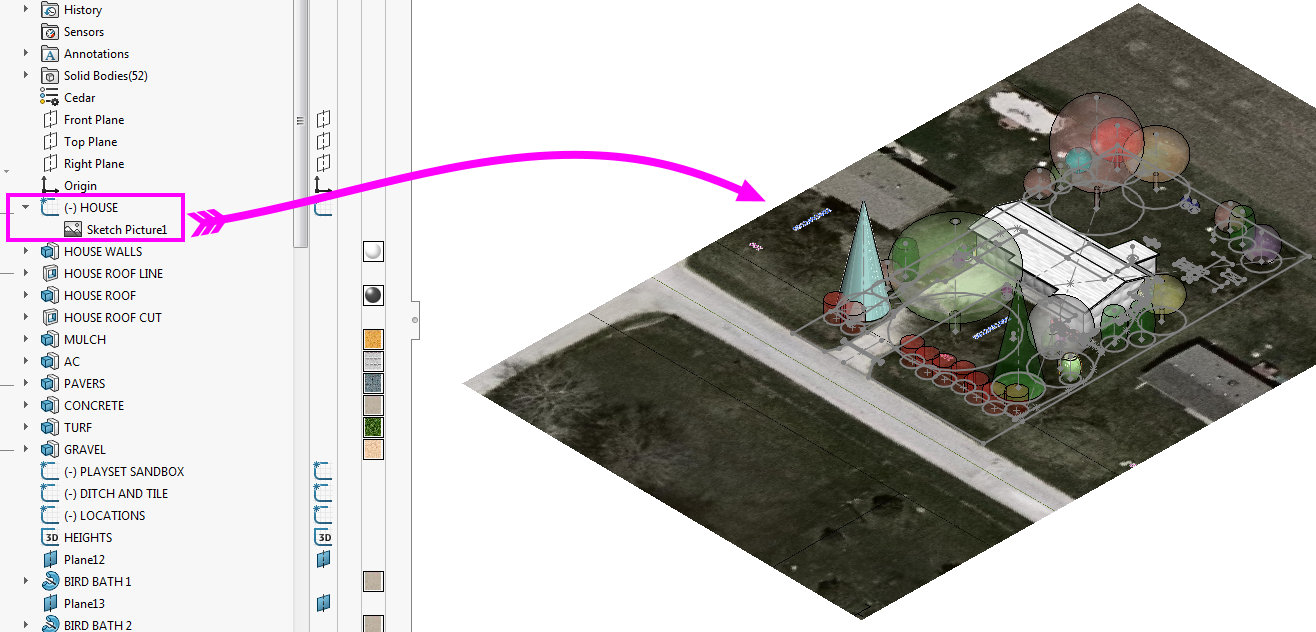
First, Create accurate site size and fixed feature locations.
This model is 1:1 scale, so I converted the dimensions to Feet. I then inserted a satellite image with plot boundary annotations from my county property tax assessor’s website so I could locate my house and driveway features reasonably true-to-life.
Second, I looked for plants that work in my zone.
(No, I’m not getting any money from Nature Hills. …BUT I WOULD BE OPEN TO THAT!)
Here’s an anecdote for why great UX (and product selection) for ecommerce is so important. I eventually spent most of my research time at one website, because it A) offered a broad product selection (within the narrow scope of “mail-order plants”) and B) allowed search filtering by climate zone and then further by categories such as “Perennials”.
I couldn’t seem to find an easy way to do this filtering at other sites, even if they had decent product selection.
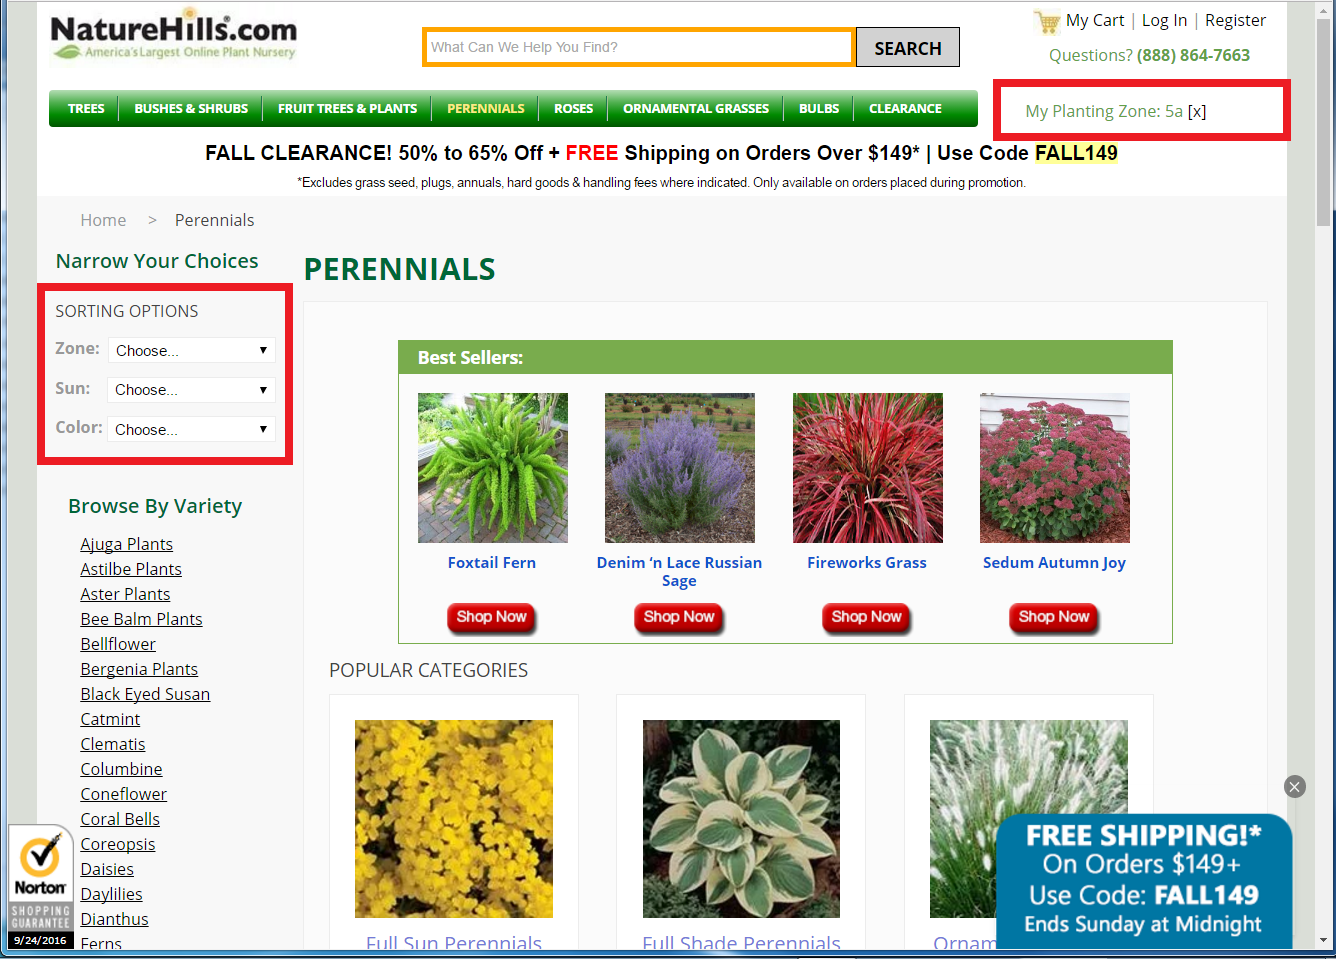
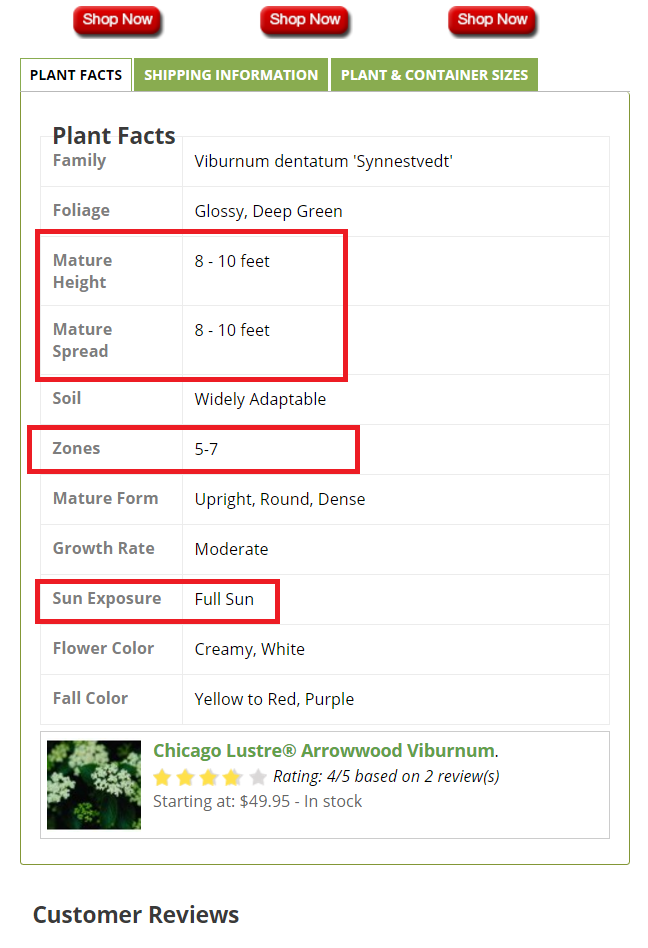
I then would load up my cart with plants that could live in my zone. Another important thing the site offers is an easily found C) description of adult height and spread. I used this to create plant models in 3D space, and then know how close to group them.
Another key piece of info they lay out conveniently in a data table is D) sun tolerance. I learned from my Grandma, who had a green thumb, that certain plants want to be on the south side of your house, where (barring trees or structures or being in a different hemisphere) should get all-day sun. Others want to be on the shady side. And some are happy in between. But if you spend the money on plants, at least try to put them where they want to be.
Mulch Model
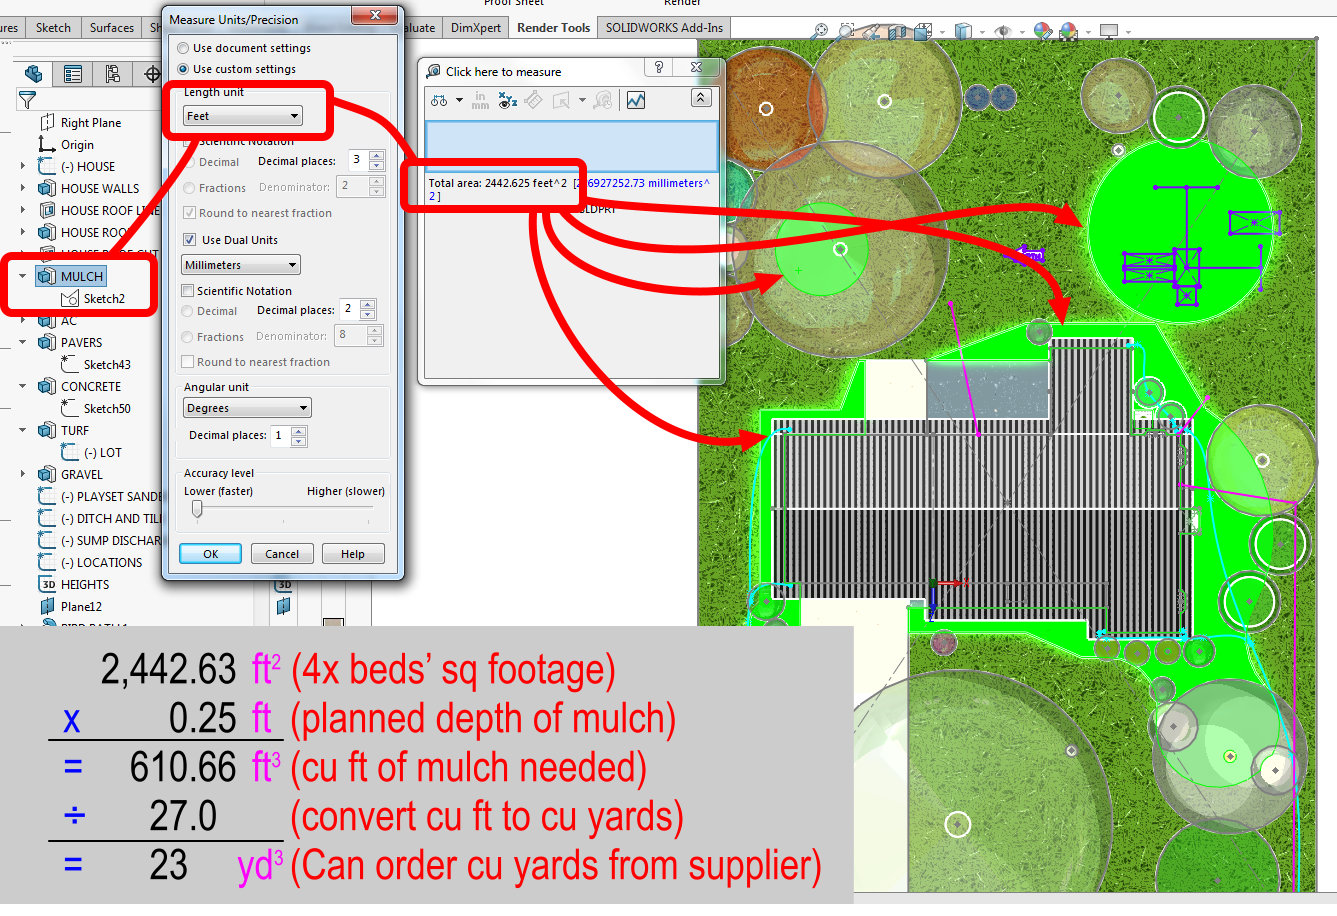
I made this model originally to calculate how much mulch I’d need to fill our new mulch beds. Doing it this way allowed me to get an accurate square footage (measured in CAD), and then I could assume 3″ (.25ft) deep layer of mulch, and then figure out cubic feet (sq ft x mulch depth in feet), and then convert to cubic yards (divide by 27), the unit mulch contractors use. We’ve since done the mulch project IRL, and the ordered amount came out surprisingly well.
This is also a great way to calculate the amount of landscaping fabric to order (sq.ft.), and how much edging
 to order (measure linear ft. around certain sides of beds).
2,442.63 ft2 (4x beds’ sq footage)
x .25 ft (planned depth of mulch)
= 610.66 ft3 (cu ft of mulch needed)
÷ 27 (convert cu ft to cu yards)
= 23 yd3 (Can order cu yards from supplier)
23 cu yds turned out to be a big ol’ dump truck fulla mulch. If you do a job that size, I recommend one of these:


Get this wheelbarrow
Don’t cheap out and get the little wheelbarrow . Compare cu. ft. between the cheap ones, then realize how many more trips that will be for you. Also, if you get this Rubbermaid wheelbarrow, buy the one with solid rubber tires
 , not the one with the pneumatic tires
 . I just have terrible luck with equipment with small blow-up tires (like my snow blower
 , or the myriad bicycles
  that have floated in and deflated out of my life). The solid tire version works great for me.
Get this rake and shovel
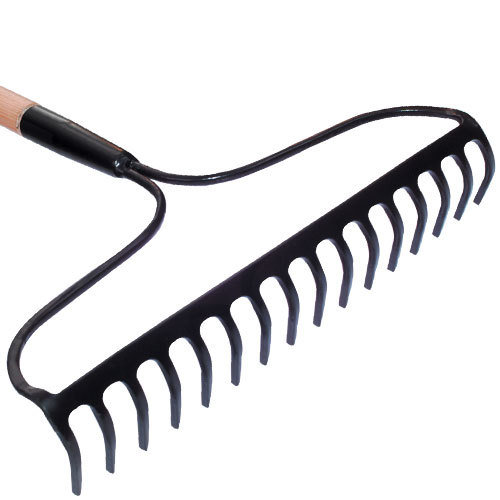
If you’re going to do a big mulch bed project, I would also recommend a good digging shovel and a gravel rake. Some people swear by pitchforks for mulch, I think those people are not to be trusted. Here’s the exact shovel I recommend, and the generic rake type I used for levelling beds:
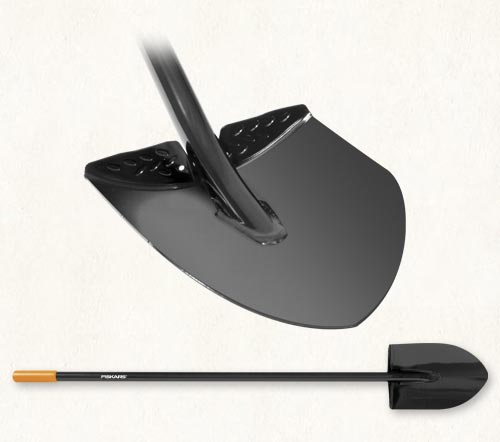
 Fiskars long-handled digging shovel (all steel construction)

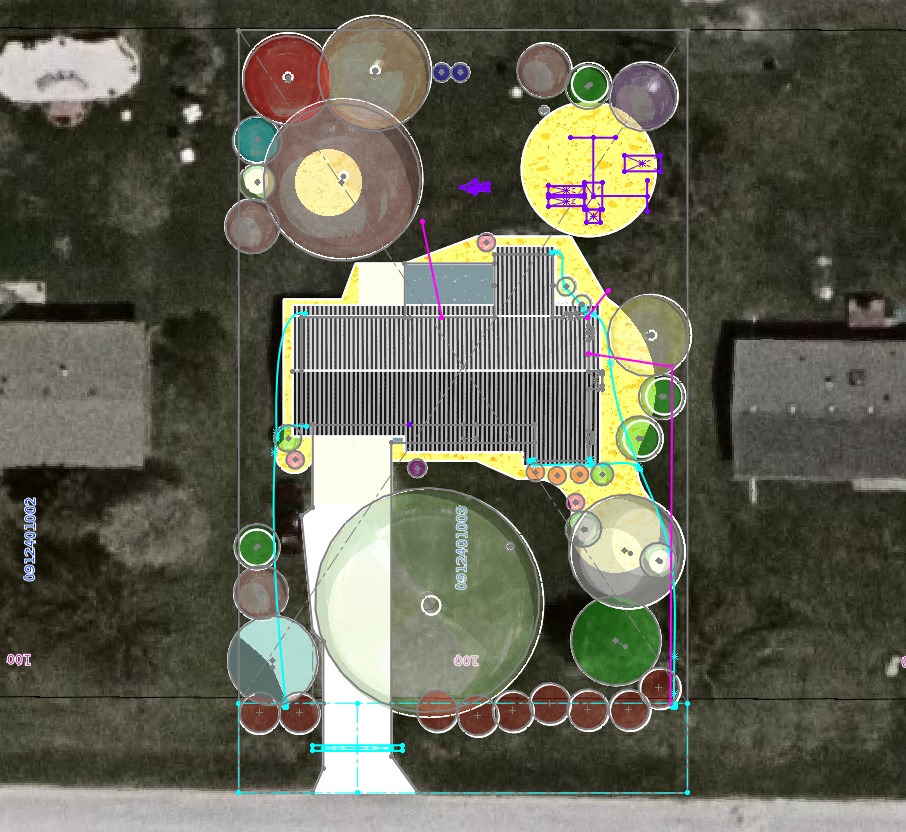
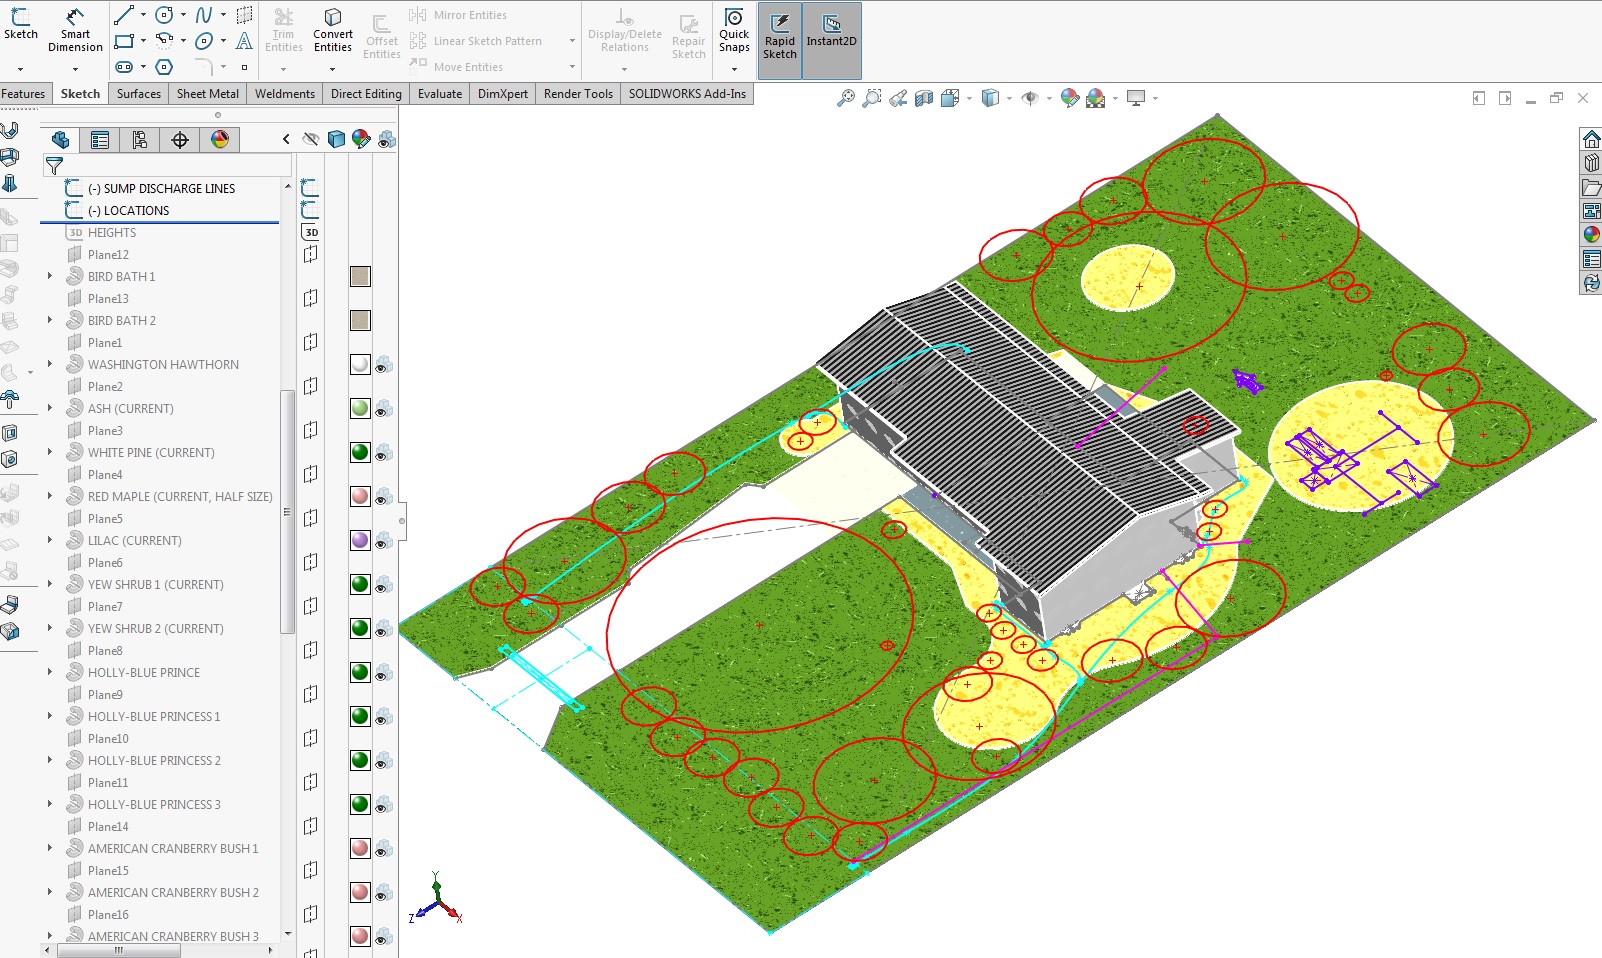
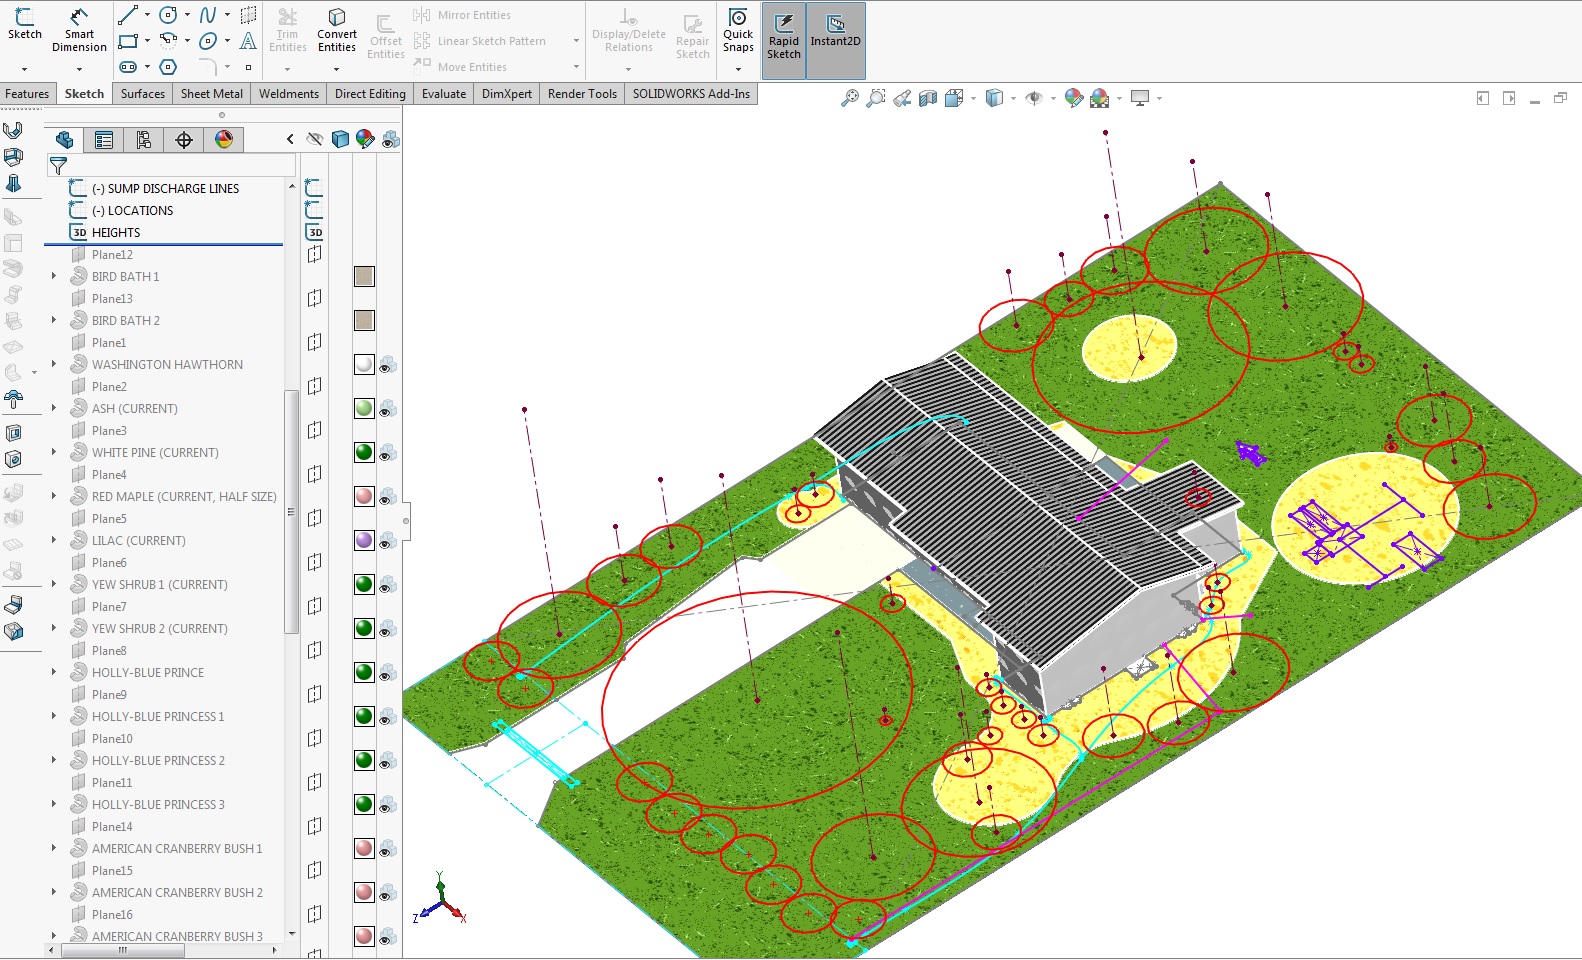
Locating plants in the model
I sketched circles where I wanted to locate each plant. The diameter is the adult spread of the plant , and in the diameter dimension I modified the text with notes on the Latin or commercial name of the plant so they’ll import later into the print automatically. Dimension only once when you can help it!
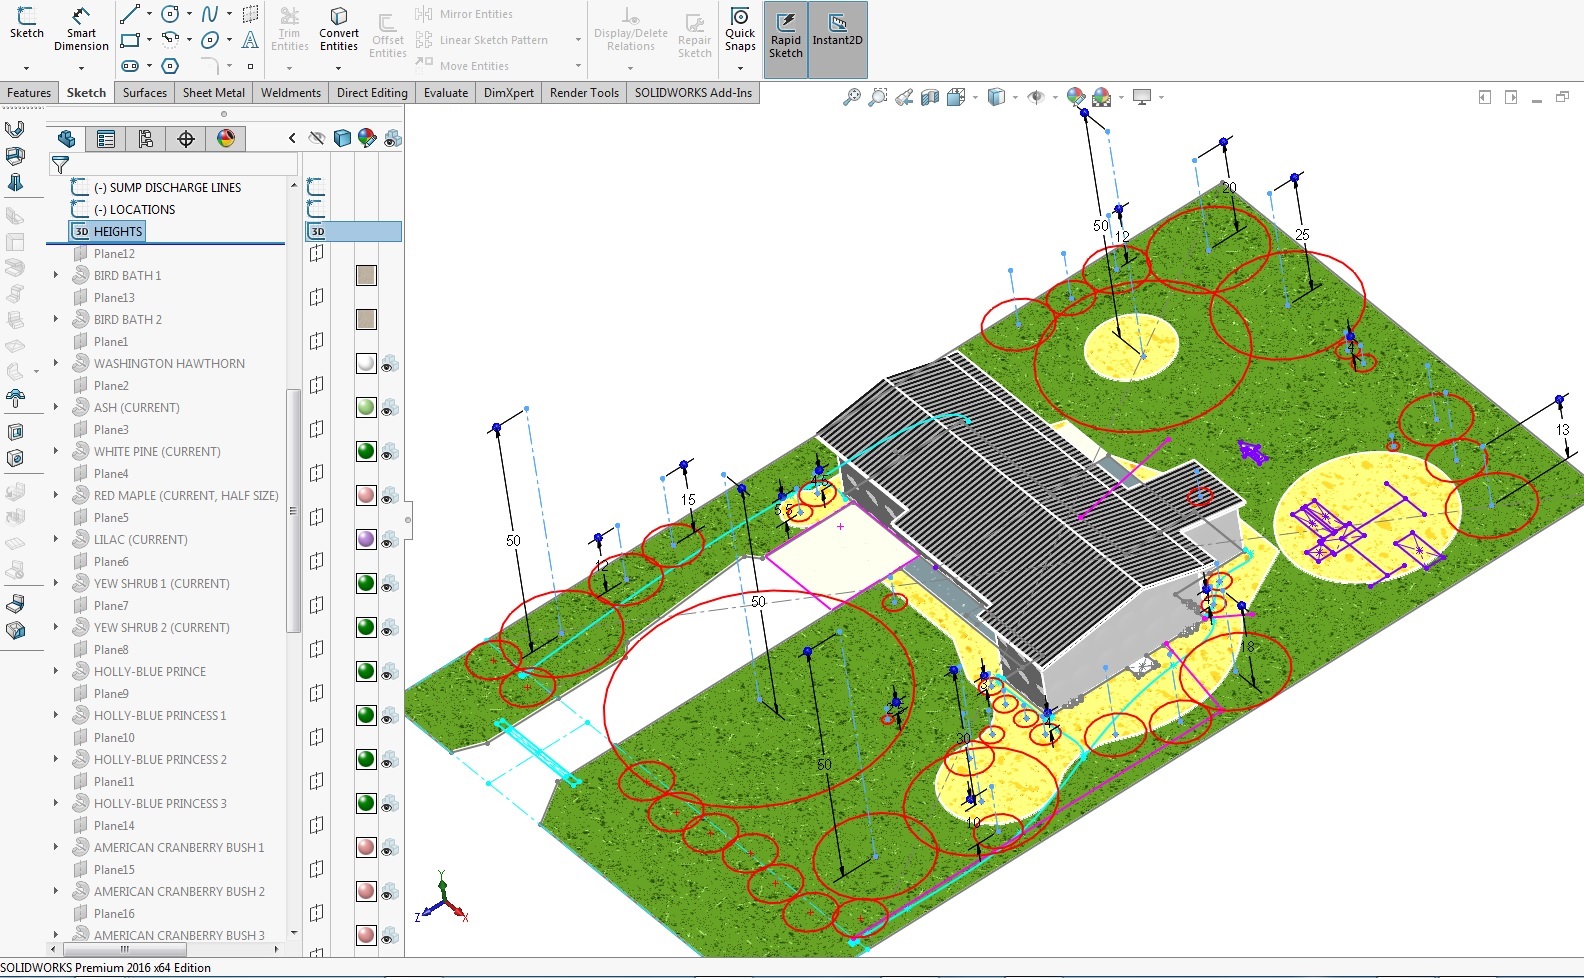
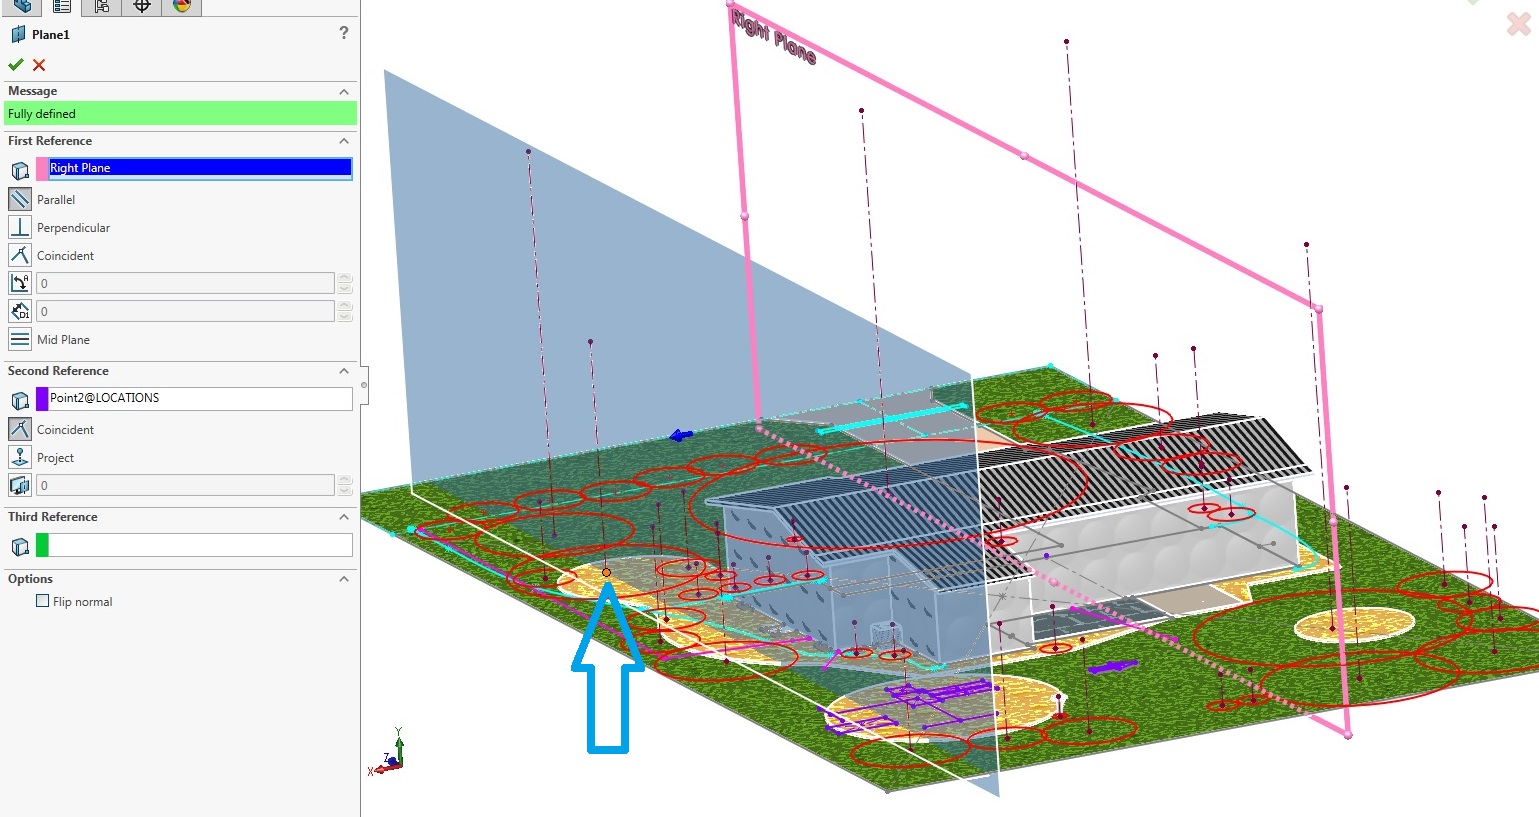
Plant Heights & Profiles in the model
- The heights are 3D sketch lines dimensioned to adult plant height.
- Then pull a parallel plane over and click a point on the plant’s location sketch to place it.
- (You could do away with the plane step if you create 3D sketches to rotate, but IMO they’re more clicks to orientate than inserting a plane).
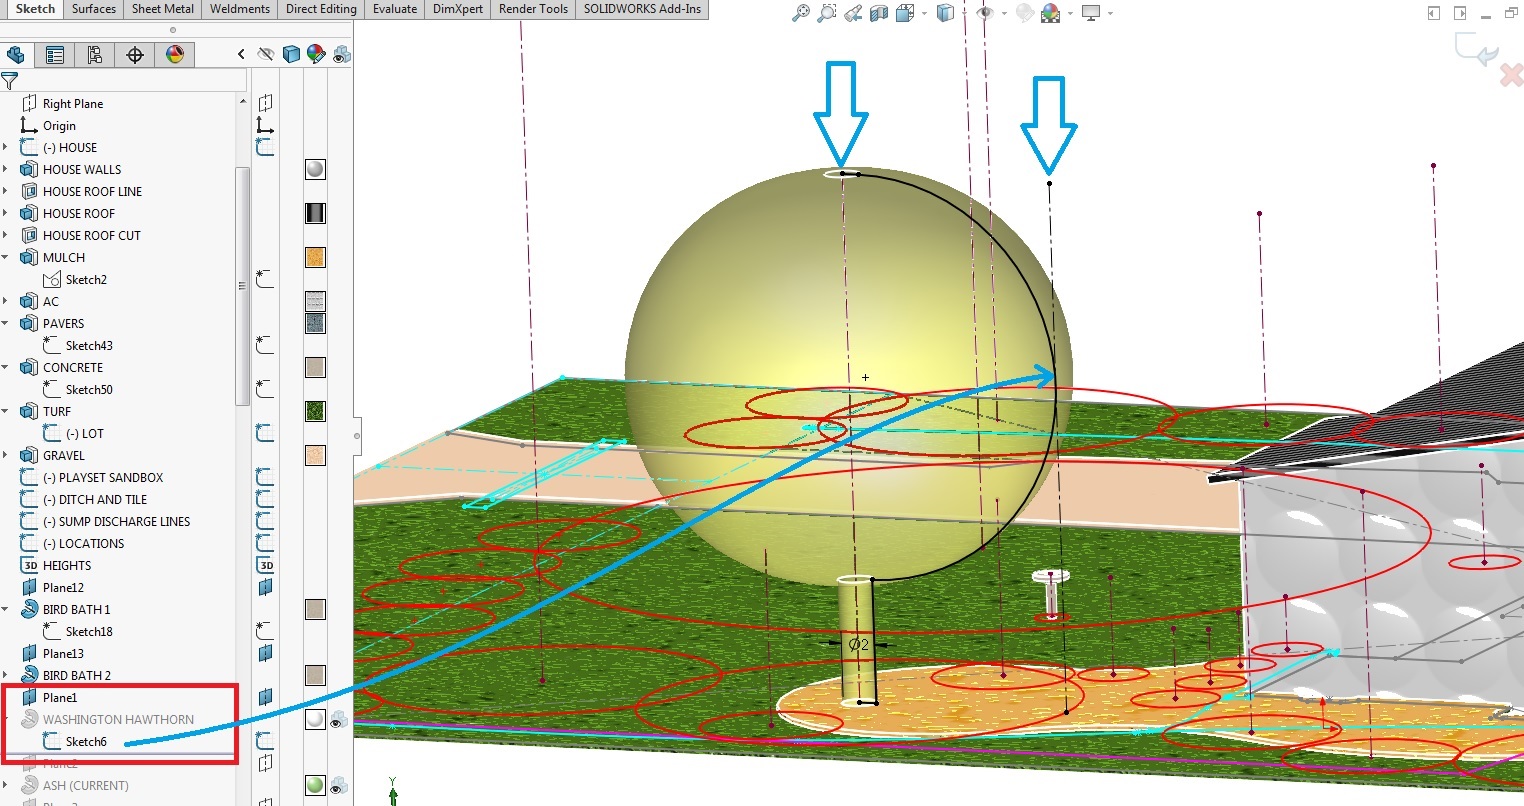
- Draw a sketch of the plant from side profile.
- If not cylindrical or conical, pull a vertical construction line up from the circle edge, then make your profile sketch tangent to the line. Then its spread will match the diameter drawn in the location sketches.
- Then spin the sketch around the center axis with a Revolve feature.
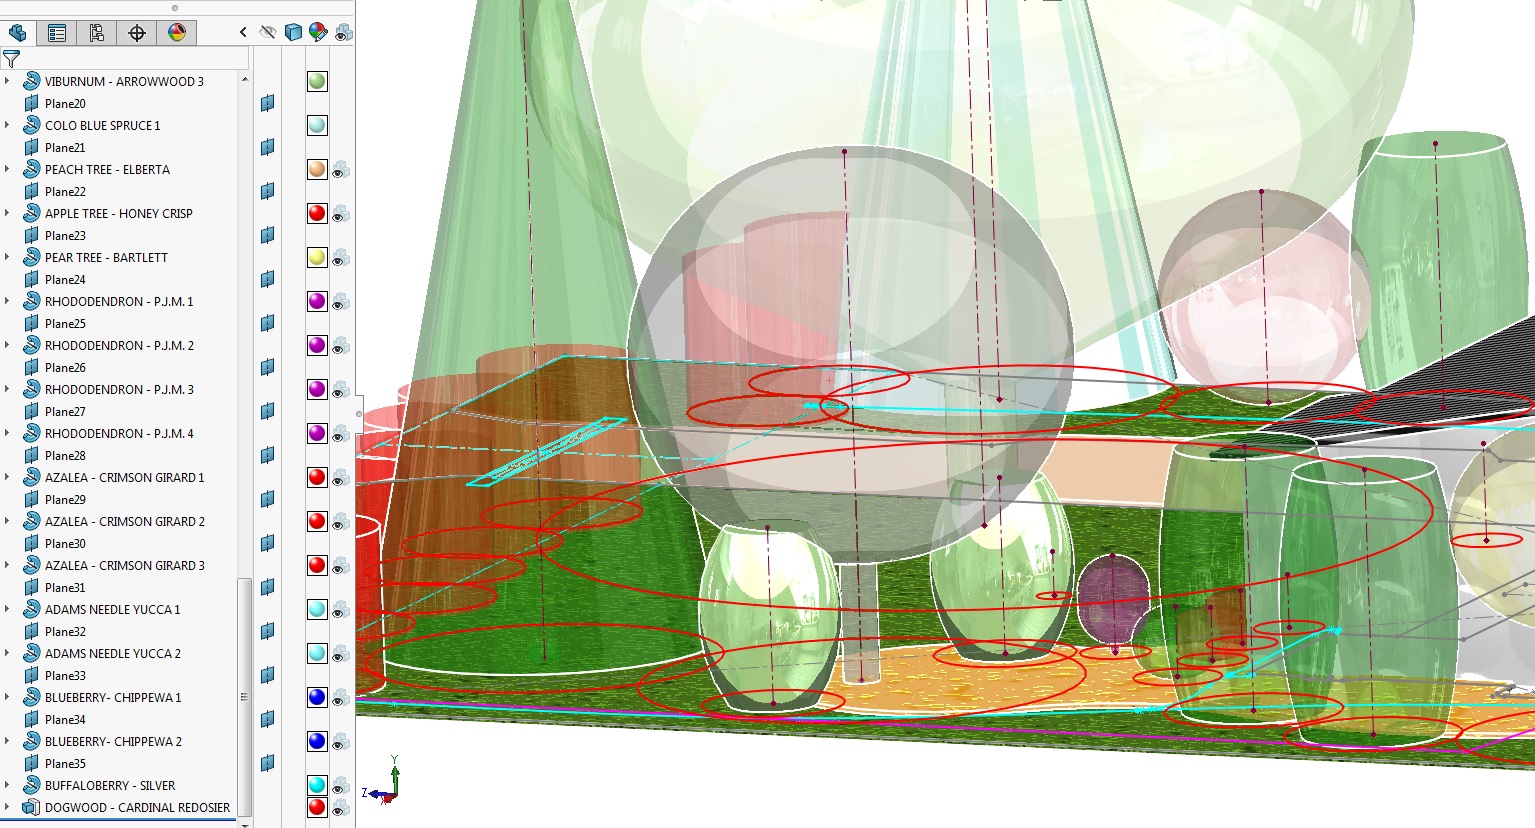
- I named mine in the feature tree so it’s easier to remember what they are later if reviewing or editing the model.
- I colored them with some indications of their foliage or flower colors to differentiate and visually describe them in renderings.
Bill Of Materials
If you read this far, you just may be a SolidWorks user. And then you may ask why I didn’t place a Cut List BOM on the drawing? Well, I hadn’t got there yet. I DO like to make shopping lists by just creating a BOM when I’ve modeled DIY projects. But this project is more à la carte, I’m not buying things all at once. This is more about fit, texture, and planning than accounting.
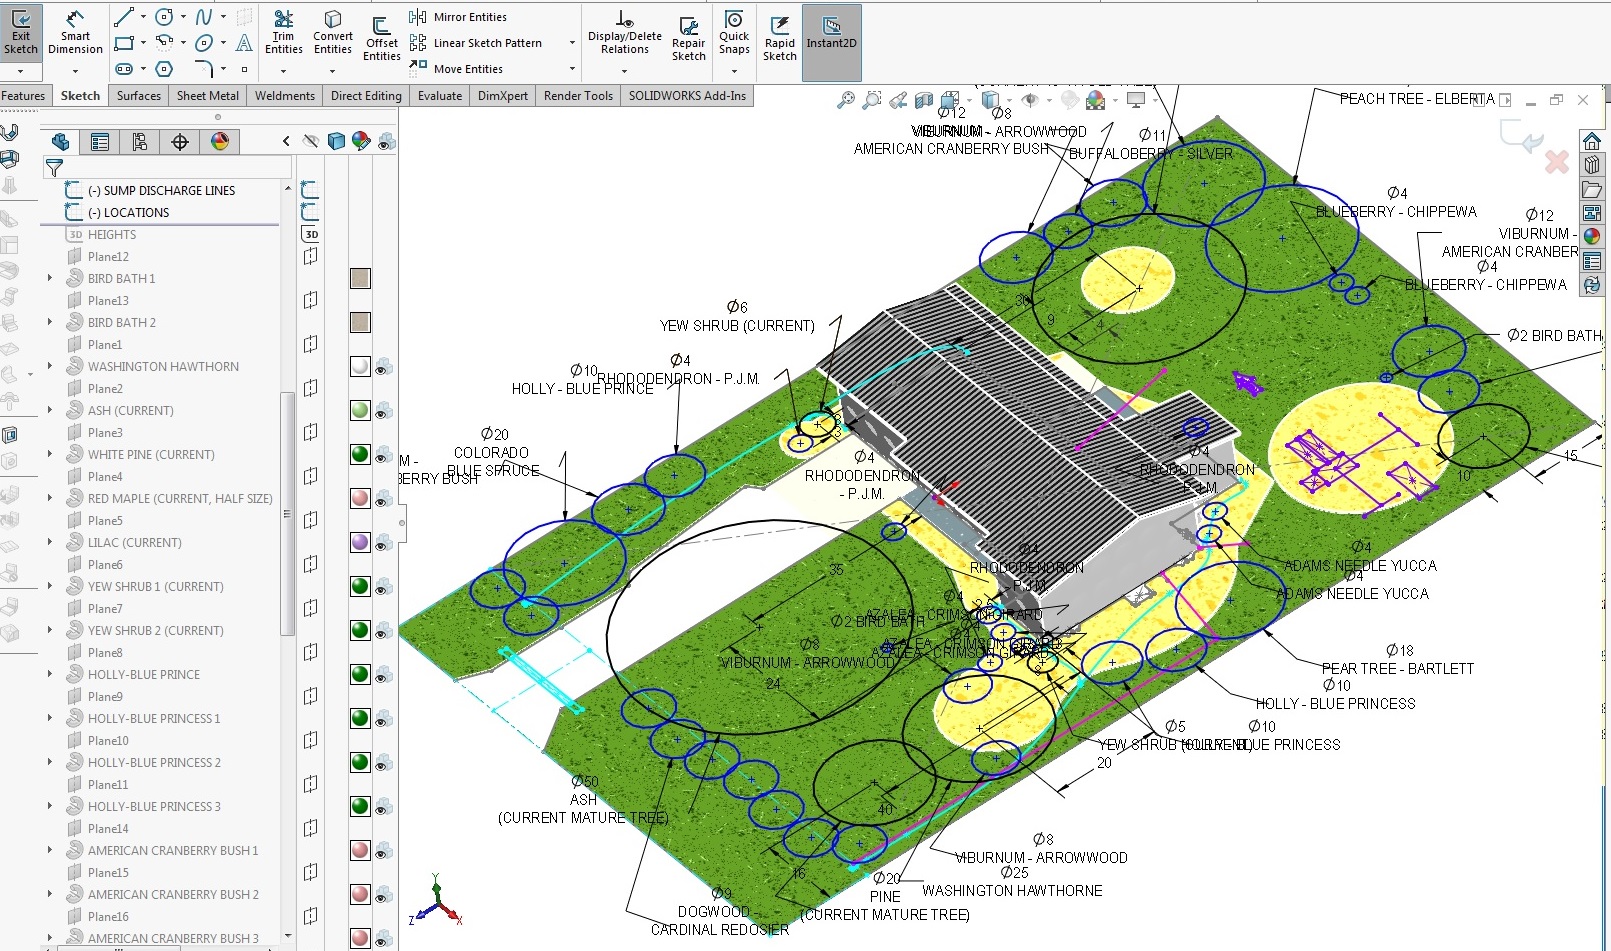
Drawing
Below is a PDF of the drawing I made. This is the version where I modified dimension callouts to include plant names, so it’s apparent where to plant them. I made another drawing copy (not shown) with dimensions to locate plant centers from main fixtures, and each other, for use when digging holes. But those dimensions get convoluted if there are too many on a page.
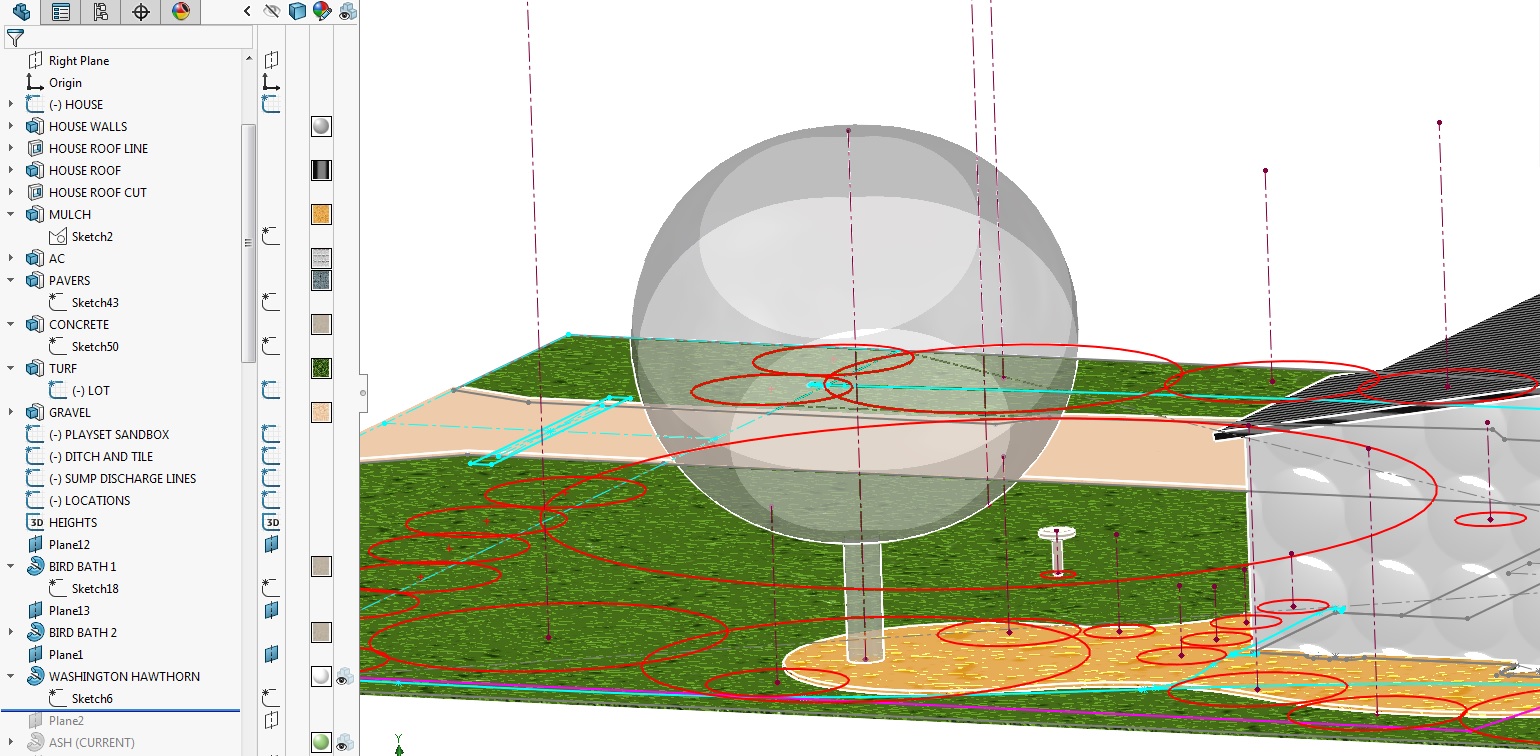
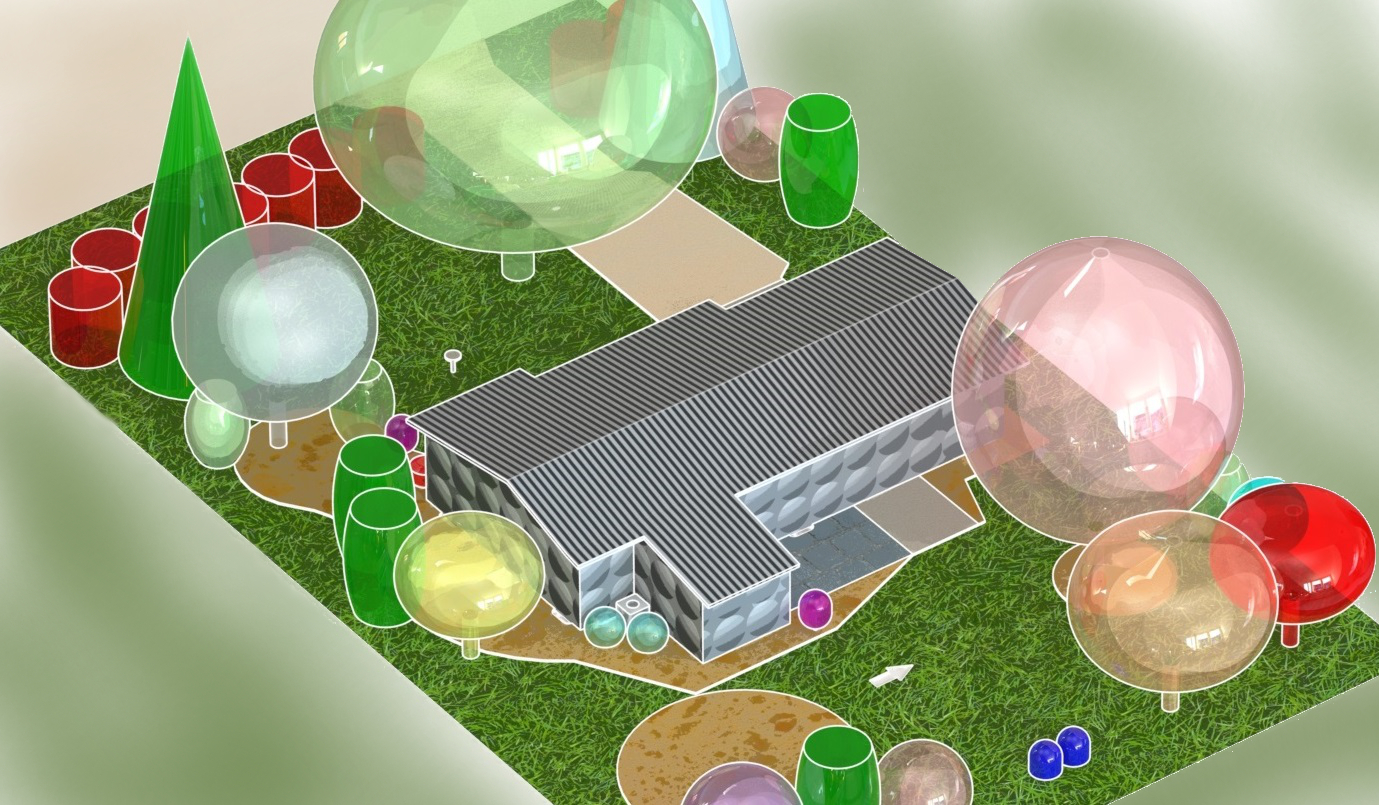
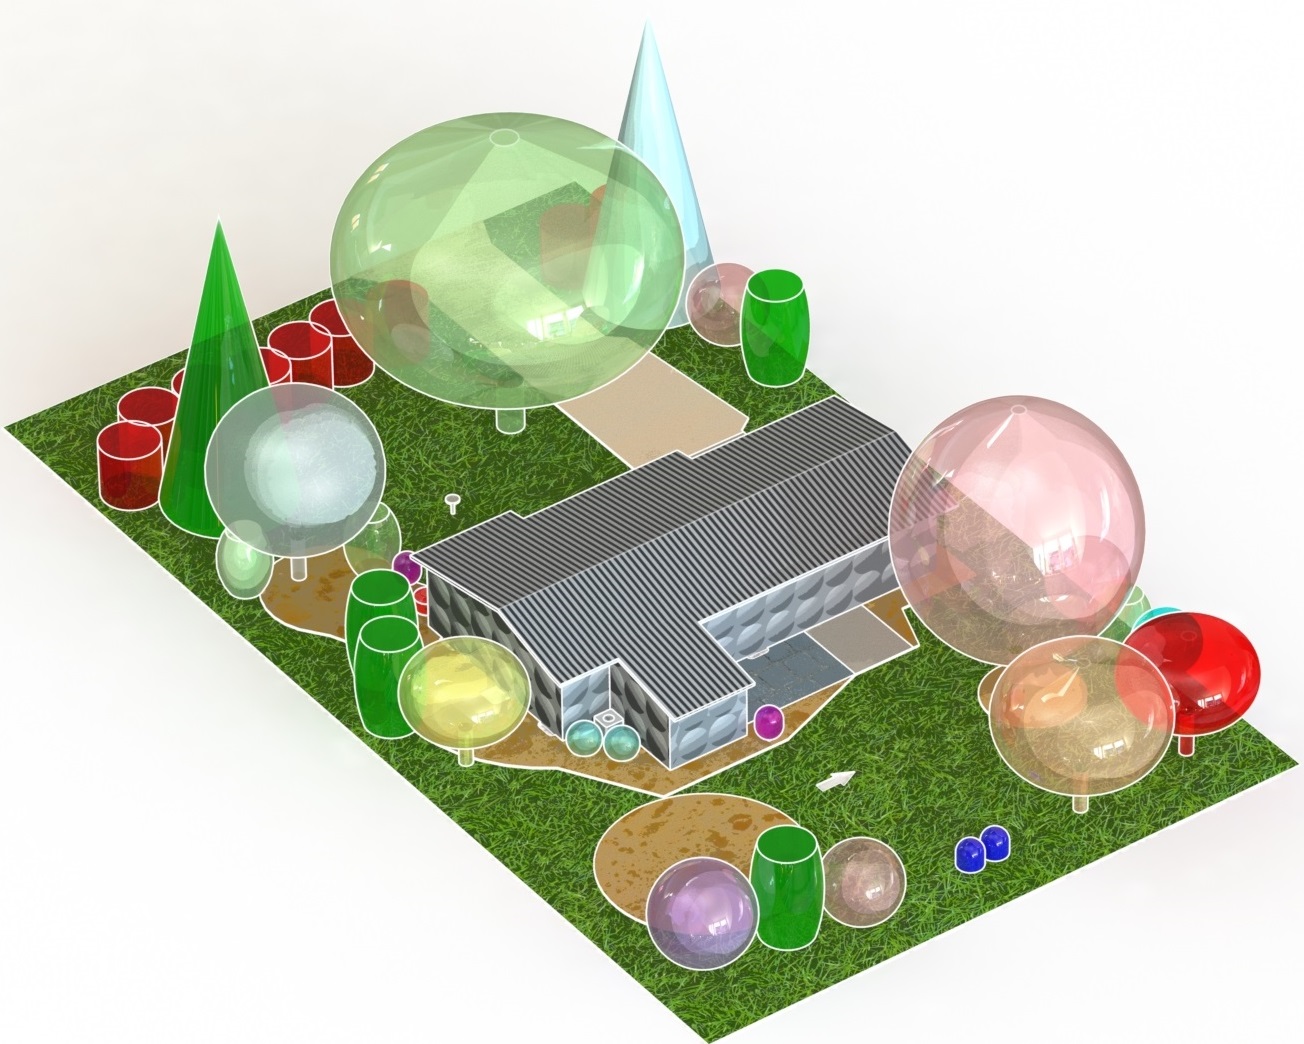
As you can see, I left most features (plants and turf) transparent so you can see through canopies to what’s below.
My only other tip is, as mentioned before, I notated many dimensions with the plant name, then “marked for drawing,” and then pulled them into to the print using “model items”, effectively dimensioning and notating only one time.
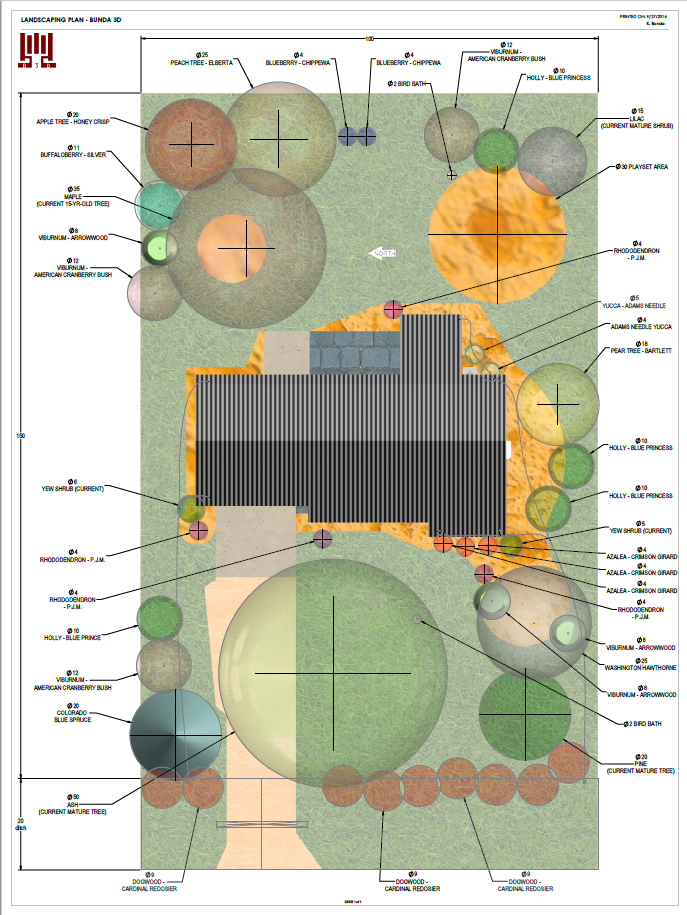
PDF: LANDSCAPING PLAN – PLANTINGS DRAWING
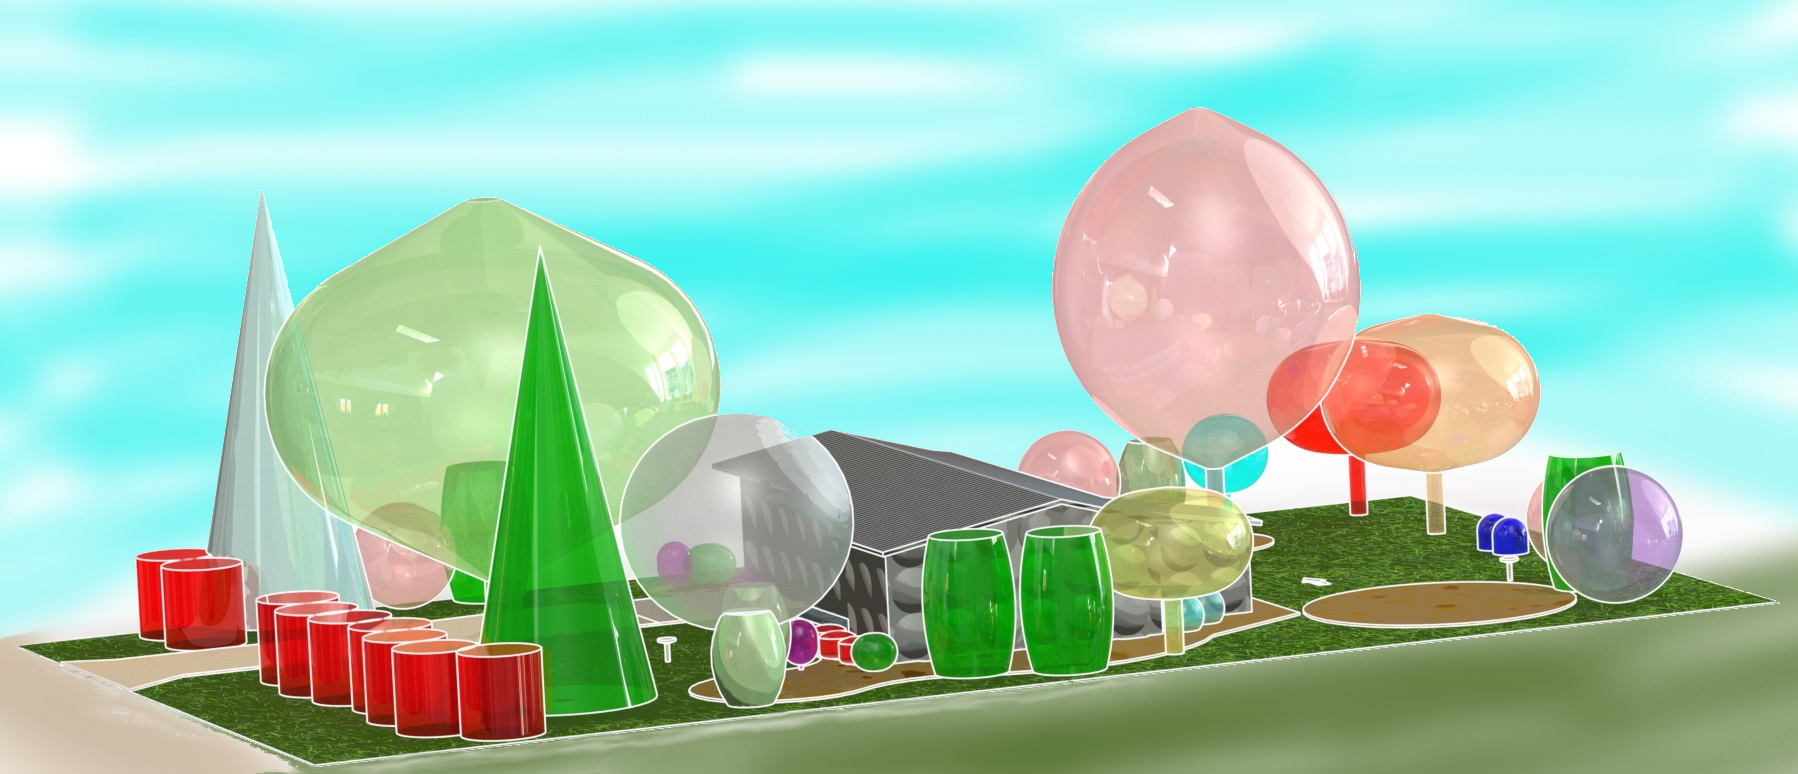
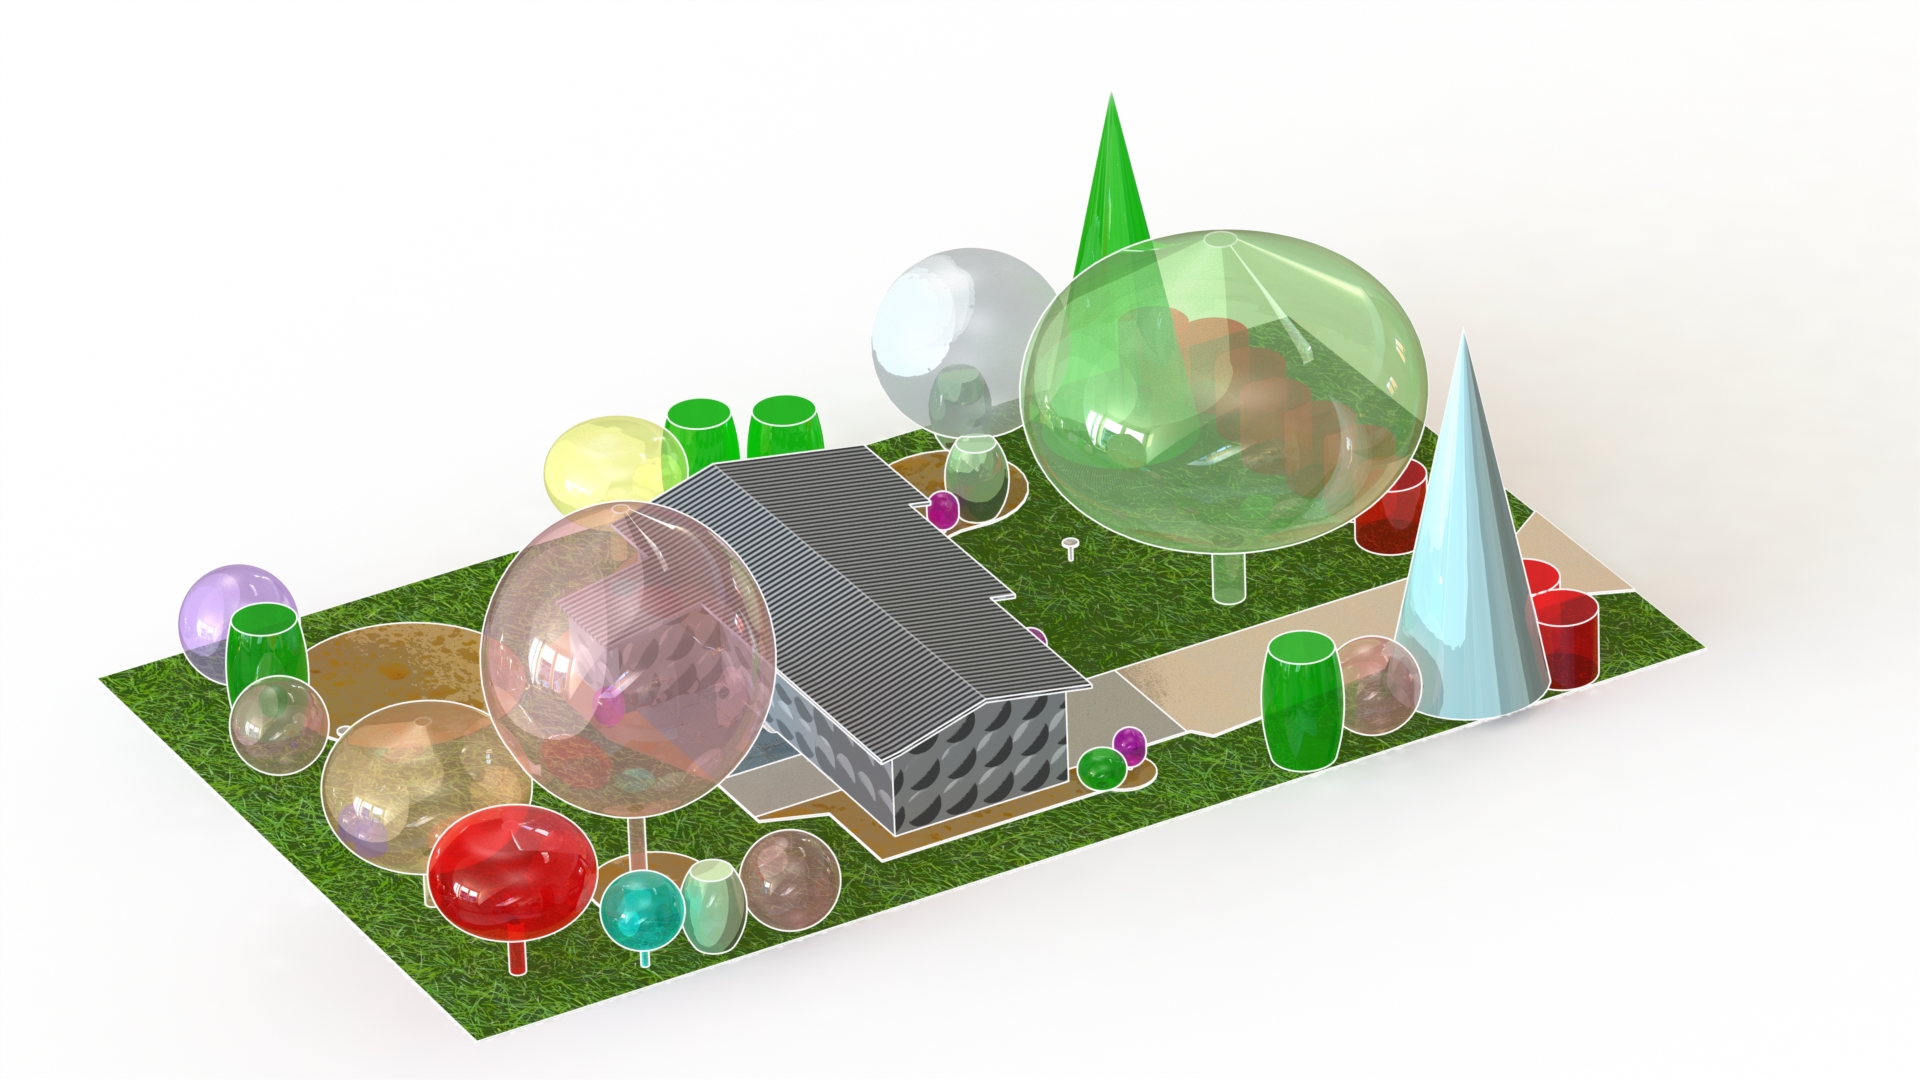
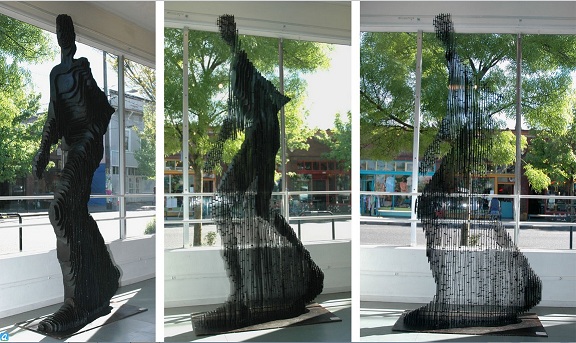
Renderings
Here’s some fun Cartoon-style renderings. The blueberry bushes look like little gumdrops, which makes it seem like a fancy gingerbread house, Jell-O mold, and blown sugar spread. On a couple you can see I did a bare minimum airbrushing over the white background in Photoshop.


This does not replace Actual Landscape Architect Humans
This is my way to cheap out on paying a landscape architect or designer. I know many of the good ones are expensive because I’ve seen excellent landscaping plans and how much they cost. I actually think most of them don’t get paid what they’re worth, since they often add so much value to a property and improve the quality of life for its inhabitants and visitors.
So while I would love to shell out the thousands (especially for labor! hardscaping sucks) to realize a landscaper’s site plan for my property, it would ultimately seem a foolish allocation of resources. I’m saying, for me: It would probably make sense to spend the cash on a kitchen remodel and DIY the yard instead.
On the other hand, there are designers in my area that charge as little as $500 for just the design. That would’ve been worth it for me, since I spent hours messing with this project and I’m still almost as ignorant as when I started. BUT: I enjoyed myself, and I got some good mulch volume calculations to boot.
Glad I showed this to a designer…
My plan is a pathetic comparison to what an average landscape designer can do. They have specialized knowledge. Which is why I still talked with a landscaper about my plan, and asked if he saw anything that should be changed.
He did.* He pointed to a few plants that, just because a website said they will grow in my zone, doesn’t mean they will stay alive for long. Several plants I had spec’d he said didn’t make it through tough winters. He also provided several other pieces of advice on suitable plants, better alternatives, and soil treatments that have the potential to save a lot of money on dead or unhappy plantings.
So I’m not writing this post to say “anyone can do it”. Like many of my DIY posts, all I’m saying is: If you’re GOING to do it anyway, then here’s how I did it, maybe my experience will work for you too.
* This post’s attached images & print are not yet updated with the professional landscape architect’s change recommendations.


Marcus
The quantity step is the valuable part here: once the bed area is modeled, depth drives the material order. I like keeping a small coverage chart next to the plan so a 3 inch mulch layer, gravel base, or soil top-up can be converted into cubic yards before anyone starts pricing materials.